HP R837 User Guide - Page 34
Print This Image Now, Print Size
 |
UPC - 808736803915
View all HP R837 manuals
Add to My Manuals
Save this manual to your list of manuals |
Page 34 highlights
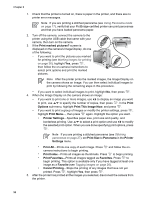
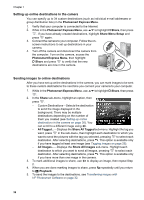
Chapter 6 1. Check that the printer is turned on, there is paper in the printer, and there are no printer error messages. Note If you are printing a stitched panorama (see Using Panorama mode on page 17), verify that your PictBridge-certified printer can print panoramas and that you have loaded panorama paper. 2. Turn off the camera, connect the camera to the printer using the USB cable that came with your camera, then turn on the camera. 3. If the Print marked pictures? screen is displayed on the camera's Image Display, do one of the following: - If you want to print the pictures you marked for printing (see Marking images for printing on page 36), highlight Yes, press , then follow the on-camera instructions to select print options and print the marked pictures. Note After the printer prints the marked images, the Image Display on the camera shows an image. You can then select individual images to print by following the remaining steps in this procedure. - If you want to select individual images to print, highlight No, then press . 4. When the Image Display on the camera shows an image: - If you want to print one or more images, use to display an image you want to print, use to specify the number of copies, then press . In the Print Options sub-menu, highlight Print This Image Now, and press . - If you want to print a group of images or modify the printer settings, press , highlight Print Menu..., then press again. Highlight the option you want. • Printer Settings-Specifies paper size, print size and quality, and borderless printing. Use to select a print option and use to modify the selected print option. When you are done specifying print options, press . Note If you are printing a stitched panorama (see Stitching panoramas on page 27), set Print Size to Panorama in the Printer Settings menu. • Print All-Prints one copy of each image. Press and follow the oncamera instructions to begin printing. • Print Index-Prints all images as thumbnails. Press to begin printing. • Print Favorites-Prints all images tagged as Favorites. Press to begin printing. This option is available only if you have tagged at least one image as a Favorite (see Tagging images on page 26). • Cancel Printing-Stops the printing of any images that have not yet printed. Press , highlight Yes, then press . 5. After the printer has printed all the images you selected, disconnect the camera from the printer. 34
-
 1
1 -
2
-
3
-
4
-
5
-
6
-
7
-
8
-
9
-
10
-
11
-
12
-
13
-
14
-
15
-
16
-
17
-
18
-
19
-
20
-
21
-
22
-
23
-
24
-
25
-
26
-
27
-
28
-
 29
29 -
 30
30 -
 31
31 -
 32
32 -
 33
33 -
 34
34 -
 35
35 -
 36
36 -
 37
37 -
 38
38 -
 39
39 -
40
-
41
-
42
-
43
-
44
-
45
-
46
-
47
-
48
-
49
-
50
-
51
-
52
-
53
-
54
-
55
-
56
 |
 |
