HP Scanjet 4070 HP Scanjet 4070 Photosmart Scanner - User Manual - Page 10
Scan pictures other than 4 x 6 inches 10 x 15 cm - scanner
 |
View all HP Scanjet 4070 manuals
Add to My Manuals
Save this manual to your list of manuals |
Page 10 highlights
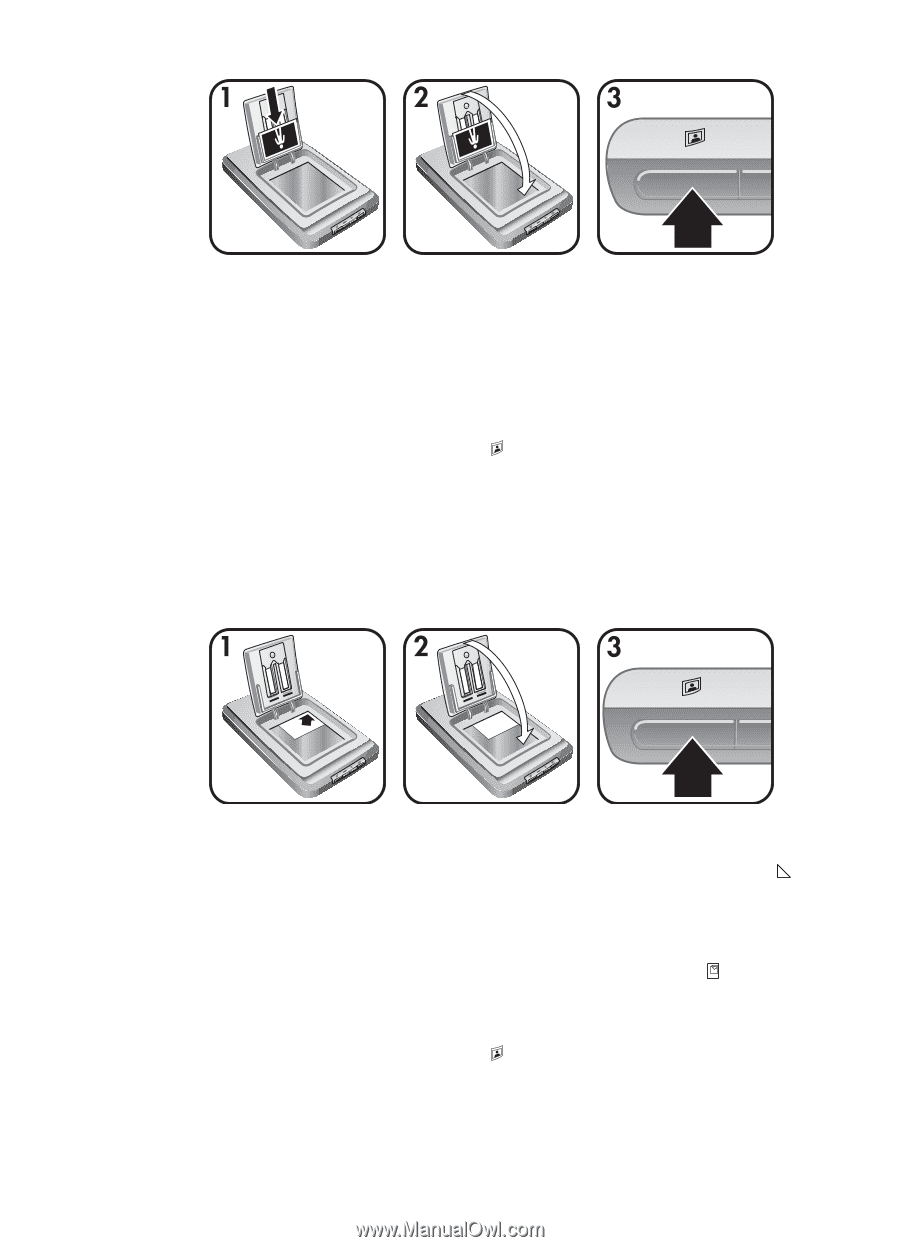
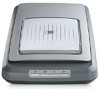
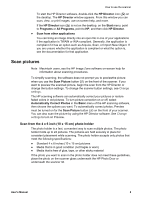
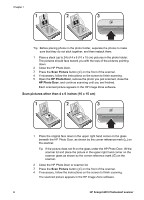
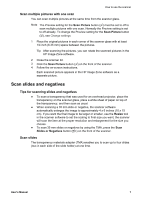
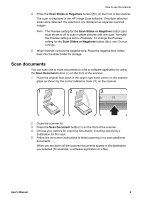
Chapter 1 Tip Before placing photos in the photo holder, separate the photos to make sure that they do not stick together, and then restack them. 1 Place a stack (up to 24) of 4 x 6 (10 x 15 cm) pictures in the photo holder. The pictures should face toward you with the tops of the pictures pointing down. 2 Close the HP Photo Door. 3 Press the Scan Picture button ( ) on the front of the scanner. 4 If necessary, follow the instructions on the screen to finish scanning. 5 Open the HP Photo Door, remove the photo you just scanned, close the HP Photo Door, and continue scanning until you are finished. Each scanned picture appears in the HP Image Zone software. Scan pictures other than 4 x 6 inches (10 x 15 cm) 1 Place the original face down in the upper right hand corner on the glass beneath the HP Photo Door, as shown by the corner reference mark ( ) on the scanner. Tip If the picture does not fit on the glass under the HP Photo Door, lift the scanner lid and place the picture in the upper right hand corner on the scanner glass as shown by the corner reference mark ( ) on the scanner. 2 Close the HP Photo Door or scanner lid. 3 Press the Scan Picture button ( ) on the front of the scanner. 4 If necessary, follow the instructions on the screen to finish scanning. The scanned picture appears in the HP Image Zone software. 6 HP Scanjet 4070 Photosmart scanner
-
 1
1 -
2
-
3
-
4
-
 5
5 -
 6
6 -
 7
7 -
 8
8 -
 9
9 -
 10
10 -
 11
11 -
 12
12 -
 13
13 -
 14
14 -
 15
15 -
16
-
17
-
18
-
19
-
20
-
21
-
22
-
23
-
24
-
25
-
26
-
27
-
28
-
29
-
30
-
31
-
32
 |
 |