HP Scanjet 4070 HP Scanjet 4070 Photosmart Scanner - User Manual - Page 15
E-mail one or more scanned documents - user manual
 |
View all HP Scanjet 4070 manuals
Add to My Manuals
Save this manual to your list of manuals |
Page 15 highlights
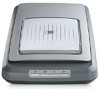
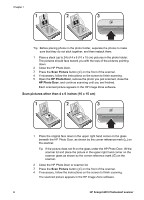
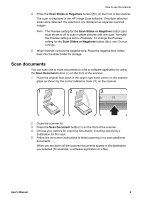
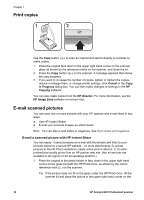
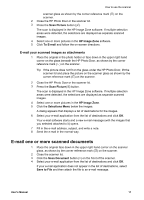
How to use the scanner scanner glass as shown by the corner reference mark ( ) on the scanner. 2 Close the HP Photo Door or the scanner lid. 3 Press the Scan Picture button ( ). The scan is displayed in the HP Image Zone software. If multiple selection areas were detected, the selections are displayed as separate scanned images. 4 Select one or more pictures in the HP Image Zone software. 5 Click To E-mail and follow the on-screen directions. E-mail your scanned images as attachments 1 Place the original in the photo holder or face down in the upper right hand corner on the glass beneath the HP Photo Door, as shown by the corner reference mark ( ) on the scanner. Tip If the picture does not fit on the glass under the HP Photo Door, lift the scanner lid and place the picture on the scanner glass as shown by the corner reference mark ( ) on the scanner. 2 Close the HP Photo Door or the scanner lid. 3 Press the Scan Picture( ) button. The scan is displayed in the HP Image Zone software. If multiple selection areas were detected, the selections are displayed as separate scanned images. 4 Select one or more pictures in the HP Image Zone. 5 Click the Selections Menu below the images. A dialog appears that displays a list of destinations for the images. 6 Select your e-mail application from the list of destinations and click OK. Your e-mail software starts and a new e-mail message (with the images that you selected attached to it) opens. 7 Fill in the e-mail address, subject, and write a note. 8 Send the e-mail in the normal way. E-mail one or more scanned documents 1 Place the original face down in the upper right hand corner on the scanner glass, as shown by the corner reference mark ( ) on the scanner. 2 Close the scanner lid. 3 Click the Scan Document button ( ) on the front of the scanner. 4 Select your e-mail application from the list of destinations and click OK. If your e-mail application does not appear in the list of destinations, select Save to File and then attach the file to an e-mail message. User's Manual 11
-
 1
1 -
2
-
3
-
4
-
5
-
6
-
7
-
8
-
9
-
 10
10 -
 11
11 -
 12
12 -
 13
13 -
 14
14 -
 15
15 -
 16
16 -
 17
17 -
 18
18 -
 19
19 -
 20
20 -
21
-
22
-
23
-
24
-
25
-
26
-
27
-
28
-
29
-
30
-
31
-
32
 |
 |