HP Slate 21-k100 HP Slate 21 All-in-One User Guide - Page 24
Using the camera, Printing, Adjusting the settings, Date/time settings - manual
 |
View all HP Slate 21-k100 manuals
Add to My Manuals
Save this manual to your list of manuals |
Page 24 highlights
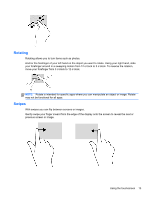
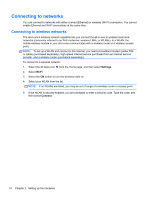
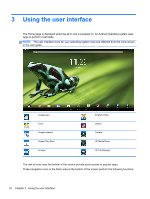
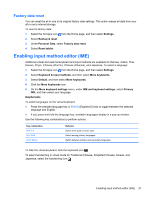
Using the camera You can use the camera to take a photo or record a video. You can preview and save the photo or video recording. To use the camera: 1. Select the Camera icon from the Home page or from HP Media Player. 2. If necessary, select the camera to use and whether to use it every time or just in this instance. Select Camera. NOTE: With the camera displayed on-screen, select the black bar at the bottom of the screen to display the navigation icons. 3. Use the controls on the right side of the screen to take photos or videos. Printing HP ePrint provides convenience printing, and documents printed with ePrint may appear different from the original. Style, formatting and text flow may differ slightly from the original document. For documents requiring a higher quality (such as legal documents), HP recommends that you print from the software application on your all-in-one where you will have more control over how your printouts appear. HP ePrint lets you print from virtually anywhere to an HP printer that supports ePrint. Once enabled, ePrint assigns an email address to your printer. To print, simply send an email containing your document to your printer's address. For more information, visit http://www.hp.com/go/ePrintCenter for compatibility and details. To configure HP ePrint: 1. Select the All Apps icon on the Home screen, and then select Settings. 2. Select Add account. 3. Select HP ePrint. 4. Follow the on-screen instructions. Adjusting the settings To configure the settings, select the All Apps icon on the Home screen, and then select Settings. Date/time settings The date/time settings allow you to set the date and time for the all-in-one. To set the date and time: 1. Select the All Apps icon from the Home page, and then select Settings. 2. Select Date & time. NOTE: You may have to scroll down the settings list to display Date & time. 3. To manually set date and time, clear the Automatic date & time box and the Automatic time zone box. 18 Chapter 3 Using the user interface
-
 1
1 -
2
-
3
-
4
-
5
-
6
-
7
-
8
-
9
-
10
-
11
-
12
-
13
-
14
-
15
-
16
-
17
-
18
-
 19
19 -
 20
20 -
 21
21 -
 22
22 -
 23
23 -
 24
24 -
 25
25 -
 26
26 -
 27
27 -
 28
28 -
 29
29 -
30
-
31
-
32
-
33
-
34
-
35
-
36
-
37
-
38
-
39
-
40
 |
 |