HP StorageWorks 2/8-EL SAN Switch 2/8 V3.1.x - Installation Guide - Page 33
Installing the SAN Switch 2/8 in an HP 9000 Series or Comparable EIA Rack
 |
View all HP StorageWorks 2/8-EL manuals
Add to My Manuals
Save this manual to your list of manuals |
Page 33 highlights
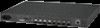
Installing the SAN Switch 2/8 Installing the SAN Switch 2/8 in an HP 9000 Series or Comparable EIA Rack Read the following sections for complete installation instructions. Obtain the following tools: ■ Fixed Rack Mount Kit (supplied with the switch) ■ A #2 Phillips screwdriver with torque capability ■ Clamps or other means to temporarily support the switch ■ Torque screwdriver Caution: The SAN Switch 2/8 ships with the complete set of rack mount hardware required for installation in an EIA rack. HP recommends using the exact screws specified for use with the switch chassis. Using screws longer than the specified length may damage the switch. Installing the Fixed Rail Kit The SAN Switch 2/8 Fixed Rack Mount Kit consists of two rail assemblies. Read the following sections for complete instructions on attaching the rails to the switch, then installing the switch in the rack. 1. Attach the left and right front brackets to the switch chassis as follows: a. Position one left front bracket (Item 1) with the flat side against right side of switch, oriented as shown in Figure 6. Note: Four sets of holes are provided to allow the switch to be set back from the front of the rack, if desired. This allows a more gradual bend in any fiber optic cables connected to the switch. b. Insert two 8-32 x 5/16 inch screws (Item 7) into one of the pairs of vertically aligned holes in both the bracket and in the switch. c. Insert one 8-32 x 5/16 inch screw (Item 7) into one of the single holes in both the bracket and in the switch. d. Tighten screws to a torque of 15-inch pounds. SAN Switch 2/8 Version 3.1.x Installation Guide 33
-
 1
1 -
2
-
3
-
4
-
5
-
6
-
7
-
8
-
9
-
10
-
11
-
12
-
13
-
14
-
15
-
16
-
17
-
18
-
19
-
20
-
21
-
22
-
23
-
24
-
25
-
26
-
27
-
 28
28 -
 29
29 -
 30
30 -
 31
31 -
 32
32 -
 33
33 -
 34
34 -
 35
35 -
 36
36 -
 37
37 -
 38
38 -
39
-
40
-
41
-
42
-
43
-
44
-
45
-
46
-
47
-
48
-
49
-
50
-
51
-
52
-
53
-
54
-
55
-
56
-
57
-
58
-
59
-
60
-
61
-
62
-
63
-
64
-
65
-
66
-
67
-
68
-
69
-
70
-
71
-
72
-
73
-
74
-
75
-
76
-
77
-
78
-
79
-
80
-
81
-
82
-
83
-
84
-
85
-
86
-
87
-
88
-
89
-
90
-
91
-
92
-
93
-
94
-
95
-
96
-
97
-
98
-
99
-
100
-
101
-
102
-
103
-
104
-
105
-
106
-
107
-
108
-
109
-
110
-
111
-
112
-
113
-
114
 |
 |
