HP ep9012 HP ep9010 Series Instant Cinema Digital Projector - User's Guide - Page 46
Adjusting the projector setup, Using the on-screen menu, Changing settings using the on-screen menu
 |
View all HP ep9012 manuals
Add to My Manuals
Save this manual to your list of manuals |
Page 46 highlights
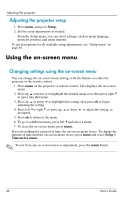
Adjusting the projector Adjusting the projector setup 1. Press menu, and go to Setup. 2. Set the setup adjustments as needed. From the Setup menu, you can select settings, such as menu language, projector position, and menu timeout. To get descriptions for all available setup adjustments, see "Setup menu" on page 49. Using the on-screen menu Changing settings using the on-screen menu You can change the on-screen menu settings with the buttons on either the projector or the remote control. 1. Press menu on the projector or remote control. This displays the on-screen menu. 2. Press up or down to highlight the desired menu icon, then press right to move into that menu. 3. Press up or down to highlight that setting, then press ok to begin adjusting the setting. 4. Press left or right , or press up or down , to adjust the setting, as prompted. 5. Press ok to return to the menu. 6. To go to a different menu, press left and select a menu. 7. To close the on-screen menu, press menu. If you do nothing for a period of time, the on-screen menu closes. To change the amount of time until the on-screen menu closes, press menu and select Setup > Timeout for menu. ✎ To exit from any on-screen menu or adjustment, press the menu button. 46 User's Guide
-
 1
1 -
2
-
3
-
4
-
5
-
6
-
7
-
8
-
9
-
10
-
11
-
12
-
13
-
14
-
15
-
16
-
17
-
18
-
19
-
20
-
21
-
22
-
23
-
24
-
25
-
26
-
27
-
28
-
29
-
30
-
31
-
32
-
33
-
34
-
35
-
36
-
37
-
38
-
39
-
40
-
 41
41 -
 42
42 -
 43
43 -
 44
44 -
 45
45 -
 46
46 -
 47
47 -
 48
48 -
 49
49 -
 50
50 -
 51
51 -
52
-
53
-
54
-
55
-
56
-
57
-
58
-
59
-
60
-
61
-
62
-
63
-
64
-
65
-
66
-
67
-
68
-
69
-
70
-
71
-
72
-
73
-
74
-
75
-
76
-
77
-
78
-
79
-
80
-
81
-
82
-
83
-
84
-
85
 |
 |