HP nx6125 HP Compaq nx6125 Notebook PC - Getting Started Guide - Enhanced for - Page 26
Create User Accounts (Select Models Only), Press the Finish Button
 |
View all HP nx6125 manuals
Add to My Manuals
Save this manual to your list of manuals |
Page 26 highlights
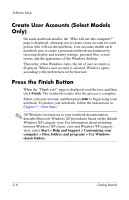
Software Setup Create User Accounts (Select Models Only) On some notebook models, the "Who will use this computer?" page is displayed, allowing you to create a user account for each person who will use the notebook. User accounts enable each notebook user to create a personal notebook environment by choosing display and security settings, personal files, screen savers, and the appearance of the Windows desktop. Thereafter, when Windows starts, the list of user accounts is displayed. When a user account is selected, Windows opens according to the preferences set by that user. Press the Finish Button When the "Thank you!" page is displayed, read the text, and then click Finish. The notebook restarts after the process is complete. Select your user account, and then press enter to begin using your notebook. To protect your notebook, follow the instructions in Chapter 3, "Next Steps." ✎ All Windows instructions in your notebook documentation describe Microsoft Windows XP procedures based on the default Windows XP category view. For information about switching between Windows XP classic view and Windows XP category view, select Start > Help and Support > Customizing your computer > Files, folders, and programs > Use Windows classic folders. 2-8 Getting Started
-
 1
1 -
2
-
3
-
4
-
5
-
6
-
7
-
8
-
9
-
10
-
11
-
12
-
13
-
14
-
15
-
16
-
17
-
18
-
19
-
20
-
 21
21 -
 22
22 -
 23
23 -
 24
24 -
 25
25 -
 26
26 -
 27
27 -
 28
28 -
 29
29 -
 30
30 -
 31
31 -
32
-
33
-
34
-
35
-
36
-
37
-
38
-
39
-
40
-
41
-
42
-
43
-
44
-
45
-
46
-
47
-
48
-
49
-
50
-
51
-
52
-
53
-
54
-
55
-
56
-
57
-
58
-
59
-
60
-
61
-
62
-
63
-
64
-
65
-
66
-
67
-
68
-
69
-
70
-
71
-
72
-
73
-
74
-
75
 |
 |