IBM 2658 Hardware Maintenance Manual - Page 30
Thermal Sensor, Serial number of the system unit, Set Default Thermal Setting
 |
UPC - 087944841135
View all IBM 2658 manuals
Add to My Manuals
Save this manual to your list of manuals |
Page 30 highlights
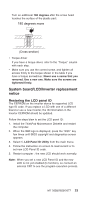
CAUTION: Make sure the new ID code you choose corresponds with the LCD brand and type. If you write a wrong ID into inverterm, just reboot and re-execute the program and input the correct ID code. Note: If LCD cannot display after change ID code, make sure you write the correct ID code, or try reseating the LCD coaxtial cable connectors. Thermal Sensor The system is equipped with sensors to protect against system overheating. By setting system and processor thermal thresholds, the system can turn on the cooling fan or shut down automatically when temperatures reach the defined threshold parameters. System experiencing frequent auto sensor shutdown may need to reset the thermal sensor threshold and execute the fan test to ensure the normal operation of the cooling fan. Follow the steps below to set thermal threshold: 1. Install the ThinkPad Maintenance Diskette and restart the computer. 2. When the IBM logo is displayed, press the ″ESC″ key few times until BIOS copyright and diagnostics screen appears. 3. Select 2. Thermal Sensor Utility from the main menu. 4. Select 1. Read Thermal Settingto view the original setting or 2. Set Default Thermal Settingto restore the default setting. Serial number of the system unit When the computer was manufactured, the EEPROM on the system board was loaded with the serial numbers of the system and all major components. These numbers need to remain the same throughout the life of the computer. If you replace the system board, you must restore the serial number of the system unit to its original value. Before replacing the system board, save the original serial number by doing the following: 1. Install the Maintenance Diskette and restart the computer. 2. When the IBM logo is displayed, press the ″ESC″ key few times until BIOS copyright and diagnostics screen appears. 3. Select 2.VPD Utility from the main menu. 24 ThinkPad R32 Series
-
 1
1 -
2
-
3
-
4
-
5
-
6
-
7
-
8
-
9
-
10
-
11
-
12
-
13
-
14
-
15
-
16
-
17
-
18
-
19
-
20
-
21
-
22
-
23
-
24
-
 25
25 -
 26
26 -
 27
27 -
 28
28 -
 29
29 -
 30
30 -
 31
31 -
 32
32 -
 33
33 -
 34
34 -
 35
35 -
36
-
37
-
38
-
39
-
40
-
41
-
42
-
43
-
44
-
45
-
46
-
47
-
48
-
49
-
50
-
51
-
52
-
53
-
54
-
55
-
56
-
57
-
58
-
59
-
60
-
61
-
62
-
63
-
64
-
65
-
66
-
67
-
68
-
69
-
70
-
71
-
72
-
73
-
74
-
75
-
76
-
77
-
78
-
79
-
80
-
81
-
82
-
83
-
84
-
85
-
86
-
87
-
88
-
89
-
90
-
91
-
92
-
93
-
94
-
95
-
96
-
97
-
98
-
99
-
100
-
101
-
102
-
103
-
104
-
105
-
106
-
107
-
108
-
109
-
110
-
111
-
112
-
113
-
114
-
115
-
116
-
117
-
118
-
119
-
120
-
121
-
122
-
123
-
124
-
125
-
126
-
127
-
128
-
129
-
130
-
131
-
132
-
133
-
134
-
135
-
136
-
137
-
138
-
139
-
140
-
141
-
142
-
143
-
144
-
145
-
146
-
147
-
148
-
149
-
150
-
151
-
152
-
153
-
154
-
155
-
156
-
157
-
158
-
159
-
160
-
161
-
162
-
163
-
164
-
165
-
166
-
167
-
168
-
169
-
170
-
171
-
172
-
173
-
174
-
175
-
176
-
177
-
178
-
179
-
180
-
181
-
182
-
183
-
184
-
185
-
186
-
187
-
188
-
189
-
190
-
191
-
192
-
193
-
194
-
195
-
196
-
197
-
198
-
199
-
200
-
201
-
202
-
203
-
204
-
205
-
206
-
207
-
208
-
209
-
210
-
211
-
212
-
213
-
214
-
215
-
216
-
217
-
218
-
219
-
220
-
221
-
222
-
223
-
224
-
225
-
226
-
227
-
228
-
229
-
230
-
231
-
232
-
233
-
234
-
235
-
236
-
237
-
238
-
239
-
240
-
241
-
242
-
243
-
244
-
245
-
246
-
247
-
248
 |
 |
