IBM 4840 Service Guide - Page 138
Removing, replacing, security
 |
View all IBM 4840 manuals
Add to My Manuals
Save this manual to your list of manuals |
Page 138 highlights
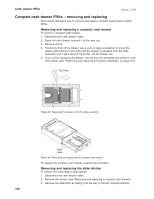
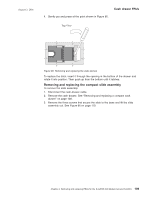
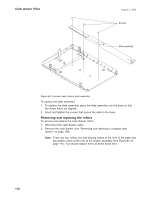
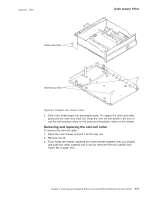
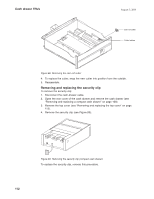
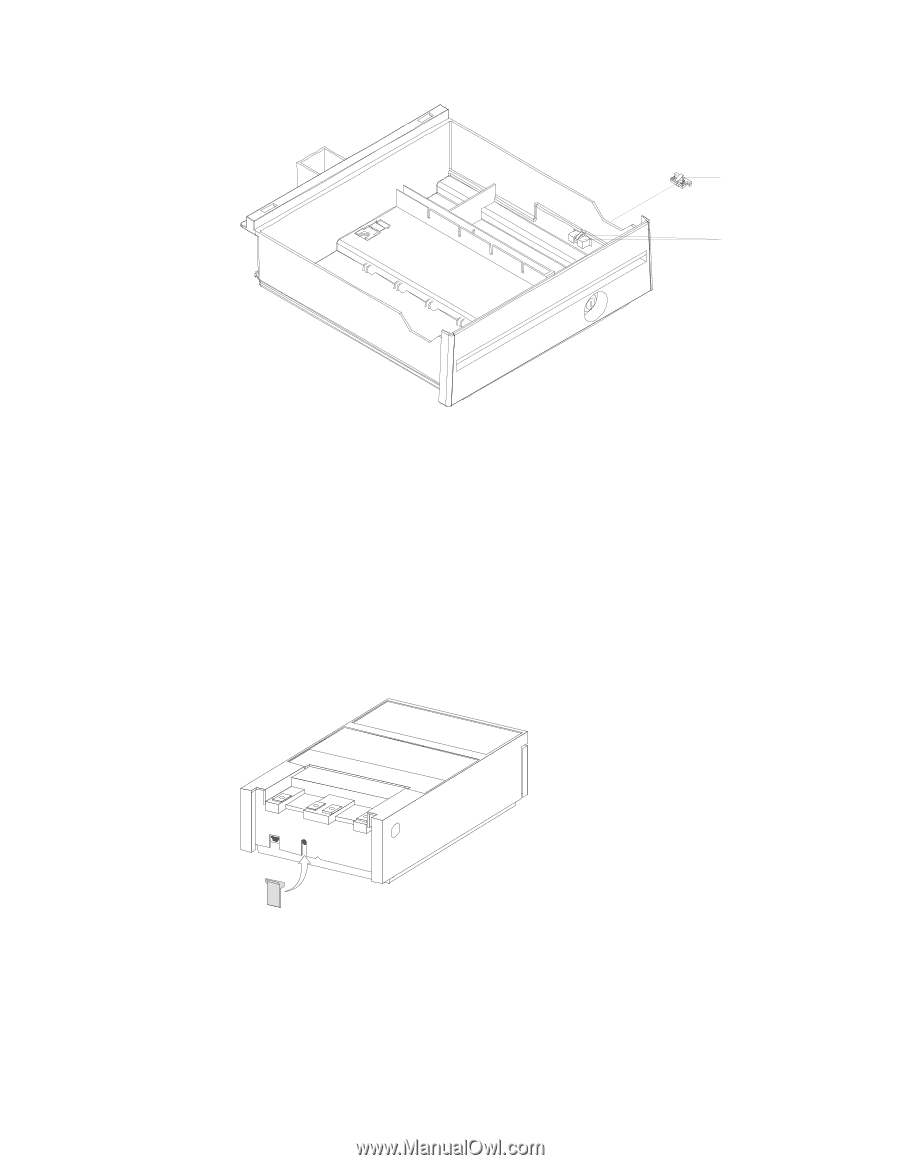
Cash drawer FRUs August 3, 2006 Coin roll cutter Cutter latches Figure 88. Removing the coin-roll cutter 4. To replace the cutter, snap the new cutter into position from the outside. 5. Reassemble. Removing and replacing the security clip To remove the security clip: 1. Disconnect the cash-drawer cable. 2. Open the rear cover of the cash drawer and remove the cash drawer (see "Removing and replacing a compact cash drawer" on page 108). 3. Remove the top cover (see "Removing and replacing the top cover" on page 113). 4. Remove the security clip (see Figure 89). Figure 89. Removing the security clip (compact cash drawer) To replace the security clip, reverse this procedure. 112
-
 1
1 -
2
-
3
-
4
-
5
-
6
-
7
-
8
-
9
-
10
-
11
-
12
-
13
-
14
-
15
-
16
-
17
-
18
-
19
-
20
-
21
-
22
-
23
-
24
-
25
-
26
-
27
-
28
-
29
-
30
-
31
-
32
-
33
-
34
-
35
-
36
-
37
-
38
-
39
-
40
-
41
-
42
-
43
-
44
-
45
-
46
-
47
-
48
-
49
-
50
-
51
-
52
-
53
-
54
-
55
-
56
-
57
-
58
-
59
-
60
-
61
-
62
-
63
-
64
-
65
-
66
-
67
-
68
-
69
-
70
-
71
-
72
-
73
-
74
-
75
-
76
-
77
-
78
-
79
-
80
-
81
-
82
-
83
-
84
-
85
-
86
-
87
-
88
-
89
-
90
-
91
-
92
-
93
-
94
-
95
-
96
-
97
-
98
-
99
-
100
-
101
-
102
-
103
-
104
-
105
-
106
-
107
-
108
-
109
-
110
-
111
-
112
-
113
-
114
-
115
-
116
-
117
-
118
-
119
-
120
-
121
-
122
-
123
-
124
-
125
-
126
-
127
-
128
-
129
-
130
-
131
-
132
-
 133
133 -
 134
134 -
 135
135 -
 136
136 -
 137
137 -
 138
138 -
 139
139 -
 140
140 -
 141
141 -
 142
142 -
 143
143 -
144
-
145
-
146
-
147
-
148
-
149
-
150
-
151
-
152
-
153
-
154
-
155
-
156
-
157
-
158
-
159
-
160
-
161
-
162
-
163
-
164
-
165
-
166
-
167
-
168
-
169
-
170
-
171
-
172
-
173
-
174
-
175
-
176
-
177
-
178
-
179
-
180
-
181
-
182
-
183
-
184
-
185
-
186
-
187
-
188
-
189
-
190
-
191
-
192
-
193
-
194
-
195
-
196
-
197
-
198
-
199
-
200
-
201
-
202
-
203
-
204
-
205
-
206
-
207
-
208
-
209
-
210
-
211
-
212
-
213
-
214
-
215
-
216
-
217
-
218
-
219
-
220
-
221
-
222
-
223
-
224
-
225
-
226
-
227
-
228
-
229
-
230
-
231
-
232
-
233
-
234
-
235
-
236
-
237
-
238
-
239
-
240
-
241
-
242
-
243
-
244
-
245
-
246
-
247
-
248
-
249
-
250
-
251
-
252
-
253
-
254
-
255
-
256
-
257
-
258
 |
 |
4.
To
replace
the
cutter,
snap
the
new
cutter
into
position
from
the
outside.
5.
Reassemble.
Removing
and
replacing
the
security
clip
To
remove
the
security
clip:
1.
Disconnect
the
cash-drawer
cable.
2.
Open
the
rear
cover
of
the
cash
drawer
and
remove
the
cash
drawer
(see
“Removing
and
replacing
a
compact
cash
drawer”
on
page
108).
3.
Remove
the
top
cover
(see
“Removing
and
replacing
the
top
cover”
on
page
113).
4.
Remove
the
security
clip
(see
Figure
89).
To
replace
the
security
clip,
reverse
this
procedure.
Coin roll cutter
Cutter latches
Figure
88.
Removing
the
coin-roll
cutter
Figure
89.
Removing
the
security
clip
(compact
cash
drawer)
Cash
drawer
FRUs
August
3,
2006
112