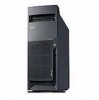
IBM 8479 User Reference - Page 25
Cache Control and PCI configuration., Save and Exit Setup
 |
UPC - 087944653912
View all IBM 8479 manuals
Add to My Manuals
Save this manual to your list of manuals |
Page 25 highlights
The server uses a startup sequence to determine the device from which the operating system starts. For example, you can define a startup sequence that checks for a startable diskette in the diskette drive, then checks the hard disk drive in a drive bay, and then checks a network adapter. You can enable a virus-warning test that checks for changes in the master boot record at startup. You also can choose to run POST in the Quick mode and read the microprocessor serial number. • Frequency Control Select this choice to enable or disable the auto-detect DIMM/PCI clock. • Date and Time Select this choice to set the system date and time. The system time is in a 24-hour format: hour:minute:second. Note: You may also set the date and time using the procedures provided on the ServerGuide CDs. • System Security Select this choice to set a power-on or administrator password. See "Using passwords" on page 12 for more information. You can also enable the chassisintrusion detector to alert you each time the server cover is removed. • Advanced Setup Select this choice to change values for advanced hardware features, such as Cache Control and PCI configuration. A message appears above the choices on this menu to alert you that the system might malfunction if these options are configured incorrectly. Follow the instructions on the screen carefully. - Cache Control Select this choice to enable or disable the microprocessor cache. Attention: Do not make changes to the Cache Control option unless directed to do so by an IBM authorized service representative. - ROM Shadowing Select this choice to enable or disable the state of ROM shadowing. - Chipset Feature Select this choice to modify settings that control features of the core chip set on the system board. Attention: Do not make changes to the Chipset Feature option unless directed to do so by an IBM authorized service representative. - Memory Settings Select this choice to manually enable or disable a bank of memory. If a memory error is detected during POST or memory configuration, the server can automatically disable the failing memory bank and continue operating with reduced memory capacity. If this occurs, you must manually enable the memory bank after the problem is corrected. Select Memory Settings from the Advanced Setup menu, and use the arrow keys to highlight the bank that you want to enable; then, use the arrow keys to select Enable. • Power Management Setup Select this choice to enable or disable system power savings. • Save and Exit Setup Select this choice to save your customized settings. Chapter 3. Configuring your server 11
-
 1
1 -
2
-
3
-
4
-
5
-
6
-
7
-
8
-
9
-
10
-
11
-
12
-
13
-
14
-
15
-
16
-
17
-
18
-
19
-
 20
20 -
 21
21 -
 22
22 -
 23
23 -
 24
24 -
 25
25 -
 26
26 -
 27
27 -
 28
28 -
 29
29 -
 30
30 -
31
-
32
-
33
-
34
-
35
-
36
-
37
-
38
-
39
-
40
-
41
-
42
-
43
-
44
-
45
-
46
-
47
-
48
-
49
-
50
-
51
-
52
-
53
-
54
-
55
-
56
-
57
-
58
-
59
-
60
-
61
-
62
-
63
-
64
-
65
-
66
-
67
-
68
-
69
-
70
-
71
-
72
-
73
-
74
-
75
-
76
-
77
-
78
-
79
-
80
-
81
-
82
-
83
-
84
-
85
-
86
-
87
-
88
-
89
-
90
-
91
-
92
-
93
-
94
-
95
-
96
-
97
-
98
-
99
-
100
-
101
-
102
-
103
-
104
-
105
-
106
-
107
-
108
-
109
-
110
-
111
-
112
-
113
-
114
-
115
-
116
-
117
-
118
-
119
-
120
-
121
-
122
-
123
-
124
-
125
-
126
-
127
-
128
 |
 |
