IBM 866441Y Hardware Maintenance Manual - Page 186
Select either server cover from the conversion kit, cover toward the front of the server, making sure
 |
UPC - 087944522201
View all IBM 866441Y manuals
Add to My Manuals
Save this manual to your list of manuals |
Page 186 highlights
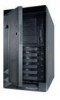
5. Remove the right-side cover. a. From the rear of the server, remove the screws holding the cover. b. Slide the cover toward the rear of the server about 25 mm (1 inch); then, lift the cover off the server. 6. Install the new bottom cover. a. Position the server open-side-down, as illustrated below. b. Select either server cover from the conversion kit to use as the bottom cover. The remaining cover will be the top cover. c. Align the bottom cover with the frame of the server. d. Press the cover onto the server; then, slide the cover toward the front of the server, making sure the tabs on the rear of the cover fit into the slots on the rear of the server. 178 Netfinity Server HMM
-
 1
1 -
2
-
3
-
4
-
5
-
6
-
7
-
8
-
9
-
10
-
11
-
12
-
13
-
14
-
15
-
16
-
17
-
18
-
19
-
20
-
21
-
22
-
23
-
24
-
25
-
26
-
27
-
28
-
29
-
30
-
31
-
32
-
33
-
34
-
35
-
36
-
37
-
38
-
39
-
40
-
41
-
42
-
43
-
44
-
45
-
46
-
47
-
48
-
49
-
50
-
51
-
52
-
53
-
54
-
55
-
56
-
57
-
58
-
59
-
60
-
61
-
62
-
63
-
64
-
65
-
66
-
67
-
68
-
69
-
70
-
71
-
72
-
73
-
74
-
75
-
76
-
77
-
78
-
79
-
80
-
81
-
82
-
83
-
84
-
85
-
86
-
87
-
88
-
89
-
90
-
91
-
92
-
93
-
94
-
95
-
96
-
97
-
98
-
99
-
100
-
101
-
102
-
103
-
104
-
105
-
106
-
107
-
108
-
109
-
110
-
111
-
112
-
113
-
114
-
115
-
116
-
117
-
118
-
119
-
120
-
121
-
122
-
123
-
124
-
125
-
126
-
127
-
128
-
129
-
130
-
131
-
132
-
133
-
134
-
135
-
136
-
137
-
138
-
139
-
140
-
141
-
142
-
143
-
144
-
145
-
146
-
147
-
148
-
149
-
150
-
151
-
152
-
153
-
154
-
155
-
156
-
157
-
158
-
159
-
160
-
161
-
162
-
163
-
164
-
165
-
166
-
167
-
168
-
169
-
170
-
171
-
172
-
173
-
174
-
175
-
176
-
177
-
178
-
179
-
180
-
 181
181 -
 182
182 -
 183
183 -
 184
184 -
 185
185 -
 186
186 -
 187
187 -
 188
188 -
 189
189 -
 190
190 -
 191
191 -
192
-
193
-
194
-
195
-
196
-
197
-
198
-
199
-
200
-
201
-
202
-
203
-
204
-
205
-
206
-
207
-
208
-
209
-
210
-
211
-
212
-
213
-
214
-
215
-
216
-
217
-
218
-
219
-
220
-
221
-
222
-
223
-
224
-
225
-
226
-
227
-
228
-
229
-
230
-
231
-
232
-
233
-
234
-
235
-
236
-
237
-
238
-
239
-
240
-
241
-
242
-
243
-
244
-
245
-
246
-
247
-
248
-
249
-
250
-
251
-
252
-
253
-
254
-
255
-
256
-
257
-
258
-
259
-
260
-
261
-
262
-
263
-
264
-
265
-
266
-
267
-
268
-
269
-
270
-
271
-
272
-
273
-
274
-
275
-
276
 |
 |

5.
Remove the right-side cover.
a.
From the rear of the server, remove the screws
holding the cover.
b.
Slide the cover toward the rear of the server
about 25 mm (1 inch); then, lift the cover off the
server.
6.
Install the new bottom cover.
a.
Position the server open-side-down, as illustrated
below.
b.
Select either server cover from the conversion kit
to use as the bottom cover.
The remaining
cover will be the top cover.
c.
Align the bottom cover with the frame of the
server.
d.
Press the cover onto the server; then, slide the
cover toward the front of the server, making sure
the tabs on the rear of the cover fit into the slots
on the rear of the server.
178
Netfinity Server HMM