IBM QS21 User Guide
IBM QS21 - BladeCenter - 0792 Manual
 |
UPC - 883436016940
View all IBM QS21 manuals
Add to My Manuals
Save this manual to your list of manuals |
IBM QS21 manual content summary:
- IBM QS21 | User Guide - Page 1
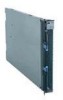
BladeCenter QS21 Type 0792 Installation and User's Guide Welcome. Thank you for buying an IBM blade server. Your blade server features superior performance, availability, and scalability. This Installation and User's Guide contains information for setting up, configuring, and using your blade - IBM QS21 | User Guide - Page 2
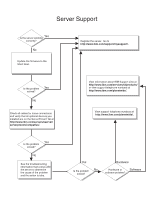
/compat/us/. Yes Is the problem solved? No See the troubleshooting information that comes with the server to determine the cause of the problem and the action to take. View information about IBM Support Line at http://www.ibm.com/services/sl/products/ or view support telephone numbers at http://www - IBM QS21 | User Guide - Page 3
BladeCenter QS21 Type 0792 Installation and User's Guide - IBM QS21 | User Guide - Page 4
, read the general information in Appendix C, "Notices," on page 81 and the Warranty and Support Information document for your blade server type on the Documentation CD. Fifth Edition (September 2008) © Copyright International Business Machines Corporation 2006, 2008. US Government Users Restricted - IBM QS21 | User Guide - Page 5
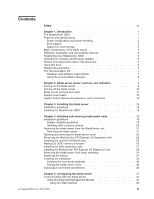
Power configuration and power throttling 3 Boot support 3 Support for local storage 3 Major components of the blade server 3 Reliability, availability, and serviceability features 4 Registering your BladeCenter QS21 5 Checking for software and firmware updates 5 Notices and statements used in - IBM QS21 | User Guide - Page 6
59 Prerequisites 59 Basic checks 59 Troubleshooting charts 60 Problems indicated by the front panel LEDs 60 Power problems 61 Power throttling 61 Network connection problems 62 Service processor problems 62 Recovering the system firmware code 63 Checking the boot image 63 Booting from - IBM QS21 | User Guide - Page 7
Change SCSI Settings 69 Select Console 69 Select Boot Options 70 Firmware Boot Side Options 72 Progress Indicator History 72 FRU information 73 information from the World Wide Web 79 Software service and support 80 Hardware service and support 80 Appendix C. Notices 81 Trademarks 82 - IBM QS21 | User Guide - Page 8
vi QS21 Installation and User's Guide - IBM QS21 | User Guide - Page 9
, leggere le Informazioni sulla Sicurezza. Les sikkerhetsinformasjonen (Safety Information) før du installerer dette produktet. Antes de instalar este produto, leia as Informações sobre Segurança. © Copyright IBM Corp. 2006, 2008 vii - IBM QS21 | User Guide - Page 10
book under statement 1. Be sure to read all caution and danger statements in this documentation before performing the instructions. Read any additional safety information that comes with the blade server or optional device before you install the device. viii QS21 Installation and User's Guide - IBM QS21 | User Guide - Page 11
a shock hazard: v Do not connect or disconnect any cables or perform installation, maintenance, or reconfiguration of this product during an electrical storm. and modems before you open the device covers, unless instructed otherwise in the installation and configuration procedures. v Connect and - IBM QS21 | User Guide - Page 12
Statement 2: CAUTION: When replacing the lithium battery, use only IBM Part Number 43W9859 or 03N2449 or an equivalent type battery recommended by the manufacturer °F) v Repair or disassemble Dispose of the battery as required by local ordinances or regulations. x QS21 Installation and User's Guide - IBM QS21 | User Guide - Page 13
the covers of the laser product could result in exposure to hazardous laser radiation. There are no serviceable parts inside the device. v Use of controls or adjustments or performance of procedures other than those specified herein might result in hazardous radiation exposure. DANGER Some laser - IBM QS21 | User Guide - Page 14
more than one power cord. To remove all electrical current from the device, ensure that all power cords are disconnected from the power source. 2 1 xii QS21 Installation and User's Guide - IBM QS21 | User Guide - Page 15
this label attached. There are no serviceable parts inside these components. If you suspect a problem with one of these parts, contact a service technician. Statement 13: DANGER Overloading a 21: CAUTION: Hazardous energy is present when the blade is connected to the power source. Always replace the - IBM QS21 | User Guide - Page 16
está considerado como un causante de cancer y de defectos congénitos, además de otros riesgos reproductivos. Lávese las manos después de usar el producto. xiv QS21 Installation and User's Guide - IBM QS21 | User Guide - Page 17
of the features of the IBM® BladeCenter® QS21 and what options are available. The BladeCenter QS21 The high performance BladeCenter QS21 is based on the 64-bit Cell Broadband Engine™ (Cell/B.E.) processor with a frequency of 3.2 GHz. Two processors are supported per blade and are directly mounted on - IBM QS21 | User Guide - Page 18
v 4 DIMM slots (2 slots per Cell/B.E. companion chip) for optional I/O Buffer DDR2 VLP DIMMs v Integrated Renesas 2166 Service processor (BMC, IPMI compliant code stack) The average maximum for power budgeting is 300 W for a QS21 blade server without options. 2 QS21 Installation and User's Guide - IBM QS21 | User Guide - Page 19
The BladeCenter QS21 supports the SAS drives of the IBM System Storage™ DS3200 and the IBM System Storage EXP3000 expansion unit. Check the IBM BladeCenter support Web site for details of supported SAS drives at http://www.ibm.com/systems/bladecenter/ support/. Major components of the blade server - IBM QS21 | User Guide - Page 20
blade server supports: v Transparent CPU Hardware error recovery v ECC for XDR and DDR2 memory v PFA for CEs on the Cell Services (SMS) menu support v Checkstop detection with data logging and automated reboot The BladeCenter unit supports the following features: 4 QS21 Installation and User's Guide - IBM QS21 | User Guide - Page 21
following table. You need this information when you register the blade server with IBM. You can register the blade server at http://www.ibm.com/support/mysupport/. Product name Machine type Model number Serial number BladeCenter QS21 0792 The machine type, model number, and serial number are - IBM QS21 | User Guide - Page 22
Install the operating system v Perform basic troubleshooting of the BladeCenter QS21 Note: The illustrations in this document might differ slightly from the hardware. Updates might be available for this document. You can check for the most recent version at http://www.ibm.com/support/us/en/. Related - IBM QS21 | User Guide - Page 23
Documentation CD contains documentation for the blade server in PDF and includes the IBM Documentation Browser to help you find Windows XP or Red Hat Linux® v 100 MHz microprocessor v 32 MB of RAM v Adobe® Acrobat Reader 3.0 (or later) or xpdf, which comes with Linux operating systems Note: Acrobat - IBM QS21 | User Guide - Page 24
of your CD drive, then click OK. - If you are using a Linux operating system, insert the CD into your CD drive; then, run the runlinux.sh The Available Topics list displays all the books for the blade server. Some books might be in folders. A plus sign (+) indicates QS21 Installation and User's Guide - IBM QS21 | User Guide - Page 25
, and what the controls and indicators mean. This chapter also identifies the system board connectors. Turning on the blade server The BladeCenter QS21 is hot-swappable and can be inserted into the BladeCenter unit when the unit is already powered up. However, it can only be powered on by one of the - IBM QS21 | User Guide - Page 26
to requests from the service processor, including remote requests to turn the blade server on. To remove all power from the blade server, you must physically remove it from the BladeCenter unit or power off the BladeCenter unit. To avoid loss of data, shut down the Linux operating system before you - IBM QS21 | User Guide - Page 27
LEDs This section describes the controls and LEDs on the front panel of the blade server. For further information about the LEDs and how they can be used to assist in troubleshooting, see Problem Determination and Service Guide. Location LED Activity LED Information Media-tray LED select button - IBM QS21 | User Guide - Page 28
condition. Complete information about the LEDs can be found in the Problem Determination and Service Guide. To find out what if any errors have occurred on the system board, you must: 1. Remove the blade server from the BladeCenter unit 2. Open the cover 3. Press the light path diagnostics switch - IBM QS21 | User Guide - Page 29
options. Connector at J200 Connector at J201 Connector at J22 Connector at JFC_18 Figure 6. Locations of the expansion option connectors on the system board Chapter 2. Blade server power, controls, and indicators 13 - IBM QS21 | User Guide - Page 30
14 QS21 Installation and User's Guide - IBM QS21 | User Guide - Page 31
19 and the BladeCenter QS21 Problem Determination and Service Guide for further information, then continue with the instructions in this chapter. Installation guidelines The BladeCenter QS21 is a hot-swappable device: you can install or remove the blade server while the BladeCenter unit is running - IBM QS21 | User Guide - Page 32
information, see Chapter 6, "Installing the operating system," on page 53. 11. Check http://www.ibm.com/support/us/en/ for any software or firmware updates. 12. Update the firmware or software if required. Note: You may be required to reboot the blade server. 16 QS21 Installation and User's Guide - IBM QS21 | User Guide - Page 33
the operating system and performed any required updates, the blade server is ready for use. If you have not already done so, turn on the blade server by pressing the power-control button on the blade server control panel. The power on LED on the blade server changes from the slowly-flashing - IBM QS21 | User Guide - Page 34
18 QS21 Installation and User's Guide - IBM QS21 | User Guide - Page 35
or install the component while the blade server or BladeCenter unit is running providing the blade server or BladeCenter unit and operating system support the hot-swappable capability. Orange can also indicate touch points on hot-swappable components. See the instructions for removing or installing - IBM QS21 | User Guide - Page 36
the device on the blade server cover or on a metal surface. v Take additional care when handling devices during cold weather. Heating reduces indoor humidity and increases static electricity. v Wear an electrostatic-discharge wrist strap, if one is available. 20 QS21 Installation and User's Guide - IBM QS21 | User Guide - Page 37
are established according to bay number. If you reinstall the blade server into a different bay, you might have to reconfigure the blade server. Removing the blade server The blade server is a hot-swappable device, and the blade bays in the BladeCenter unit are hot-swappable bays. Therefore, you can - IBM QS21 | User Guide - Page 38
cover before installing the blade server. Removing the BladeCenter PCI Express I/O Expansion Unit You must remove BladeCenter PCI Express I/O Expansion Unit, if installed, to access, install or remove any of the replaceable items except the front bezel assembly. 22 QS21 Installation and User's Guide - IBM QS21 | User Guide - Page 39
BladeCenter PCI Express I/O Expansion Unit: 1. Read the safety information beginning on page vii and "Installation guidelines" on page 19. 2. Carefully place the blade server (CFFh) you must install Red Hat Enterprise Linux 5.2 or higher. Chapter 4. Installing and removing replaceable units 23 - IBM QS21 | User Guide - Page 40
the following steps to install the InfiniBand card: 1. Shut down the BladeCenter QS21. 2. Remove the BladeCenter QS21 from BladeCenter unit. 3. Remove the top cover. 4. Locate the high-speed connector Locate the connector and ball socket on the InfiniBand card. 24 QS21 Installation and User's Guide - IBM QS21 | User Guide - Page 41
clip has locked into position. 11. If you do not want to install any other options, replace the cover and insert the BladeCenter QS21 into the BladeCenter unit. Attention: The connectors on the system board and the InfiniBand card are not designed for repeated removal or replacement of components - IBM QS21 | User Guide - Page 42
must use slots JDIM00 and JDIM11. The BladeCenter QS21 supports VLP DDR2 512 MB DIMMs only. Note: The DIMMs are used as memory for the I/O buffers only. You cannot increase the size of system memory which is fixed at 1GB for each Cell/B.E. processor. To install extra I/O buffer memory, complete the - IBM QS21 | User Guide - Page 43
There are four DIMM slots, two for each Cell/B.E. companion chip. If this is the first any DIMMs from the blade server as they are an important part of the blade server cooling system. 6. Place the BladeCenter QS21 into the BladeCenter unit. Installing the SAS expansion card The BladeCenter QS21 does - IBM QS21 | User Guide - Page 44
the following steps to install the SAS expansion card: 1. Shut down the BladeCenter QS21. 2. Remove the BladeCenter QS21 from the BladeCenter unit. 3. Open the top cover. 4. Locate the two SAS expansion on the system board with the connector on the SAS card. 28 QS21 Installation and User's Guide 1 - IBM QS21 | User Guide - Page 45
want to install any other options, replace the cover and insert the BladeCenter QS21 into the BladeCenter unit. Installing the BladeCenter PCI Express I/O Expansion Unit Important: v A BladeCenter QS21 with the BladeCenter PCI Express I/O Expansion Unit installed takes up two contiguous slots in the - IBM QS21 | User Guide - Page 46
BladeCenter PCI Express I/O Expansion Unit: 1. Read the safety information beginning on page vii and "Installation guidelines" on page 19. 2. Remove the blade server cover and set it aside. See "Opening and removing the blade server cover pins at the rear of the blade server, as shown in Figure 22 on - IBM QS21 | User Guide - Page 47
bezel assembly away from the blade server. 5. Store the front bezel assembly in a safe place. Replacing the battery IBM has designed this product with battery, you must adhere to the following instructions. Note: In the U. S., call 1-800-IBM-4333 for information about battery disposal. If you - IBM QS21 | User Guide - Page 48
BladeCenter unit" on page 21 for information). 5. Carefully place the blade server on a flat, static-protective surface. 6. Open the blade server cover (see "Opening and removing the blade server cover" on page 22 for instructions). 7. Locate the battery (connector BH1) on the system board. 32 QS21 - IBM QS21 | User Guide - Page 49
source. Always replace the blade cover before installing the blade server. 11. Reinstall the blade server into the BladeCenter unit. See Chapter 3, "Installing the blade server," on page 15 for further information. 12. Turn on the blade server (see "Turning on the blade server" on page 9). 13. Reset - IBM QS21 | User Guide - Page 50
on the BladeCenter unit, wait until the power on LED on the blade server flashes slowly before powering on the blade server. Installing the front bezel assembly The following illustration shows how to reinstall the front bezel assembly on the blade server. 34 QS21 Installation and User's Guide - IBM QS21 | User Guide - Page 51
19. 2. Connect the control panel cable to the control panel connector on the system board assembly. 3. Carefully slide the front bezel assembly onto the blade server, as shown in Figure 25, until it clicks into place. Note: Make sure that you do not pinch any cables when you reinstall the front - IBM QS21 | User Guide - Page 52
into place. Input/output connectors and devices The BladeCenter unit contains the input/output connectors that are available to the blade server. See the documentation that comes with the BladeCenter unit for information about the input/output connectors. 36 QS21 Installation and User's Guide - IBM QS21 | User Guide - Page 53
blade server This chapter describes how to: v Communicate with a newly-installed blade server. v Use System Management Services (SMS) to view and update the system firmware with the blade server The operating system does not have to be booted before you can communicate with the BladeCenter QS21. You - IBM QS21 | User Guide - Page 54
can issue commands to control the power and configuration of the blade server and other components in the BladeCenter unit. For information and instructions, see the IBM BladeCenter Management Module Command-Line Interface Reference Guide. Using Serial over LAN To establish a Serial over LAN (SOL - IBM QS21 | User Guide - Page 55
firmware progress. v Access the Linux terminal in order to configure Linux. You can connect a PC serially through the BladeCenter stop bit v No flow control By default, the blade server sends output over SOL and to the serial port on the BladeCenter unit. However, the default for input is to use - IBM QS21 | User Guide - Page 56
on each blade server contains details about the machine type or model, serial number and the universal unique ID. Complete the following steps to see this information: 1. Start SMS by completing the above steps. The SMS menu appears: PowerPC Firmware Version HEAD SLOF-SMS 1.6 (c) Copyright IBM Corp - IBM QS21 | User Guide - Page 57
same versioning scheme. IBM provides two basic update options for updating or ″flashing″ the firmware: online and offline. The offline method requires you to use an alternate bootable media to restart the server and perform the firmware update. For greater Chapter 5. Configuring the blade server 41 - IBM QS21 | User Guide - Page 58
be downloaded from http://www.ibm.com/support/us/en/. Note: To avoid problems and to maintain proper system performance, always make sure that both the BMC firmware and the system firmware are at the same level for all BladeCenter QS21 servers within the BladeCenter unit. Updating steps Complete the - IBM QS21 | User Guide - Page 59
If the two match, then the blade server has the latest firmware. If not, download the firmware package from the IBM Support Web site. See "Updating the BMC firmware" or the IBM Support Web site for installation instructions. You can also view the firmware level from within the operating system by - IBM QS21 | User Guide - Page 60
firmware from the Linux command prompt: 1. Check the README that comes with the BMC firmware as it contains specific information about that particular firmware release. 2. Boot the blade server and the operating system. 3. Download the package from the IBM support site at http://www.ibm.com/support - IBM QS21 | User Guide - Page 61
5. Choose the blade server you want to update (target) and browse to the firmware image file. 6. Click on Update. 7. The validity of the image is checked, then the following screen appears: Chapter 5. Configuring the blade server 45 - IBM QS21 | User Guide - Page 62
the other sections of the manual Chapter 7, "Solving problems," on page 59 for further information about troubleshooting the BladeCenter QS21 blade server. You can update the system firmware: v Through IBM Director. See the IBM Director documentation on the IBM Director CD for further information - IBM QS21 | User Guide - Page 63
on the IBM Director CD. Note: The blade server must be configured and have a running Linux operating system before the package can be extracted or installed. The update package consists of 4 files: v A file containing the change history for the BladeCenter QS21 system firmware. This has - IBM QS21 | User Guide - Page 64
the update has succeeded. See "Determining current blade server firmware levels" on page 42 for instructions. Installing the firmware manually If you cannot update the firmware using the update_flash script, it is possible to update the firmware manually. You can use rtas_flash over /proc. Complete - IBM QS21 | User Guide - Page 65
the system firmware images" for instructions. Updating the system firmware images Once the system firmware is updated, the BladeCenter QS21 boots from the new firmware. However, there are always two copies of the system firmware image on the blade server: TEMP This is the firmware image normally - IBM QS21 | User Guide - Page 66
is enabled and the operating system that is installed. See "Blade server Ethernet controller enumeration" on page 52 for information about how to the Ethernet controller firmware To update the Ethernet controller firmware, you must download an update package from http://www.ibm.com/support/us/en/. - IBM QS21 | User Guide - Page 67
supported on BladeCenter QS21. The -u option performs an unattended and automatic update of the firmware. The blade server reboots automatically as part of the update process. Firmware -2.0.3-ppc]# ./ brcm_fw_nic_2.0.3-e-1_rhel5_cell.sh -u IBM Ethernet Firmware Update Tool, Version 1.0.2 Warning. No - IBM QS21 | User Guide - Page 68
blade server you can verify which controller port on an expansion card is routed to which I/O bay by performing IBM BladeCenter Planning and Installation Guide or the Installation and User's Guide for your BladeCenter unit. You can find this documentation at http://www.ibm.com/support/us/en/. 52 QS21 - IBM QS21 | User Guide - Page 69
at http://www.redhat.com/. For additional instructions specific to your blade server, check for QS21 documentation on the BladeCenter support Web site at http://www.ibm.com/ systems/bladecenter/support/. If you need to install Linux on numerous blade servers, consider using DIM (Distributed Image - IBM QS21 | User Guide - Page 70
Guide. Note: Be aware that your BladeCenter QS21 has two Ethernet controllers and can be connected to two Ethernet switches. As the blade center performs a network boot from the controller that acquires the IP address, first make sure that your Linux configuration supports this. If your Linux - IBM QS21 | User Guide - Page 71
BladeCenter QS21 SAS fabric Management station Figure 28. DS3200 setup for BladeCenter QS21 The SAS expansion card is attached to the PCI-X connector of the blade server drive as a boot device by performing the following steps from an SMS session with your blade server: a. Select Change SAS Boot - IBM QS21 | User Guide - Page 72
see IBM BladeCenter Management Module User's Guide. Post installation configuration After you install the operating system on the blade server, you must install any service packs or update packages that come with the operating system. For additional information, see http://www.ibm.com/support/us - IBM QS21 | User Guide - Page 73
for information about installing any required device drivers. If your operating system does not have the required device drivers, contact your IBM marketing representative or authorized reseller, or see your operating system documentation for additional information. If you want to use the Wake - IBM QS21 | User Guide - Page 74
58 QS21 Installation and User's Guide - IBM QS21 | User Guide - Page 75
This chapter provides basic troubleshooting information to help you solve some common problems that might occur while setting up your blade server. A problem with the BladeCenter QS21 can relate either to the BladeCenter QS21 or the BladeCenter unit. A problem with the blade server exists if the - IBM QS21 | User Guide - Page 76
problem in the troubleshooting charts, or if carrying out the suggested steps do not solve the problem, have the blade server serviced. If you have problems with an adapter, monitor, keyboard, mouse, or power module, see the Problem Determination and Service Guide that comes with your BladeCenter - IBM QS21 | User Guide - Page 77
further information about troubleshooting networks, see "Network connection problems" on page 62. Power-on LED Flashing rapidly The service processor on the blade server is communicating with the BladeCenter Management Module. No action required Flashing slowly The blade server has power but - IBM QS21 | User Guide - Page 78
the IBM BladeCenter documentation, go to http://www.ibm.com/support/us/en/. If the problem remains, see QS21 Problem Determination and Service Guide. If all the blades cannot communicate with the network, check the network itself for problems. Service processor problems Service processor symptom - IBM QS21 | User Guide - Page 79
the blade server does not restart, you must replace the system board assembly. Contact a service support representative for assistance. Recovering the TEMP image from the PERM image To recover the TEMP image from the PERM image, you must copy the PERM image into the TEMP image. To perform the copy - IBM QS21 | User Guide - Page 80
firmware to continue the startup process. Check the error codes in theQS21 Problem Determination and Service Guide. If these do not help resolve the problem, contact a service support Problem Determination and Service Guide for your blade server for further information. 64 QS21 Installation and User - IBM QS21 | User Guide - Page 81
System Management Services (SMS) utility to perform a variety of configuration tasks on the BladeCenter QS21 blade server. Starting the SMS utility Start the SMS utility to configure the blade server. 1. Establish an SOL session with the blade server. See the BladeCenter Management Module Command - IBM QS21 | User Guide - Page 82
the SCSI controllers that are attached to the blade server. Select Console Select this choice to select to the following appears: PowerPC Firmware Version HEAD SLOF-SMS 1.6 (c) Copyright IBM Corp. 2000,2005,2007 All only. By default the BladeCenter QS21 uses DHCP, in which case no changes should be made - IBM QS21 | User Guide - Page 83
screen similar to the following appears: PowerPC Firmware Version HEAD SLOF-SMS 1.6 (c) Copyright IBM Corp. 2000,2005,2007 All rights reserved Menu ESC key = return to previous screen X = eXit System Management Services Type menu item number and press Enter or select Navigation key : Type - IBM QS21 | User Guide - Page 84
Firmware Version HEAD SLOF-SMS 1.6 (c) Copyright IBM Corp. 2000,2005,2007 All rights reserved. IP Parameters NET /axon@10000000000/plb5/plb4/pcix@4000004600000000/ethernet@1 1. Client IP Address [000.000.000.000] 2. Server Management Services Type QS21 Installation and User's Guide - IBM QS21 | User Guide - Page 85
specific block size or filename. PowerPC Firmware Version HEAD SLOF-SMS 1.6 (c) Copyright IBM Corp. 2000,2005,2007 All rights reserved Management Services Type menu item number and press Enter or select Navigation key : Change SCSI Settings At present the BladeCenter QS21 does not support SCSI - IBM QS21 | User Guide - Page 86
device order. If you wish to install or boot from the BladeCenter unit media tray, you must first allocate it to the blade server using the Advanced Management Module. PowerPC Firmware Version HEAD SLOF-SMS 1.6 (c) Copyright IBM Corp. 2000,2005,2007 All rights reserved. Multiboot 1. Select Install - IBM QS21 | User Guide - Page 87
Management Services Type BladeCenter media tray in the list, first been allocate it to the blade server using Advanced Management Module. To select boot device order, type 2 and press Enter. A screen similar to the following appears: PowerPC Firmware Version HEAD SLOF-SMS 1.6 (c) Copyright IBM - IBM QS21 | User Guide - Page 88
Boot Side Options Normally the BladeCenter QS21 boots from the Temporary side and you should not change this. However, there may be occasions, for example boot failure, where you must change the setting. PowerPC Firmware Version HEAD SLOF-SMS 1.6 (c) Copyright IBM Corp. 2000,2005,2007 All rights - IBM QS21 | User Guide - Page 89
Services Type menu item number and press Enter or select Navigation key : The screen below shows an example of a successful previous boot: PowerPC Firmware Version HEAD SLOF-SMS 1.6 (c) Copyright IBM menu. FRU information The VPD on each blade server contains details about the machine type or - IBM QS21 | User Guide - Page 90
Firmware Version HEAD SLOF-SMS 1.6 (c) Copyright IBM Services Select Navigation key : Adding FRU information When you replace a FRU details are not recorded in the VPD. You must enter them manually through SMS. When the system firmware password. 3. Power cycle the blade and start an SOL console - IBM QS21 | User Guide - Page 91
) Enter Type Model Number : Type the model number according to the instructions on the screen and press Enter to continue. 5. You must confirm the model number: PowerPC Firmware Version HEAD SLOF-SMS 1.6 (c) Copyright IBM Corp. 2000,2005,2007 All rights reserved. Number entered is: 1234567 Accept - IBM QS21 | User Guide - Page 92
now confirm the serial number: PowerPC Firmware Version HEAD SLOF-SMS 1.6 (c) Copyright IBM Corp. 2000,2005,2007 All rights IBM BladeCenter Boot Disk System. Note: You must use this option when configuring an IBM BladeCenter Boot Disk System for the first time. 76 QS21 Installation and User's Guide - IBM QS21 | User Guide - Page 93
return to previous screen X = eXit System Management Services Type SAS Address in hexadecimal and press Enter or select navigation key: The SAS address can be obtained from the Storage System Profile utility. See the documentation that comes with your IBM BladeCenter Boot Disk System for more - IBM QS21 | User Guide - Page 94
press Enter or select navigation key: The LUN Id can be obtained from the Storage System Profile utility. See the documentation that comes with your IBM BladeCenter Boot Disk System for more information about the Storage System Profile utility. 78 QS21 Installation and User's Guide - IBM QS21 | User Guide - Page 95
. Information about diagnostic tools is in the Hardware Maintenance Manual and Troubleshooting Guide or Problem Determination and Service Guide on the IBM Documentation CD that comes with your system. v Go to http://www.ibm.com/systems/bladecenter/support/ to check for information to help you solve - IBM QS21 | User Guide - Page 96
, and software problems with BladeCenter products. For information about which products are supported by Support Line in your country or region, see http://www.ibm.com/services/sl/products/. For more information about Support Line and other IBM services, see http://www.ibm.com/services/us/, or - IBM QS21 | User Guide - Page 97
right may be used instead. However, it is the user's responsibility to evaluate and verify the operation of any non-IBM product, program, or service. IBM may have patents or pending patent applications covering subject matter described in this document. The furnishing of this document does not - IBM QS21 | User Guide - Page 98
fitness for a particular purpose. These products are offered and warranted solely by third parties. IBM makes no representations or warranties with respect to non-IBM products. Support (if any) for the non-IBM products is provided by the third party, not IBM. 82 QS21 Installation and User's Guide - IBM QS21 | User Guide - Page 99
offers a variety of product return programs and services in several countries to assist equipment owners in recycling their IT products. Information on IBM product recycling offerings can be found on IBM's Internet site at http://www.ibm.com/ibm/ environment/products/index.shtml. Esta unidad debe - IBM QS21 | User Guide - Page 100
IBM representative. Battery return program This product may contain a sealed lead acid, nickel cadmium, nickel metal hydride, lithium, or lithium ion battery. Consult your user manual or service manual , but rather reclaimed upon end of life per this Directive. 84 QS21 Installation and User's Guide - IBM QS21 | User Guide - Page 101
energy and, if not installed and used in accordance with the instruction manual, may cause harmful interference to radio communications. Operation of this and connectors must be used in order to meet FCC emission limits. IBM is not responsible for any radio or television interference caused by using - IBM QS21 | User Guide - Page 102
, wenn das Produkt ohne Zustimmung der IBM verändert bzw. wenn Erweiterungskomponenten von Fremdherstellern ohne Empfehlung der IBM gesteckt/eingebaut werden. EN 55022 Klasse Übereinstimmung mit dem Deutschen EMVG das EG-Konformitätszeichen - CE - zu führen. 86 QS21 Installation and User's Guide - IBM QS21 | User Guide - Page 103
responsibility for any failure to satisfy the protection requirements resulting from a nonrecommended modification of the product, including the fitting of non-IBM option cards. This product has been tested and found to comply with the limits for Class A Information Technology Equipment according to - IBM QS21 | User Guide - Page 104
Japanese Voluntary Control Council for Interference (VCCI) statement Korean Class A warning statement 88 QS21 Installation and User's Guide - IBM QS21 | User Guide - Page 105
BladeCenter unit 21 blade server communication 37 BladeCenter QS21 registration 5 BMC firmware 41 updating 43 viewing level 42 boot device network 53 preparation 53 SAS 54 boot support 13 system board 13 controller enumeration 52 © Copyright IBM Corp. 2006, 2008 controller (continued) Ethernet 49 - IBM QS21 | User Guide - Page 106
59 prerequisites 59 troubleshooting charts 60 problems power 61 service processor 62 solving 59 product recycling and disposal 83 publications 6 R RAS features 4 recovering system firmware code 63 TEMP image from PERM image 63 recycling and disposal, product 83 registration BladeCenter QS21 5 reject - IBM QS21 | User Guide - Page 107
82 troubleshooting overview 59 turning off the blade server 10 turning on the blade server 9 U United States electronic emission Class A notice 85 United States FCC Class A notice 85 update_flash 46 -c option 49 updates firmware 5 software 5 W Wake on LAN 9 Web site BladeCenter documentation - IBM QS21 | User Guide - Page 108
92 QS21 Installation and User's Guide - IBM QS21 | User Guide - Page 109
- IBM QS21 | User Guide - Page 110
Part Number: 40M2416 Printed in USA (1P) P/N: 40M2416
-
 1
1 -
 2
2 -
 3
3 -
 4
4 -
 5
5 -
 6
6 -
 7
7 -
8
-
9
-
10
-
11
-
12
-
13
-
14
-
15
-
16
-
17
-
18
-
19
-
20
-
21
-
22
-
23
-
24
-
25
-
26
-
27
-
28
-
29
-
30
-
31
-
32
-
33
-
34
-
35
-
36
-
37
-
38
-
39
-
40
-
41
-
42
-
43
-
44
-
45
-
46
-
47
-
48
-
49
-
50
-
51
-
52
-
53
-
54
-
55
-
56
-
57
-
58
-
59
-
60
-
61
-
62
-
63
-
64
-
65
-
66
-
67
-
68
-
69
-
70
-
71
-
72
-
73
-
74
-
75
-
76
-
77
-
78
-
79
-
80
-
81
-
82
-
83
-
84
-
85
-
86
-
87
-
88
-
89
-
90
-
91
-
92
-
93
-
94
-
95
-
96
-
97
-
98
-
99
-
100
-
101
-
102
-
103
-
104
-
105
-
106
-
107
-
108
-
109
-
110
 |
 |
Welcome.
Thank you for buying an
IBM blade server.
For more information about your
BladeCenter components and
features, you can view the
publications on the
Your blade
server features superior
performance, availability,
and scalability.
This
contains information for setting up,
configuring, and using your
blade server.
Additionally, a service information
label is attached to each BladeCenter
unit and blade server. This label
provides a graphical summary of
many of the installation and service
activities that are associated with
each device.
CD or download them from the
IBM Support Web site.
Go to
Installation and User’s Guide
Documentation
Installation and
User’s Guide
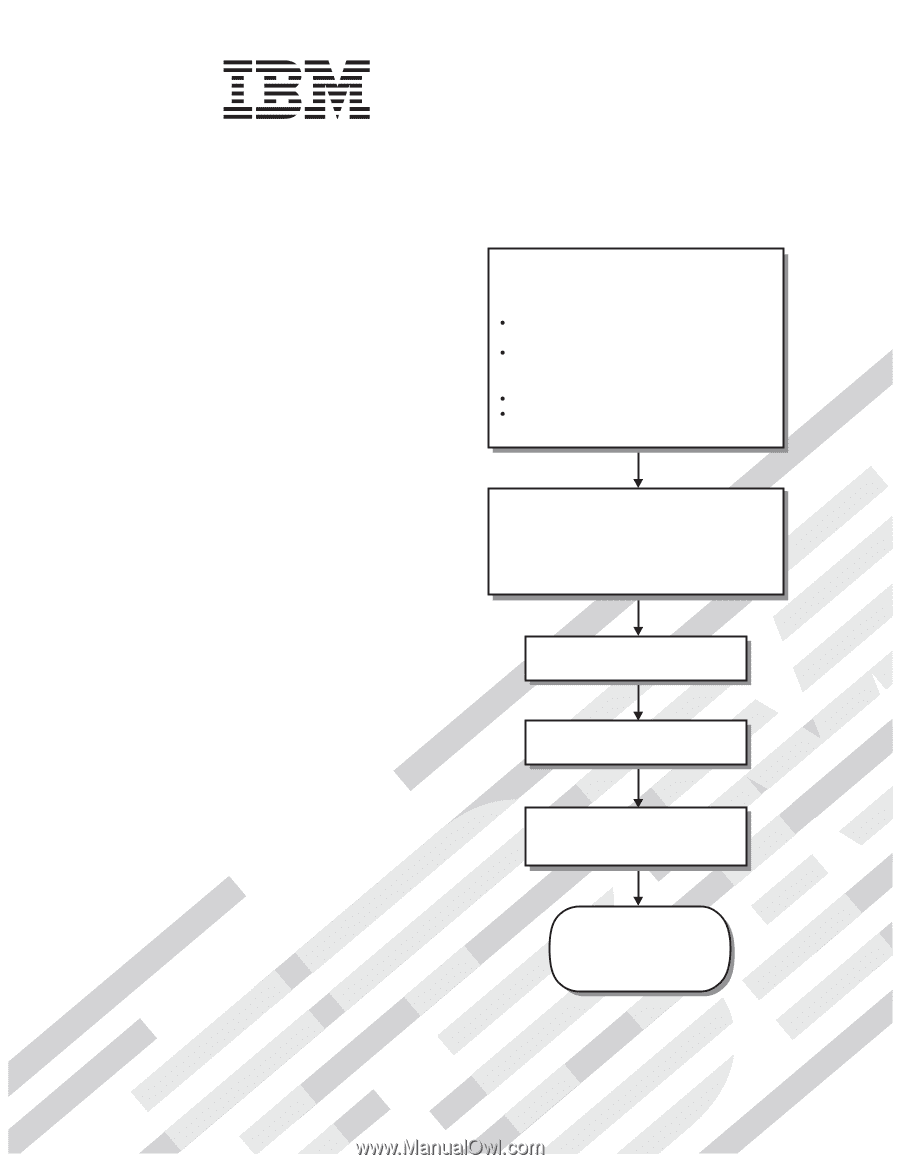
The blade server is now
ready to use. Be sure to
register and profile your
blade server on the
IBM Support Web site.
Before installing the BladeCenter QS21
in a BladeCenter unit, complete the
following procedures:
Install and configure the rack according
to the documentation that came with the rack.
Install the BladeCenter unit into the rack and
configure it, according to the documentation
that comes with the BladeCenter unit.
Supply input power to the BladeCenter unit.
Install the latest firmware in all BladeCenter
components.
Before you install the blade server into the
BladeCenter unit, install optional components
such as memory modules and expansion cards
in the blade server.
Install the blade server in the BladeCenter unit.
See Chapter 4 for more information.
BladeCenter QS21 Type 0792
Install the operating system.
See Chapter 6 for more information.
Install additional applications
according to the instructions that
come with the applications.
Configure the blade server.
See Chapter 5 for more information.