Insignia NL19W2QP-10A User Manual (English) - Page 31
Adjusting time settings, Setting the clock
 |
UPC - 600603122286
View all Insignia NL19W2QP-10A manuals
Add to My Manuals
Save this manual to your list of manuals |
Page 31 highlights
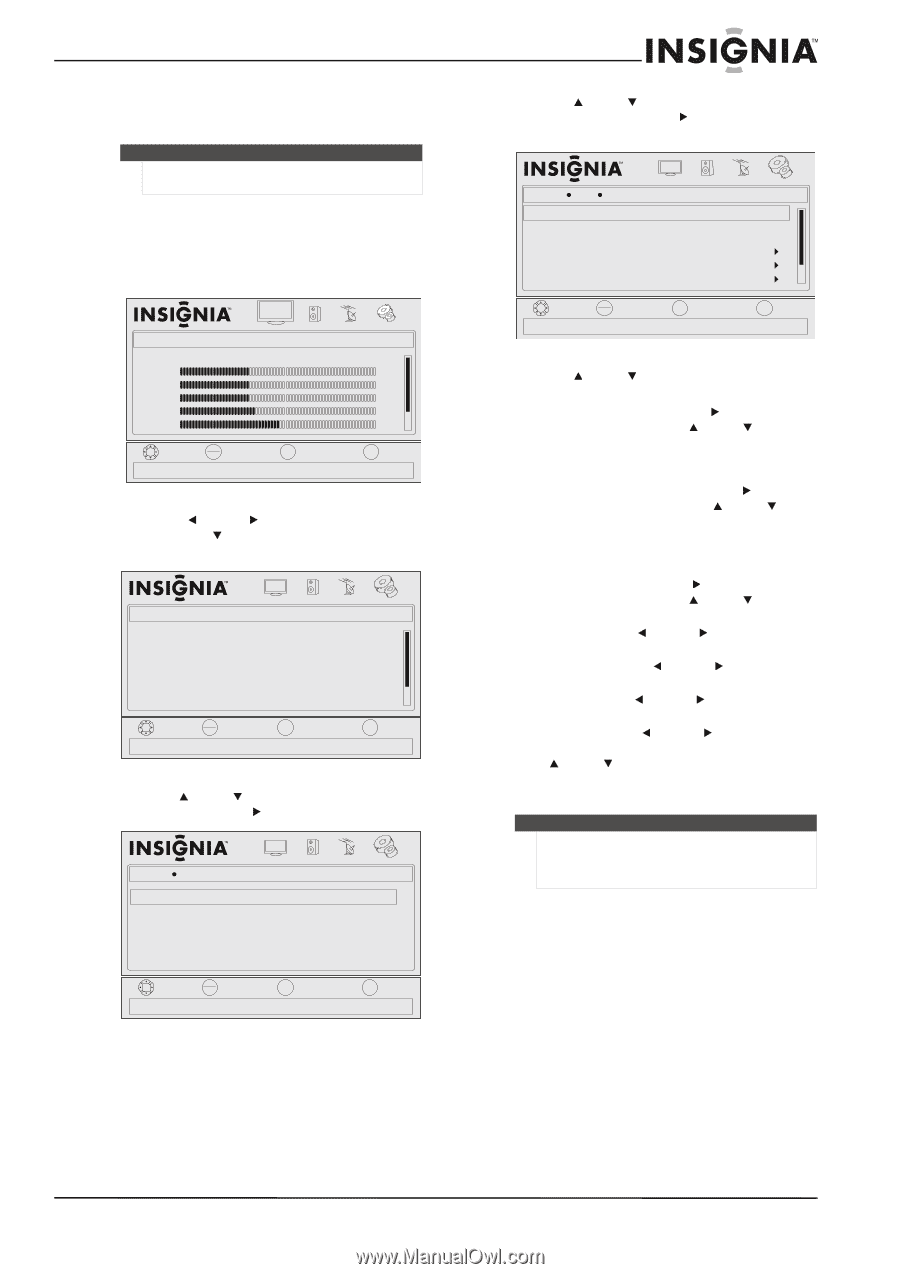
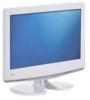
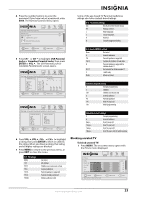
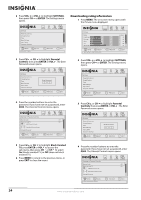
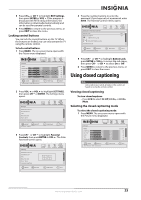
Adjusting time settings Note Unless otherwise noted, all tasks in this section are based on using the remote control. Setting the clock To set the clock: 1 Press MENU. The on-screen menu opens with the Picture menu displayed. Picture Mode Brightness Contrast Color Tint Sharpness PICTURE AUDIO CHANNELS SETTINGS Custom 40 40 40 R5 +5 MOVE OK ENTER SELECT Adjust settings t o affect picture quality MENU PREVIOUS EXIT EXIT 2 Press VOL or VOL to highlight SETTINGS, then press CH or ENTER. The Settings menu opens. Settings Parental Controls Closed Caption Time Menu Settings Input Labels Computer Settings PICTURE AUDIO CHANNELS SETTINGS MOVE OK ENTER SELECT Set various TV options MENU PREVIOUS EXIT EXIT 3 Press CH or CH to highlight Time, then press ENTER or VOL . The Time menu opens. Settings Time Dat e/Ti m e Sleep Timer PICTURE AUDIO CHANNELS SETTINGS Off MOVE OK ENTER SELECT MENU PREVIOUS Adjust the date and time to get the correct program times EXIT EXIT 4 Press CH or CH to highlight Date/Time, then press ENTER or VOL to open the Date/Time screen. Settings Time PICTURE Date/Time Mode Time Zone Daylight Savings Year Month Day AUDIO CHANNELS SETTINGS Custom Pacific Off 2008 May 22 MOVE OK ENTER SELECT MENU PREVIOUS If Automatic, options are automatically set by TV source EXIT EXIT 5 Press CH or CH to highlight the option. You can select: • Mode-Press ENTER or VOL to access the sub-menu, then press CH or CH to select Custom or Auto. To set the time manually, select Custom. If you select Auto, the time is set automatically and cannot be adjusted. • Time Zone-Press ENTER or VOL to access the sub-menu, then press CH or CH to select your time zone. You can select Eastern, Central, Mountain, Pacific, Alaska, Hawaii, Atlantic, or Newfoundland. • Daylight Savings-To set daylight savings time, press ENTER or VOL to access the sub-menu, then press CH or CH to select On or Off. • Year-Press VOL or VOL to select the correct year. • Month-Press VOL or VOL to select the correct month. • Day-Press VOL or VOL to select the correct day. • Hour-Press VOL or VOL to select the hour, minute, and AM/PM option, then press CH or CH to to set the option. 6 Press MENU to go to the previous menu, or press EXIT to close the menu. Note If Mode is set to Auto, the date and time are set based on a time signal received from a DTV channel, and the only options you can adjust are Time Zone and Daylight Savings. www.insigniaproducts.com 27
-
 1
1 -
2
-
3
-
4
-
5
-
6
-
7
-
8
-
9
-
10
-
11
-
12
-
13
-
14
-
15
-
16
-
17
-
18
-
19
-
20
-
21
-
22
-
23
-
24
-
25
-
 26
26 -
 27
27 -
 28
28 -
 29
29 -
 30
30 -
 31
31 -
 32
32 -
 33
33 -
 34
34 -
 35
35 -
 36
36 -
37
-
38
-
39
-
40
 |
 |