Insignia NS-DVDR1 User Manual (English) - Page 17
The on-screen display - unlock code
 |
View all Insignia NS-DVDR1 manuals
Add to My Manuals
Save this manual to your list of manuals |
Page 17 highlights
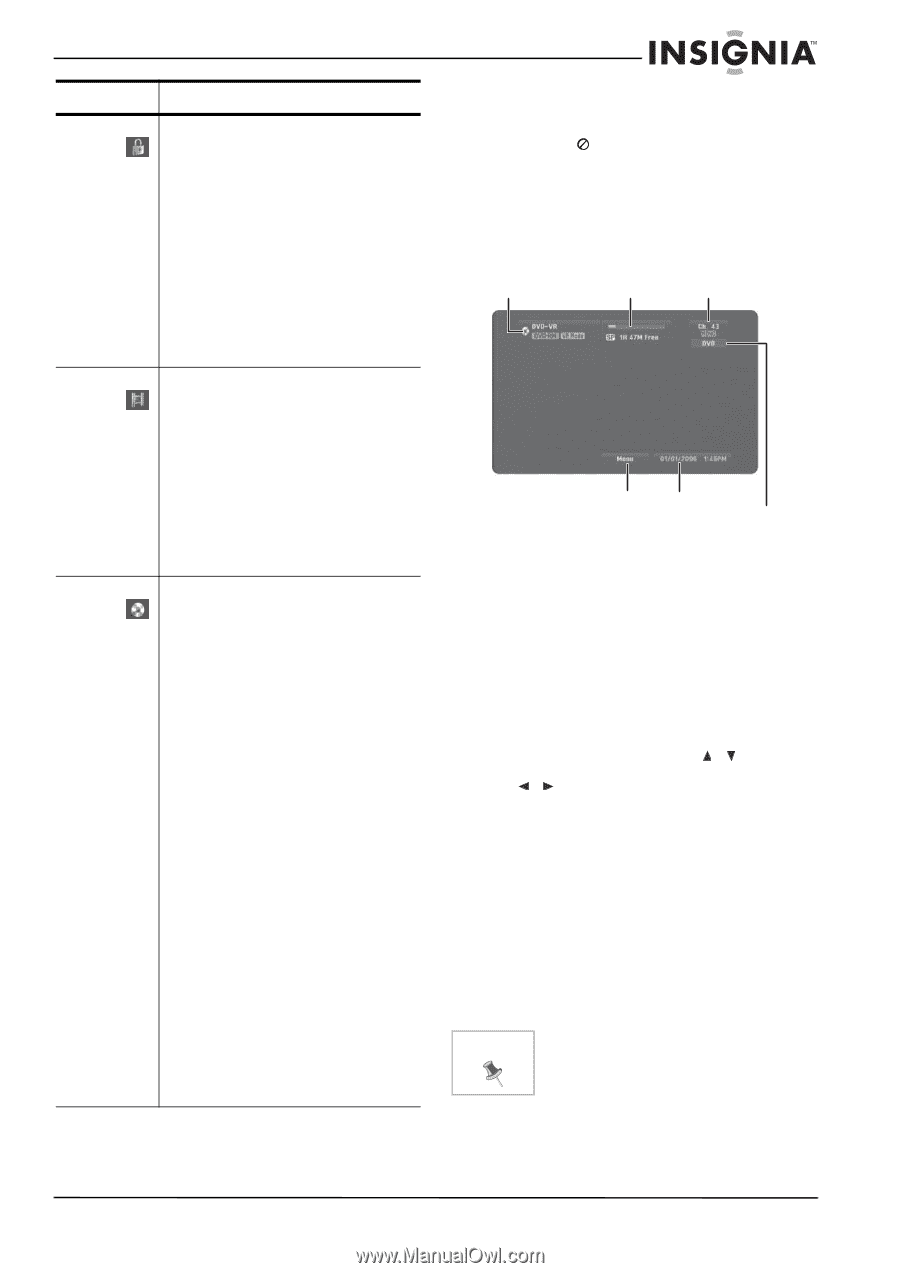
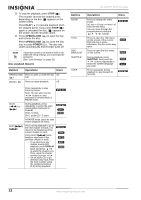
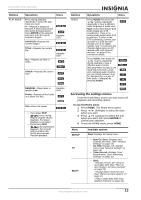
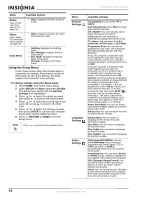
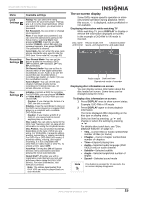
NS-DVDR1 DVD Recorder Menu Lock Settings Recording Settings Disc Settings Available settings Rating-You can select the rating restrictions for your DVD player. Ratings are 1-8 (1 is the most restrictive). When you select this option, you must enter a password. Set Password-You can enter or change your password. Note: If you forget your password, you can clear the password by going to the Setup menu, selecting Start, then pressing ENTER. Input the six-digit number (210449), select OK when the message appears, then press ENTER. The password is cleared. Area Code-You can enter the area code whose standards were used to rate the DVD (see "Area code list" on page 30). Disc Record Mode-You can set the picture quality for recording a DVD. (XP=excellent, SP=standard, LP= low, EP=extended.) DV Record Audio-You can set this to choose which of two digital camcorder soundtracks to use. Audio 1 (to use the sound that was recorded when a recording was made), or Audio 2 (to use the overdubbed sound). Auto Chapter-You can set the auto chapter markings (made during recording) to 5 minute intervals, 10 minute intervals, or None. Initialize-Formats a DVD for recording. For DVD-RWs, you can choose VR Mode or Video Mode. For DVD+RWs you can choose OK. Caution: If you change the format of a DVD, the disc is erased. Finalize-Fixes the recordings in place so the DVD can be played on a regular DVD player or a computer with a suitable DVD-ROM drive. Caution: If you finalize a DVD-R or DVD+R, you cannot edit or record anything else on the disc. Disc Label-You can enter a name for the DVD. See "Naming a title" on page 26 for information on using the Keyboard menu. Disc Protect-You can protect recordings, depending on the type of DVD you are using. For DVD+RWs, it prevents editing, erasing, overwriting, or regular recording. For DVD+Rs or DVD-RWs (VR mode), it prevents editing, erasing, and regular recording. It is not compatible with DVD-RWs in Video mode or DVD-Rs. To unlock a DVD, select OFF. AutoPlay-Turning this ON will bypass the Disc menu and trailers and start playing the movie automatically. About DivX®-Provides you with a registration code that lets you rent and purchase videos using the DivX VOD service. For more information, visit www.divx.com/vod. Note: The videos downloaded from DivX VOD can only be played back on your recorder. The on-screen display Some DVDs require specific operation or allow only limited operation during playback. When this occurs, is displayed, action prohibited or not available. Displaying information while watching TV While watching TV, press DISPLAY to display or remove the information displayed on-screen. In the example a DVD-RW in VR mode is inserted. Disc name Record mode, free Channel number and format space, and elapsed time and audio input Audio output Date and time Operational mode of recorder Displaying disc information on screen You can display various information about the disc loaded on screen. Some items can be changed using the menu. To display disc information on screen: 1 Press DISPLAY once to show current status. Example: DVD-RW in VR mode 2 Press DISPLAY again to show playback information. The items displayed differ depending on the disc type or playing status. 3 Select an item by pressing / and change or select the setting by pressing /. For details about each item, see "Disc playback features" on page 12. • Title-Current title (or track) number/total number of titles (or tracks) • Chapter-Current chapter number/total number of chapters • Time-Elapsed playing time • Audio-Selected audio language (DVD VIDEO only) or audio channel • Subtitle-Selected subtitle • Angle-Selected angle/total number of angles • Sound-Selected sound mode Note If no button is pressed for 10 seconds, the on-screen display disappears. www.insignia-products.com 15
-
 1
1 -
2
-
3
-
4
-
5
-
6
-
7
-
8
-
9
-
10
-
11
-
 12
12 -
 13
13 -
 14
14 -
 15
15 -
 16
16 -
 17
17 -
 18
18 -
 19
19 -
 20
20 -
 21
21 -
 22
22 -
23
-
24
-
25
-
26
-
27
-
28
-
29
-
30
-
31
-
32
-
33
-
34
-
35
-
36
-
37
-
38
-
39
-
40
-
41
-
42
-
43
-
44
-
45
-
46
-
47
-
48
-
49
-
50
-
51
-
52
-
53
-
54
-
55
-
56
-
57
-
58
-
59
-
60
-
61
-
62
-
63
-
64
-
65
-
66
-
67
-
68
-
69
-
70
-
71
-
72
-
73
-
74
-
75
-
76
-
77
-
78
-
79
-
80
-
81
-
82
-
83
-
84
-
85
-
86
-
87
-
88
-
89
-
90
-
91
-
92
-
93
-
94
-
95
-
96
-
97
-
98
-
99
-
100
-
101
-
102
-
103
-
104
-
105
-
106
-
107
-
108
-
109
-
110
-
111
-
112
-
113
-
114
-
115
-
116
-
117
-
118
 |
 |