Intel SE7221BK1-E User Guide - Page 26
Installing or Replacing the Processor - server motherboard
 |
UPC - 735858168656
View all Intel SE7221BK1-E manuals
Add to My Manuals
Save this manual to your list of manuals |
Page 26 highlights
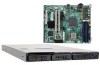
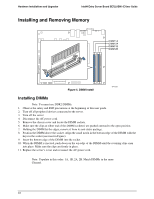
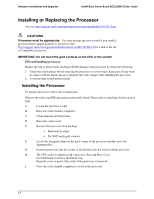
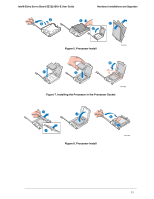
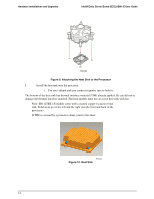
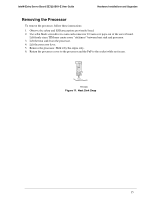
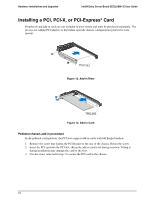
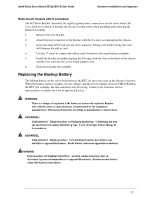
Hardware Installations and Upgrades Intel® Entry Server Board SE7221BK1-E User Guide Installing or Replacing the Processor Also see http://support.intel.com/support/processors/pentium4/sb/CS-012311.htm. CAUTIONS Processor must be appropriate: You may damage the server board if you install a processor that is inappropriate for your server. See http://support.intel.com/support/motherboards/server/SE7221BK1-E for a link to the list of compatible processors. IMPORTANT: Do not touch the gold contacts on the CPU or the socket! ESD and handling processors: Reduce the risk of electrostatic discharge (ESD) damage to the processor by doing the following: 1. Touch the metal chassis before touching the processor or server board. Keep part of your body in contact with the metal chassis to dissipate the static charge while handling the processor. 2. Avoid moving around unnecessarily. Installing the Processor To install a processor, follow these instructions: Observe the safety and ESD precautions previously listed. Please refer to matching visuals on next page. A. Locate the processor socket B. Raise the socket handle completely C. Using fingertip on back prong, D. Raise the socket cover E. Remove the processor from package i. Hold only by edges ii. Do NOT touch gold contacts F. Locate the triangular shape on the pin 1 corner of the processor and line up to the alignment key G. Insert the processor into the socket. It should drop into the socket without any force H. The CPU socket is shipped with a protective Pick and Place Cover Use both hands to remove the Plastic Cap Keep the cover to protect the socket if the processor is removed I. Close the socket handle completely to lock in the processor 12
-
 1
1 -
2
-
3
-
4
-
5
-
6
-
7
-
8
-
9
-
10
-
11
-
12
-
13
-
14
-
15
-
16
-
17
-
18
-
19
-
20
-
 21
21 -
 22
22 -
 23
23 -
 24
24 -
 25
25 -
 26
26 -
 27
27 -
 28
28 -
 29
29 -
 30
30 -
 31
31 -
32
-
33
-
34
-
35
-
36
-
37
-
38
-
39
-
40
-
41
-
42
-
43
-
44
-
45
-
46
-
47
-
48
-
49
-
50
-
51
-
52
-
53
-
54
-
55
-
56
-
57
-
58
-
59
-
60
-
61
 |
 |
