Intel SE7221BK1-E User Guide - Page 37
Creating a Bootable Diskette, Flash Update Utility - linux
 |
UPC - 735858168656
View all Intel SE7221BK1-E manuals
Add to My Manuals
Save this manual to your list of manuals |
Page 37 highlights
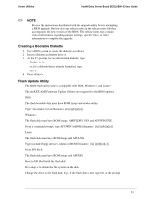
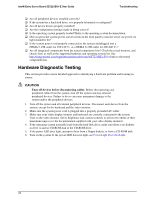
Server Utilities Intel® Entry Server Board SE7221BK1-E User Guide ✏ NOTE Review the instructions distributed with the upgrade utility before attempting a BIOS upgrade. Review also any release notes in the release notes file that accompanies the new version of the BIOS. The release notes may contain critical information regarding jumper settings, specific fixes, or other information to complete the upgrade. Creating a Bootable Diskette 1. Use a DOS system to create the diskette as follows: 2. Insert a diskette in diskette drive A. 3. At the C:\ prompt, for an unformatted diskette, type: format a:/s or, for a diskette that is already formatted, type: sys a: 4. Press . Flash Update Utility The BIOS flash utility suite is compatible with DOS, Windows*, and Linux*. The afuXXX AMI Firmware Update Utilities are required for the BIOS updates. DOS: The flash bootable disk must have ROM image and afudos utility. Type "run afudos /i [/n] [/p[b][n][c]]. Windows: The flash disk must have ROM image, AMIFLDRV.SYS and AFUWIN.EXE. From a command prompt, type AFUWIN /i [/n] [/p[b][n][c]]. Linux The flash disk must have ROM image and AFULNX. Type (include floppy device) ./afulnx /i [/n] [/p[b][n][c]]. From EFI Shell The flash disk must have ROM image and AFUEFI. Boot to EFI Shell with the flash disk. Do a map -r to obtain the file system on the disk. Change the drive to the flash disk. E.g., if the flash disk is fs0: type fs0: at the prompt. 23
-
 1
1 -
2
-
3
-
4
-
5
-
6
-
7
-
8
-
9
-
10
-
11
-
12
-
13
-
14
-
15
-
16
-
17
-
18
-
19
-
20
-
21
-
22
-
23
-
24
-
25
-
26
-
27
-
28
-
29
-
30
-
31
-
 32
32 -
 33
33 -
 34
34 -
 35
35 -
 36
36 -
 37
37 -
 38
38 -
 39
39 -
 40
40 -
 41
41 -
 42
42 -
43
-
44
-
45
-
46
-
47
-
48
-
49
-
50
-
51
-
52
-
53
-
54
-
55
-
56
-
57
-
58
-
59
-
60
-
61
 |
 |