Intel SR1690WB Service Guide - Page 38
Hard Disk Drives, Slimline Optical Drive latch, Rack-Mounted Systems
 |
UPC - 735858210980
View all Intel SR1690WB manuals
Add to My Manuals
Save this manual to your list of manuals |
Page 38 highlights
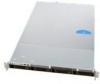
A. Front Control Panel B. Slimline Optical Drive C. Hard Drive Bays HDD0~3 D. HDD Status LED E. HDD Power LED Figure 10. Optional Peripherals Hard Disk Drives The server system ships with four hot-swap drive carriers for installing four SATA/SAS Hard disk drives, both 3.5-inch or 2.5-inch HDDs. For instructions on installing hard drives, see "Installing and Removing a Hot-swap Hard Drive" on page -35. Slimline Optical Drive latch You can use a slimline optical drive latch with an optional optical drive. One slimline optical drive latch is included with your server system; you must purchase the optical drive separately. You can only insert or remove the slimline optical drive when the system power is turned off. Drive in the optical drive bay is NOT hot-swappable. For installation instructions on installing an optical drive, see "Installing or Removing a Slimline Optical Drive" on page -38. To use one of the drives provided by Intel, use the following order codes: • SATA Slimline DVD Drive: AXXSATADVDROM • SATA Slimline DVD Rewriteable Drive: AXXSATADVDRWROM Rack-Mounted Systems Your Intel® Server System SR1690WB can be mounted into a rack. Intel provides three options to mount this server into a rack. When installing the chassis into a rack, Intel recommends you install systems from the bottom of the rack to the top. In other words, install the first system in the rack into the bottom position of the rack, the second system in the second position from the bottom, and so on. Instructions for installing your chassis into a rack are included in the rail kit. 20 Intel® Server System SR1690WB Service Guide
-
 1
1 -
2
-
3
-
4
-
5
-
6
-
7
-
8
-
9
-
10
-
11
-
12
-
13
-
14
-
15
-
16
-
17
-
18
-
19
-
20
-
21
-
22
-
23
-
24
-
25
-
26
-
27
-
28
-
29
-
30
-
31
-
32
-
 33
33 -
 34
34 -
 35
35 -
 36
36 -
 37
37 -
 38
38 -
 39
39 -
 40
40 -
 41
41 -
 42
42 -
 43
43 -
44
-
45
-
46
-
47
-
48
-
49
-
50
-
51
-
52
-
53
-
54
-
55
-
56
-
57
-
58
-
59
-
60
-
61
-
62
-
63
-
64
-
65
-
66
-
67
-
68
-
69
-
70
-
71
-
72
-
73
-
74
-
75
-
76
-
77
-
78
-
79
-
80
-
81
-
82
-
83
-
84
-
85
-
86
-
87
-
88
-
89
-
90
-
91
-
92
-
93
-
94
-
95
-
96
-
97
-
98
-
99
-
100
-
101
-
102
-
103
-
104
-
105
-
106
-
107
-
108
-
109
-
110
-
111
-
112
-
113
-
114
-
115
-
116
-
117
-
118
-
119
-
120
-
121
-
122
-
123
-
124
-
125
-
126
-
127
-
128
-
129
-
130
-
131
-
132
-
133
-
134
-
135
-
136
-
137
-
138
-
139
-
140
-
141
-
142
-
143
-
144
-
145
-
146
-
147
-
148
-
149
-
150
-
151
-
152
-
153
-
154
 |
 |
