JVC GR-D33 Instruction Manual - Page 23
Setting Print Information (DPOF Setting), To Print All Still Images (One Print For Each) - support
 |
UPC - 074101484793
View all JVC GR-D33 manuals
Add to My Manuals
Save this manual to your list of manuals |
Page 23 highlights
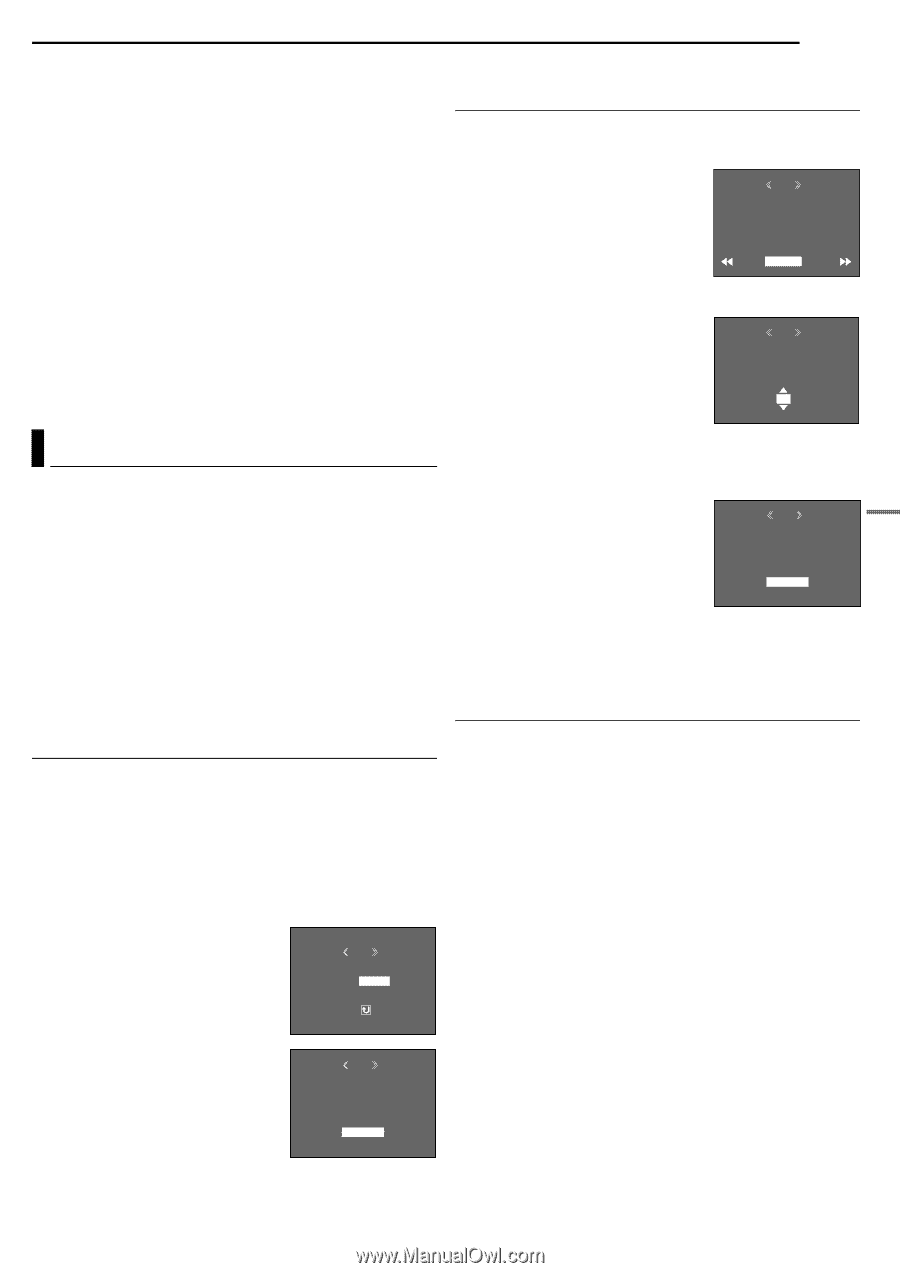
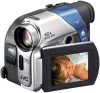
ADDITIONAL FEATURES FOR D.S.C. (GR-D93/D73 only) EN 23 To delete all files stored in the memory card 6 Rotate the MMENU/VOL. Wheel to select "ALL", and press it. The DELETE screen appears. 7 Rotate the MMENU/VOL. Wheel to select "EXECUTE", and press it. ● To cancel deletion, select "RETURN". NOTES: ● Protected files (੬ pg. 22) cannot be deleted. To delete them, remove protection first. ● Once files are deleted, they cannot be restored. Check files before deleting. CAUTION: Do not remove the memory card or perform any other operation (such as turning off the camcorder) during deletion. Also, be sure to use the provided AC Adapter, as the memory card may be corrupted if the battery becomes exhausted during deletion. If the memory card becomes corrupted, initialize it. (੬ pg. 24) Setting Print Information (DPOF Setting) This camcorder is compatible with the DPOF (Digital Print Order Format) standard in order to support future systems such as automatic printing. You can select one of the 2 print information settings for images stored in the memory card: "To Print All Still Images (One Print For Each)" or "To Print By Selecting Still Images And Number Of Prints". NOTES: ● If you load a memory card already set as shown below in a printer compatible with DPOF, it will make prints of the selected still images automatically. ● To print images recorded on a tape, first dub them to a memory card. (੬ pg. 19) To Print By Selecting Still Images And Number Of Prints 1 Perform steps 1 - 5 in "To Print All Still Images (One Print For Each)". 2 Rotate the MMENU/VOL. Wheel to select "CURRENT", and press it. DPOF The DPOF screen appears. 3 Press 3 or 5 to select the SHEETS desired file. 4 Rotate the MMENU/VOL. Wheel 00 RETURN to select the number indication (00), and press it. 5 Select the number of prints by rotating the MMENU/VOL. Wheel DPOF towards "+" to increase number, or towards "-" to decrease the number, and press it. ● Repeat steps 3 through 5 for the SHEETS 05 desired number of prints. ● The number of prints can be set up to 15. ● To correct the number of prints, select the image again and change the number. 6 Rotate the MMENU/VOL. Wheel to select "RETURN", and press it. DPOF The "SAVE?" appears. ● If you did not change any settings in step 3 through 5, the Menu Screen reappears. SAVE? EXECUTE CANCEL 7 Rotate the MMENU/VOL. Wheel to select "EXECUTE" to save the setting you have just made, and press it. ● To cancel selection, select "CANCEL". To Reset The Number Of Prints DIGITAL STILL CAMERA (D.S.C.) RECORDING & PLAYBACK (GR-D93/D73 only) To Print All Still Images (One Print For Each) 1 Load a memory card. (੬ pg. 10) 2 Set the VIDEO/MEMORY Switch to "MEMORY". 3 Set the Power Switch to "PLAY" while pressing down the Lock Button located on the switch. ● A stored file is displayed. 4 Press the MMENU/VOL. Wheel in. The Menu Screen appears. 5 Rotate the MMENU/VOL. Wheel to select "DPOF", and press it. The MENU Sub Menu appears. DPOF CURRENT 6 Rotate the MMENU/VOL. Wheel ALL 1 RESET to select "ALL 1", and press it. The RETURN DPOF screen appears. 7 Rotate the MMENU/VOL. Wheel to select "EXECUTE", and press it. DPOF The normal playback screen appears. ● To cancel selection, select "RETURN". ALL1? EXECUTE RETURN 1 Perform steps 1 - 5 in "To Print All Still Images (One Print For Each)". 2 Rotate the MMENU/VOL. Wheel to select "RESET", and press it. The DPOF screen appears. 3 Rotate the MMENU/VOL. Wheel to select "EXECUTE", and press it. The normal playback screen appears. ● To cancel selection, select "RETURN". ● The number of prints is reset to 0 for all still images. CAUTION: While performing the above, never disconnect power, as this may cause the memory card to be corrupted.
-
 1
1 -
2
-
3
-
4
-
5
-
6
-
7
-
8
-
9
-
10
-
11
-
12
-
13
-
14
-
15
-
16
-
17
-
 18
18 -
 19
19 -
 20
20 -
 21
21 -
 22
22 -
 23
23 -
 24
24 -
 25
25 -
 26
26 -
 27
27 -
 28
28 -
29
-
30
-
31
-
32
-
33
-
34
-
35
-
36
-
37
-
38
-
39
-
40
-
41
-
42
-
43
-
44
-
45
-
46
-
47
-
48
-
49
-
50
-
51
-
52
-
53
-
54
-
55
-
56
 |
 |