JVC GR-D33 Instruction Manual - Page 29
FEATURES FOR RECORDING, White LED Light, Night Alive
 |
UPC - 074101484793
View all JVC GR-D33 manuals
Add to My Manuals
Save this manual to your list of manuals |
Page 29 highlights
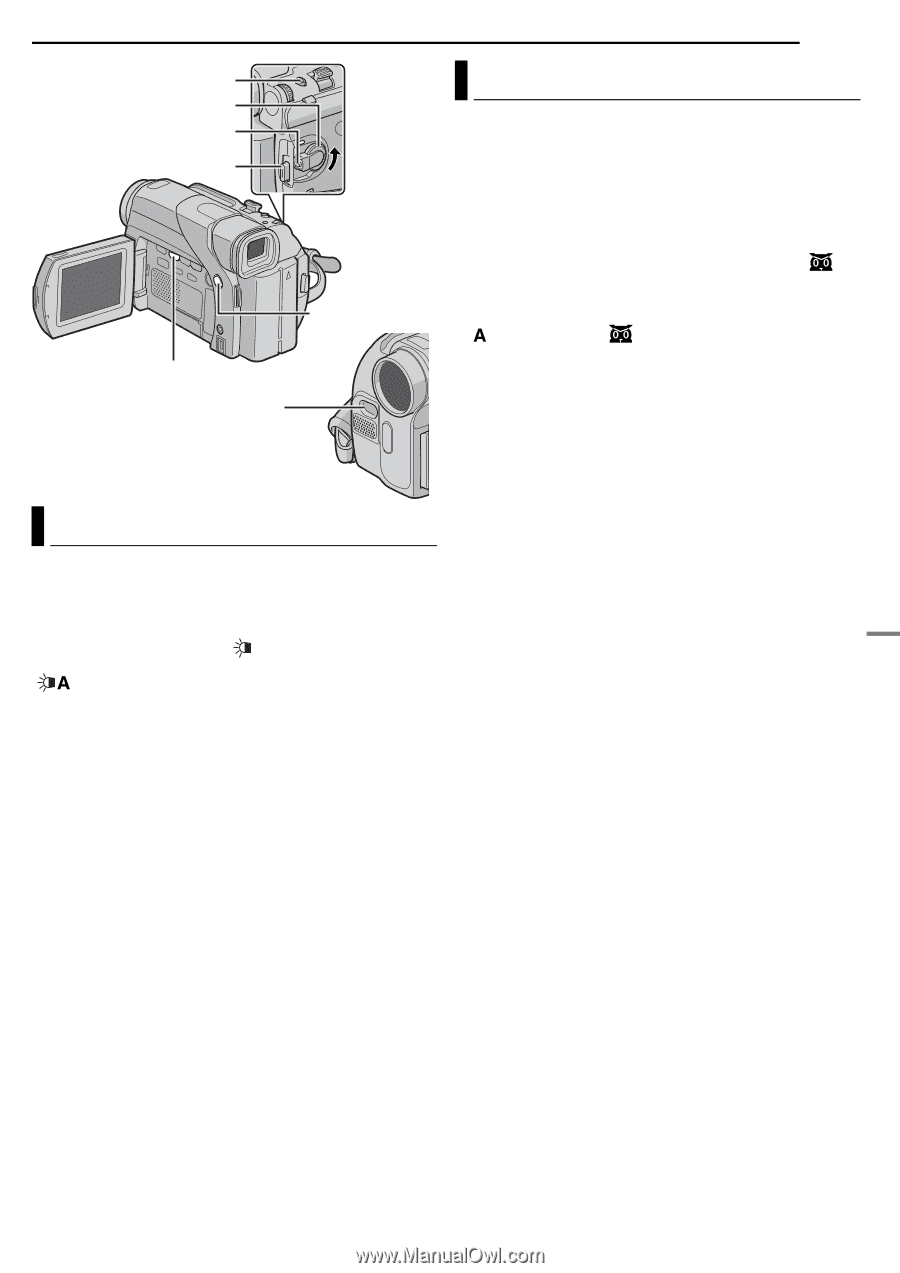
FEATURES FOR RECORDING EN 29 SNAPSHOT Power Switch Lock Button Recording Start/Stop Button LIGHT NIGHT White LED Light White LED Light White LED Light can be used to brighten the subject in the dark place during video recording or D.S.C. shooting. 1 Press LIGHT repeatedly to change the setting. OFF: Turns off the light. ON: The light is on always. ( appears.) AUTO: The light turns on automatically when dark. ( appears.) 2 Press the Recording Start/Stop Button to start video recording or SNAPSHOT to shoot a still image. NOTES: ● Be careful not to point the LED Light directly to eyes. ● If the light does not reach the subject, the Night-Alive function will be activated, and makes it possible to shoot the subject brighter. ● There is a difference in the brightness of the images shot between the centre area which is illuminated by the LED Light and the surrounding areas (which will be darker). ● Since subjects are shot at a reduced shutter speed when the White LED Light setting is "ON", they will appear slightly blurred. Night Alive Makes dark subjects or areas even brighter than they would be under good natural lighting. Although the recorded image is not grainy, it may look as if it is strobing due to the slow shutter speed. 1 Set the Power Switch to "M" while pressing down the Lock Button located on the switch. 2 Open the LCD monitor fully. (੬ pg. 12) 3 Press NIGHT so that the Night-Alive indicator " " appears. ● The shutter speed is automatically adjusted to provide up to 30 times sensitivity. ● " " appears beside " " while the shutter speed is being automatically adjusted. To deactivate Night-Alive Press NIGHT again so that the Night-Alive indicator disappears. NOTES: ● During Night-Alive, the following functions or settings cannot be activated and its indicator blinks or goes out: • Some modes of "Program AE With Special Effects" (੬ pg. 30). • "GAIN UP" in CAMERA Menu. (੬ pg. 26) • "DIS" in MANUAL Menu. (੬ pg. 26) ● During Night-Alive, it may be difficult to bring the camcorder into focus. To prevent this, use of a tripod is recommended. ADVANCED FEATURES
-
 1
1 -
2
-
3
-
4
-
5
-
6
-
7
-
8
-
9
-
10
-
11
-
12
-
13
-
14
-
15
-
16
-
17
-
18
-
19
-
20
-
21
-
22
-
23
-
 24
24 -
 25
25 -
 26
26 -
 27
27 -
 28
28 -
 29
29 -
 30
30 -
 31
31 -
 32
32 -
 33
33 -
 34
34 -
35
-
36
-
37
-
38
-
39
-
40
-
41
-
42
-
43
-
44
-
45
-
46
-
47
-
48
-
49
-
50
-
51
-
52
-
53
-
54
-
55
-
56
 |
 |