JVC GR-D33 Instruction Manual - Page 9
Viewfinder Adjustment, Brightness Adjustment Of The Display, Tripod Mounting, GETTING STARTED - - manual
 |
UPC - 074101484793
View all JVC GR-D33 manuals
Add to My Manuals
Save this manual to your list of manuals |
Page 9 highlights
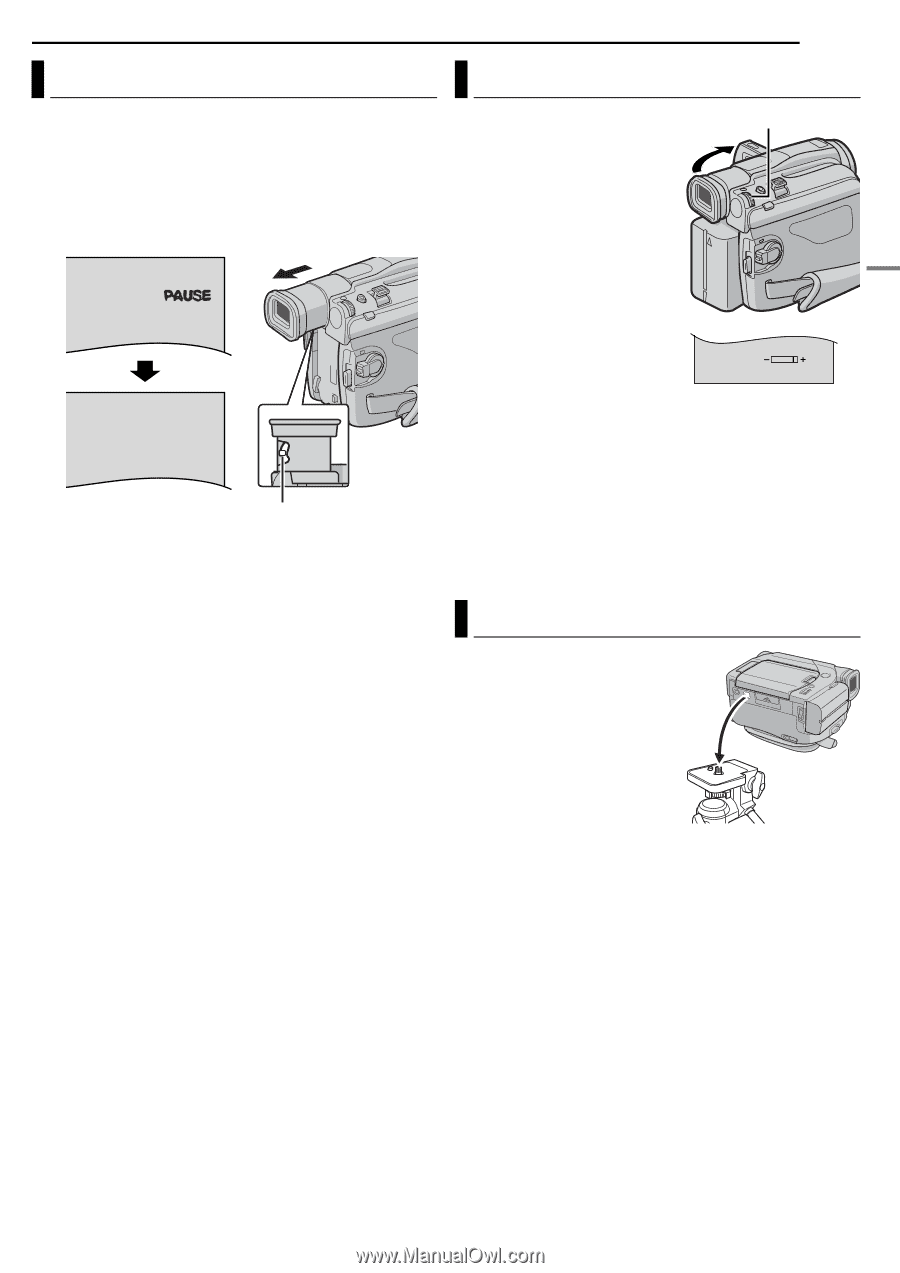
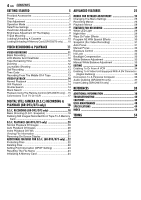
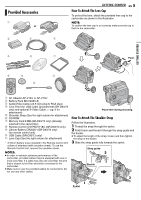
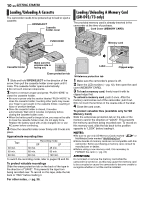
GETTING STARTED EN 9 GETTING STARTED Viewfinder Adjustment 1 Set the Power Switch to "A" or "M" while pressing down the Lock Button located on the switch. 2 Make sure the LCD monitor is closed and locked. Pull out the viewfinder fully and adjust it manually for best viewability. 3 Turn the Diopter Adjustment Control until the indications in the viewfinder are clearly focused. PAUSE Diopter Adjustment Control CAUTION: When retracting the viewfinder, take care not to pinch your fingers. Brightness Adjustment Of The Display 1 Set the Power Switch to "M" MMENU/VOL. or "PLAY" while pressing down the Lock Button located on the switch. 2 Open the LCD monitor fully. (੬ pg. 12) 3 Press the MMENU/VOL. Wheel in. The Menu Screen appears. 4 Rotate the MMENU/VOL. Wheel to select "n", and press it. The CAMERA DISPLAY Menu appears. 5 Rotate the MMENU/VOL. BRIGHT Wheel to select "BRIGHT", and press it. The Menu Screen closes and the brightness control indicator appears. 6 Rotate the MMENU/VOL. Wheel until the appropriate brightness is reached. 7 Press the MMENU/VOL. Wheel in. ● It is also possible to adjust the brightness of the viewfinder by pulling out the viewfinder, setting "PRIORITY" in the SYSTEM Menu to "FINDER" (੬ pg. 25, 27) and adjusting as described above. Tripod Mounting To attach the camcorder to a tripod, align the direction stud and screw to the mounting socket and stud hole on the camcorder. Then tighten the screw clockwise. ● Some tripods are not equipped with studs. CAUTION: When attaching the camcorder to a tripod, extend its legs to stabilize the camcorder. It is not advised to use small sized tripods. This may cause damage to the unit by falling over.
-
 1
1 -
2
-
3
-
 4
4 -
 5
5 -
 6
6 -
 7
7 -
 8
8 -
 9
9 -
 10
10 -
 11
11 -
 12
12 -
 13
13 -
 14
14 -
15
-
16
-
17
-
18
-
19
-
20
-
21
-
22
-
23
-
24
-
25
-
26
-
27
-
28
-
29
-
30
-
31
-
32
-
33
-
34
-
35
-
36
-
37
-
38
-
39
-
40
-
41
-
42
-
43
-
44
-
45
-
46
-
47
-
48
-
49
-
50
-
51
-
52
-
53
-
54
-
55
-
56
 |
 |