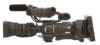
JVC GY-HD200UB GY-HD200U Owner's Manual - Page 85
Screen Adjustment, Viewfinder Adjustment, Back Focus Adjustment
 |
UPC - 046838035616
View all JVC GY-HD200UB manuals
Add to My Manuals
Save this manual to your list of manuals |
Page 85 highlights
PREPARATIONS FOR OPERATION Screen Adjustment Viewfinder Adjustment LCD monitor direction, angle, screen brightness, etc. can be adjusted. Adjusting the Direction and Angle of the LCD monitor • With the LCD door in the open condition, rotate the LCD door. • It can be turned 180° in upward direction and 90° in downward direction. When turned 180° upward direction, the LCD monitor can be viewed from the lens side (vertically inverted image). PEAKING volume LCD BRIGHT button 180° up LCD - BRIGHT + AUDIO SELECT CH-1 CH-2 AUTO MANU CAM/VTR TC DISPLAY TC UB GENE. FREE REC REGEN 90° down LCD lock release lever Adjusting the LCD monitor • PEAKING: Adjusts the contour of the LCD monitor. • LCD BRIGHT: Adjusts the brightness of the LCD monitor. Adjustments are made on the LCD/VF[2/4] menu screen. X See page 90. • LCD MIRROR MODE: Sets the LCD monitor to display mirrored images when shooting facing the subject. Adjustments are made on the LCD/VF[4/4] menu screen. X See page 92. • LCD CONTRAST: Adjusts the contrast of the LCD monitor. • BLACK & WHITE: Sets the LCD monitor and viewfinder to black and white display. Direction of the Viewfinder Adjust the position and angle of the viewfinder. Diopter Adjustment Rotate the eyepiece focusing ring until the viewfinder screen image is clearly visible. Adjustment of the Viewfinder Screen • PEAKING: Adjusts the contour of the LCD monitor and the viewfinder screen. • VF BRIGHT: Adjusts the brightness of the viewfinder screen. Eyepiece focusing ring Eyepiece VF BRIGHT volume PEAKING volume Sliding securing ring Viewfinder mount base Adjustments are made on the LCD/VF[4/4] menu screen. X See page 92. • VF CONTRAST: Adjusts the contrast of the viewfinder screen. • BLACK & WHITE: Sets the LCD monitor and viewfinder to black and white display. MEMO The screen size of the viewfinder can be changed by selecting the desired size with the ASPECT item on the VIDEO FORMAT[1/2] menu screen (4:3 or 16:9). Back Focus Adjustment It is only necessary to perform this when the lens is attached for the first time or when focusing is not correct in both the telephoto and wide-angle positions. • It is easier to adjust back focus when the subject is more than 3 meters from the camera. The optimal subject for this adjustment is a Siemens star chart. 3 4, 6 5 1. Set the IRIS mode switch to M (Manual). 2. Set the zoom mode to M (Manual). 3. Open the iris by turning the iris ring. If the illumination is too strong, reduce it or move to a darker place. 4. Turn the zoom lever until the lens is at the maximum tele- photo position. 5. Bring the subject into focus. 6. Set the lens to maximum wide-angle. 7. Loosen the back focus ring retaining knob. 8. View the same subject and adjust the back focus ring for the best possible focus. 9. Repeat steps 4. through 8. about three times for fine adjustment until the subject remains in focus in both the telephoto position and the wide-angle position. 10.Tighten the back focus ring retaining knob to secure the ring. 1 2 7, 8, 10 Siemens star chart 50 51
-
 1
1 -
2
-
3
-
4
-
5
-
6
-
7
-
8
-
9
-
10
-
11
-
12
-
13
-
14
-
15
-
16
-
17
-
18
-
19
-
20
-
21
-
22
-
23
-
24
-
25
-
26
-
27
-
28
-
29
-
30
-
31
-
32
-
33
-
34
-
35
-
36
-
37
-
38
-
39
-
40
-
41
-
42
-
43
-
44
-
45
-
46
-
47
-
48
-
49
-
50
-
51
-
52
-
53
-
54
-
55
-
56
-
57
-
58
-
59
-
60
-
61
-
62
-
63
-
64
-
65
-
66
-
67
-
68
-
69
-
70
-
71
-
72
-
73
-
74
-
75
-
76
-
77
-
78
-
79
-
 80
80 -
 81
81 -
 82
82 -
 83
83 -
 84
84 -
 85
85 -
 86
86 -
 87
87 -
 88
88 -
 89
89 -
 90
90 -
91
-
92
-
93
-
94
-
95
-
96
-
97
-
98
-
99
-
100
-
101
-
102
-
103
-
104
-
105
-
106
-
107
-
108
-
109
-
110
-
111
-
112
-
113
-
114
-
115
-
116
-
117
 |
 |
