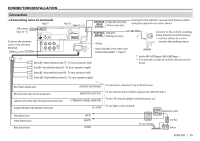
JVC KW-V30BT Instruction Manual - Page 50
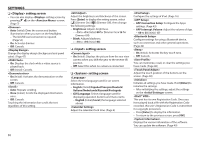
<Display> setting screen, <Input> setting screen, <System> setting screen
 |
View all JVC KW-V30BT manuals
Add to My Manuals
Save this manual to your list of manuals |
Page 50 highlights
SETTINGS ❏ setting screen • You can also display setting screen by pressing [ ] on the screen. • Auto (Initial): Dims the screen and button illumination when you turn on the headlights. - The ILLUMI lead connection is required. • On: Activates dimmer. • O : Cancels. Change the display design (background and panel • On: Displays the clock while a video source is played back. • O (Initial): Cancels. • On (Initial): Activates the demonstration on the screen. • O : Cancels. • Auto: Repeats scrolling. • Once (Initial): Scrolls the displayed information once. • O : Cancels. Touching the information bar scrolls the text regardless of this setting. Adjust the brightness and blackness of the screen. Press [Enter] to display the setting screen, select [ ] (Dimmer On)/[ ] (Dimmer O ), then change the following settings: • Brightness: Adjusts brightness. - -15 to +15 (Initial: 00 for Dimmer On/+15 for Dimmer O ) • Black: Adjusts blackness. - -10 to +10 (Initial: 00) ❏ setting screen • On (Initial): Displays the picture from the rear view camera when you shift the gear to the reverse (R) position. • O : Select this when no camera is connected. ❏ setting screen Select the text language used for on-screen information. • English (Initial)/Español/Français/Deutsch/ Italiano/Nederlands/Руccĸий/Português • GUI Language: Select a language used for displaying operation buttons and menu items. - English (Initial)/Local (the language selected above) • APP Connection Setup: Con gure the Apps • APP Interrupt Volume: Adjust the volume of App. - 00 to 35 (Initial: 17) Con gure settings for using a Bluetooth device, such as connection and other general operations. • On (Initial): Activates the key-touch tone. • O : Cancels. You can memorize, recall, or clear the settings you Adjust the touch position of the buttons on the Initialize all settings you have made. Hold [Enter] to initialize the settings. • After initializing the settings, adjust the settings on the screen. This unit has its own Registration Code. Once you have played back a le with the Registration Code recorded, this unit's Registration Code is overwritten for copyright protection. • Press [Enter] to display the information. • To return to the previous screen, press [OK]. Displays the version information of the software. 50
-
 1
1 -
2
-
3
-
4
-
5
-
6
-
7
-
8
-
9
-
10
-
11
-
12
-
13
-
14
-
15
-
16
-
17
-
18
-
19
-
20
-
21
-
22
-
23
-
24
-
25
-
26
-
27
-
28
-
29
-
30
-
31
-
32
-
33
-
34
-
35
-
36
-
37
-
38
-
39
-
40
-
41
-
42
-
43
-
44
-
 45
45 -
 46
46 -
 47
47 -
 48
48 -
 49
49 -
 50
50 -
 51
51 -
 52
52 -
 53
53 -
 54
54 -
 55
55 -
56
-
57
-
58
-
59
-
60
-
61
-
62
-
63
-
64
-
65
-
66
-
67
-
68
-
69
-
70
-
71
-
72
-
73
-
74
-
75
-
76
-
77
-
78
-
79
-
80
-
81
-
82
-
83
-
84
-
85
-
86
-
87
-
88
-
89
-
90
-
91
-
92
-
93
-
94
-
95
-
96
-
97
-
98
-
99
-
100
-
101
-
102
-
103
-
104
-
105
-
106
-
107
-
108
-
109
-
110
-
111
-
112
-
113
-
114
-
115
-
116
-
117
-
118
-
119
-
120
-
121
-
122
-
123
-
124
-
125
-
126
-
127
-
128
-
129
-
130
-
131
-
132
-
133
-
134
-
135
-
136
-
137
-
138
-
139
-
140
-
141
-
142
-
143
-
144
-
145
-
146
-
147
-
148
-
149
-
150
-
151
-
152
-
153
-
154
-
155
-
156
-
157
-
158
-
159
-
160
-
161
-
162
-
163
-
164
-
165
-
166
-
167
-
168
-
169
-
170
-
171
-
172
-
173
-
174
-
175
-
176
-
177
-
178
-
179
-
180
-
181
-
182
-
183
-
184
-
185
-
186
-
187
-
188
-
189
-
190
-
191
-
192
-
193
-
194
-
195
-
196
-
197
-
198
-
199
-
200
-
201
-
202
-
203
-
204
-
205
-
206
 |
 |
