JVC VN-C215VP4U Instruction Manual - Page 13
Lens MONITOR] Monitor terminal RCA pin - instructions
 |
UPC - 046838030192
View all JVC VN-C215VP4U manuals
Add to My Manuals
Save this manual to your list of manuals |
Page 13 highlights
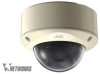
S [MONITOR] Monitor terminal (RCA pin) (A Pg. 28) T Heater power connector This power connector is used when the camera is installed with a heater (sold separately: KAZH215). U Heater space Memoɿ ● When mounting the heater (sold separately :KA-ZH215), read the instruction manual of the heater carefully before mounting. V Camera unit W Camera Fastening Claw ן2 This claw fastens the camera unit to the base. To remove the base, push it towards the direction of the arrow and remove. (A Pg. 17) X [MAC address] MAC address indicator The MAC address is a unique physical address of the product. This address cannot be altered. Y Tilt fastening screw After adjusting the field angle, tighten the screw so that the camera field angle will not be misaligned when using the camera in locations with vigorous vibrations. (A Pg. 28) Z Imaging Direction mark Install the camera facing the arrow in the shooting direction. a Lug plate This plate fastens the silica gel. (A Pg. 20) b Silica gel insertion space (A Pg. 20) Lens section c SPOT FOCUS ADJ IRIS ADJ d FOR SERVICE L H IRIS LEVEL e f c [FOCUS ADJ] Focus adjustment button This is used to adjust the lens focus. Press the button to open the lens iris for 30 seconds. The focus is now easier to adjust as the depth of field becomes shallow. (A Pg. 29) Memoɿ ● Pressing the focus adjustment button automatically activates the electronic shutter. The screen may flicker but this is not a malfunction. d [IRIS LEVEL] Iris level adjustment dial This dial adjusts the iris level of the auto iris lens. Normally, adjustment is not required. Adjust if required, depending on the conditions of the object. To darken: Anti-clockwise direction (towards L) To brighten: Clockwise direction (towards H) Memoɿ ● Adjust the iris level after [AGC] is set to AOffB. (A Pg. 45) ● If AOffB is not set, turning the dial towards L will activate the AGC function. The camera sensitivity increases and the image quality becomes grainy. e Focus adjustment ring Move the ring to the left and right to adjust the focus. (A Pg. 29) f Zoom adjustment ring Move the ring to the left and right to adjust the field angle. (A Pg. 29) 13
-
 1
1 -
2
-
3
-
4
-
5
-
6
-
7
-
 8
8 -
 9
9 -
 10
10 -
 11
11 -
 12
12 -
 13
13 -
 14
14 -
 15
15 -
 16
16 -
 17
17 -
 18
18 -
19
-
20
-
21
-
22
-
23
-
24
-
25
-
26
-
27
-
28
-
29
-
30
-
31
-
32
-
33
-
34
-
35
-
36
-
37
-
38
-
39
-
40
-
41
-
42
-
43
-
44
-
45
-
46
-
47
-
48
-
49
-
50
-
51
-
52
-
53
-
54
-
55
-
56
-
57
-
58
-
59
-
60
-
61
-
62
-
63
-
64
-
65
-
66
-
67
-
68
-
69
-
70
-
71
-
72
-
73
-
74
-
75
-
76
-
77
-
78
-
79
-
80
-
81
-
82
-
83
-
84
-
85
-
86
-
87
-
88
 |
 |
