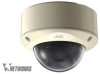
JVC VN-C215VP4U Instruction Manual - Page 23
Using the piping hole at the side of the, base to mount the camera, Wind the seal tape
 |
UPC - 046838030192
View all JVC VN-C215VP4U manuals
Add to My Manuals
Save this manual to your list of manuals |
Page 23 highlights
Using the piping hole at the side of the base to mount the camera When the camera is not directly mounted on a ceiling, use the piping hole at the side of the base to mount the camera to the piping. 1. Remove the camera unit from the base and mount the fall-prevention wire (A Pg. 17)(A Pg. 18) 2. Wind the seal tape Wind the joint (where the threaded portion of the piping hole and the tapped hole of the piping meets) of the piping with seal tape for more than 2 rounds. Seal tape 4. Mount the piping hole plug to the piping hole at the bottom of the base 5. Mount the base to the piping Screw the piping into the piping hole at the side of the base. (Piping hole: G3/4-14 UNC) Noteɿ ● Do not screw in the piping for more than 12 mm deep. Otherwise, it may damage the internal parts of the camera. Piping hole plug 3. Remove the piping hole plug of the base Loosen the mounting screw (M3 x 6 mm) with a straight slot screw driver and pull out the plug from the side of the base. Piping hole plug 6. The following procedures are the same as normal mounting ● Cable connection (A Pg. 18) ● Mounting the camera to the base (A Pg. 19) ● Image adjustment (A Pg. 28) ● Mounting the inner dome (A Pg. 30) ● Mounting the dome cover (A Pg. 30) Mounting screw 23
-
 1
1 -
2
-
3
-
4
-
5
-
6
-
7
-
8
-
9
-
10
-
11
-
12
-
13
-
14
-
15
-
16
-
17
-
 18
18 -
 19
19 -
 20
20 -
 21
21 -
 22
22 -
 23
23 -
 24
24 -
 25
25 -
 26
26 -
 27
27 -
 28
28 -
29
-
30
-
31
-
32
-
33
-
34
-
35
-
36
-
37
-
38
-
39
-
40
-
41
-
42
-
43
-
44
-
45
-
46
-
47
-
48
-
49
-
50
-
51
-
52
-
53
-
54
-
55
-
56
-
57
-
58
-
59
-
60
-
61
-
62
-
63
-
64
-
65
-
66
-
67
-
68
-
69
-
70
-
71
-
72
-
73
-
74
-
75
-
76
-
77
-
78
-
79
-
80
-
81
-
82
-
83
-
84
-
85
-
86
-
87
-
88
 |
 |
