Kenmore 8027 Use and Care Guide - Page 14
VENTING, DRYER, CHECK, EXHAUST, SYSTEM, PROBLEMS, Selecting, Verifying, Length, Chart
 |
UPC - 719192272088
View all Kenmore 8027 manuals
Add to My Manuals
Save this manual to your list of manuals |
Page 14 highlights
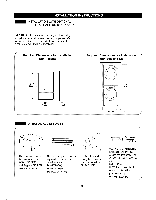
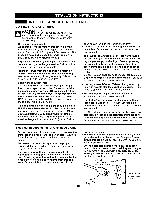
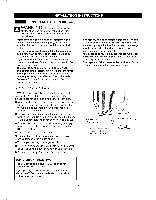
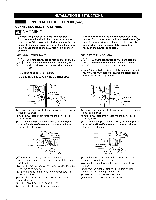
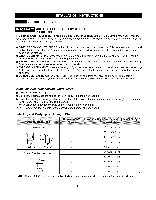
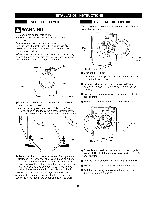
I I VENTING THE DRYER CHECK YOUR EXHAUST SYSTEM FOR PROBLEMS The most common cause of dryer problems is poor exhaust venting. Before you install your new dryer, check the items listed below to make sure you get the best possible performance. This can save you time and money by reducing cycle times and increasing energy efficiency. @ DIRTY OR DAMAGED EXHAUST DUCTS. Lint builds up in exhaust ducts over time. This decreases the airflow and makes the dryer work harder. Visually inspect your ducts from both ends and have them cleaned if they have not been cleaned recently. O WRONG VENT MATERIAL. Check your vent to make sure it is rigid or semi-rigid metal ducting. If your venting is plastic flexible foil, have it replace before using the dryer. O RESTRICTED OR DAMAGED VENT HOOD. Check your vent hood outside. It must be clean and free of lint buildup. Check the damper and make sure it opens fully and easily. O EXESSIVEL¥ LONG VENT. Measure the length of your exhaust system and count the elbows. Use the chart of page 14 to see if your duct is too long. If it is too long, have the duct routed to another location that is within the venting guidelines. O DO NOT USE PLASTIC OR FOIL VENTING. The transition duct from your dryer to the wall must be rigid or semi-rigid metal ducting. If your old transition duct is plastic or foil, REPLACE IT with semi-rigid metal ducting. Using the Duct Requirements Chart (below) O Select the type of wall cap. O Select row that matches the number of elbows required in the dryer duct run. O Select the duct type. The length shown in the chart at this point is the maximum allowable duct length for your instal- lation. Longer duct length will result in reduced drying performance, longer dry times and increased energy consumption. DO NOT exceed maximum length for the duct type and number of elbows used. Selecting and Verifying Duct Length Chart Recommended 0 65 feet (19.8 m) 1 55 feet (16.8 m) 2 47 feet (13.7 m) 3 4" 4" (10,2 cm) (10,2 cm) 4 36 feet (11.0 m) 28 feet (8.5 m) 0 Only for Short-Run Installations 1 55 feet (16.8 m) 47 feet (13.7 m) 2 41 feet (12.5 m) 3 2-1/2" (6,35 cm) 4 30 feet (9.1 m) 22 feet (6.7 m) NOTE: Deduct 6 ft. (1.8 m) for each additional elbow. It is not recommended to use more than four 906elbows. 14 I I
-
 1
1 -
2
-
3
-
4
-
5
-
6
-
7
-
8
-
 9
9 -
 10
10 -
 11
11 -
 12
12 -
 13
13 -
 14
14 -
 15
15 -
 16
16 -
 17
17 -
 18
18 -
 19
19 -
20
-
21
-
22
-
23
-
24
-
25
-
26
-
27
-
28
-
29
-
30
-
31
-
32
-
33
-
34
-
35
-
36
-
37
-
38
-
39
-
40
-
41
-
42
-
43
-
44
-
45
-
46
-
47
-
48
-
49
-
50
-
51
-
52
-
53
-
54
-
55
-
56
-
57
-
58
-
59
-
60
-
61
-
62
-
63
-
64
 |
 |
