Kenwood TS-590SG Operation Manual - Page 50
Noise Blanker, Pre-amplifier, Attenuator, Cw Reverse Reception
 |
View all Kenwood TS-590SG manuals
Add to My Manuals
Save this manual to your list of manuals |
Page 50 highlights
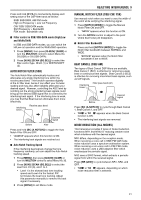
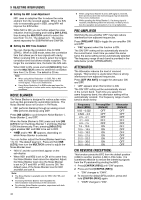
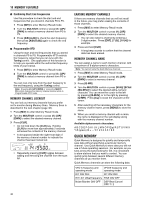
9 REJECTING INTERFERENCE ■ Setting the NR1 Level Adjustment NR1 uses an adaptive filter to reduce the noise element from the received signals. When the S/N ratio is reasonably good in SSB, using NR1 will improve the S/N further. While NR1 is ON, you can further adjust the noise reduction level by pressing and holding [NR (LEV)], then turning the MULTI/CH control to select the level from 1 to 10. The default is 5. The level is saved separately for SSB/FM/AM and CW/FSK. ■ Setting the NR2 Time Constant You can change the correlation time for NR2 (SPAC). When in SSB mode, select the correlation time that allows you to hear signals with clarity. When receiving CW, it is best to select the longest correlation time that allows reliable reception. The longer the correlation time, the better the S/N ratio. When NR2 is ON, press and hold [NR (LEV)], then turn the MULTI/CH control to select the correlation time from 2 to 20 ms. The default is 20 ms. Note: ◆ When using Noise Reduction 1 in SSB, FM, or AM mode, the beat signal is suppressed along with the normal signal. This is not a malfunction. ◆ Using Noise Reduction 2 in SSB mode may lower the clarity of signals or induce pulse noise, depending on the conditions. NOISE BLANKER The Noise Blanker is designed to reduce pulse noise such as that generated by automobile ignitions. The Noise Blanker does not function in FM mode. • NB1 performs blanking through an analog circuit. NB2 performs blanking using DSP. Press [NB (LEV)] to cycle between Noise Blanker 1, Noise Blanker 2, and OFF. When the Noise Blanker is OFF, press and hold [NB (LEV)] to turn the Noise Blanker 1 and Noise Blanker 2 ON simultaneously. Then, pressing [NB (LEV)] again enables NB1 and NB2 to be set to OFF. • " " and/or " " appears, depending on which Noise Blanker is selected. You can further adjust the Noise Blanker level from 1 to 10. The default level is 6. Press and hold [NB (LEV)], then turn the MULTI/CH control to adjust the Noise Blanker level. • "NB LV." and the current level appear on the sub-display. • When NB1 and NB2 is set to ON at the same time, the Noise Blanker level cannot be adjusted. Adjust the Noise Blanker level once the Noise Blanker is set to OFF and NB1 or NB2 is set to ON. The default value of the Noise Blanker level for NB1 and NB2 are both 6. Note: ◆ The Noise Blanker is available only for SSB, CW, FSK, and AM modes. ◆ Increasing the Noise Blanker level degrades the intermodulation characteristics of the transceiver. ◆ For effective Noise Blanker operation, experiment with both NB1 and NB2 on each band. 42 ◆ When using Noise Blanker 2 and a CW signal is received, there are times when the received signal may be distorted. This is not a malfunction. ◆ While operating the Noise Blanker 2, if a strong signal is received, the Blanking effect will decrease. In theory, this is how the operation should perform; it is not a malfunction. PRE-AMPLIFIER Switching the pre-amplifier OFF may help reduce interference from adjacent frequencies. Press [PRE (ANT 1/2)] to toggle the pre-amplifier ON and OFF. • " " appears when this function is ON. The ON/ OFF setting will be automatically stored in the current band. Each time you select the same band, the same setting will be automatically selected The frequency range of each band is provided in the table below (under "ATTENUATOR"). ATTENUATOR The Attenuator reduces the level of received signals. This function is useful when there is strong interference from adjacent frequencies. Press [ATT (RX ANT)] to toggle the attenuator ON and OFF. • " " appears when this function is ON. The ON/ OFF setting will be automatically stored in the current band. Each time you select the same frequency band, the attenuator setting will be automatically recalled. The frequency range of each band is shown below. Frequency Band (MHz) 0.03 ~ 0.522 0.522 ~ 2.5 2.5 ~ 4.1 4.1 ~ 6.9 6.9 ~ 7.5 7.5 ~ 10.5 10.5 ~ 14.5 14.5 ~ 18.5 18.5 ~ 21.5 21.5 ~ 25.5 25.5 ~ 30.0 30.0 ~ 60.0 Pre-amplifier (Default) OFF OFF OFF OFF OFF ON ON ON ON ON ON ON Attenuator (Default) OFF OFF OFF OFF OFF OFF OFF OFF OFF OFF OFF OFF CW REVERSE (RECEPTION) This function pivots the BFO from the default position (USB) to another position (LSB) in CW mode. It is sometimes effective to remove the interfering signals from the IF passband by pivoting the BFO. 1 Press [CW/FSK (REV)] until "CW" appears. 2 Press and hold [CW/FSK (REV)]. • "CW" changes to "CWR". 3 To recover the default BFO position, press and hold [CW/FSK (REV)] again. • "CWR" changes to "CW".
-
 1
1 -
2
-
3
-
4
-
5
-
6
-
7
-
8
-
9
-
10
-
11
-
12
-
13
-
14
-
15
-
16
-
17
-
18
-
19
-
20
-
21
-
22
-
23
-
24
-
25
-
26
-
27
-
28
-
29
-
30
-
31
-
32
-
33
-
34
-
35
-
36
-
37
-
38
-
39
-
40
-
41
-
42
-
43
-
44
-
 45
45 -
 46
46 -
 47
47 -
 48
48 -
 49
49 -
 50
50 -
 51
51 -
 52
52 -
 53
53 -
 54
54 -
 55
55 -
56
-
57
-
58
-
59
-
60
-
61
-
62
-
63
-
64
-
65
-
66
-
67
-
68
-
69
-
70
-
71
-
72
-
73
-
74
-
75
-
76
-
77
-
78
-
79
-
80
-
81
-
82
-
83
-
84
-
85
-
86
-
87
-
88
-
89
-
90
-
91
-
92
-
93
-
94
-
95
-
96
-
97
-
98
-
99
-
100
 |
 |
