KitchenAid KRFC704FSS Use & Care Guide - Page 33
Make sure the ice maker is ON. See Ice Maker and Ice Storage
 |
View all KitchenAid KRFC704FSS manuals
Add to My Manuals
Save this manual to your list of manuals |
Page 33 highlights
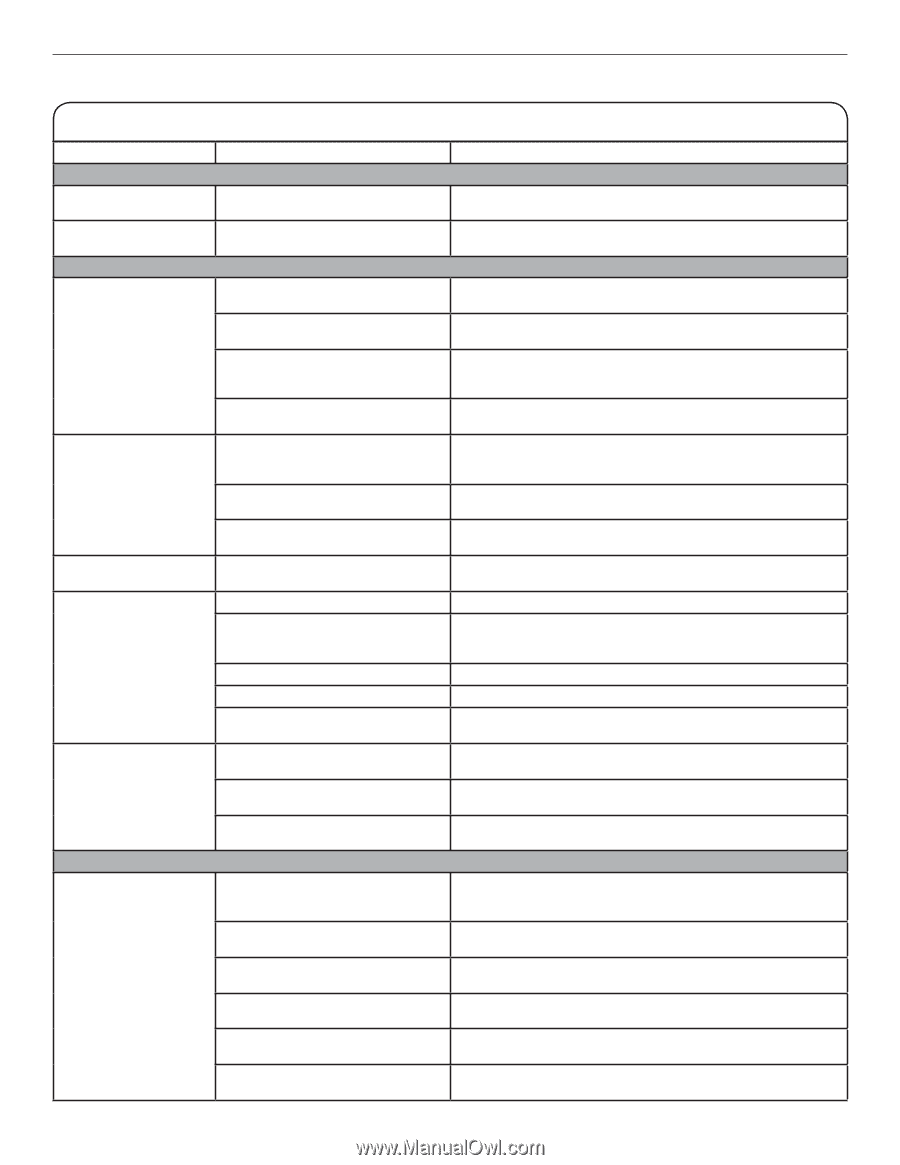
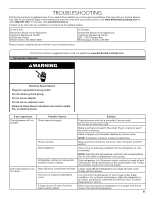
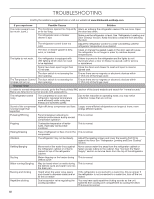
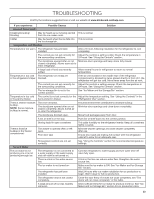
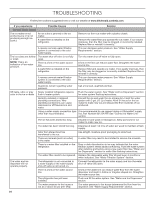
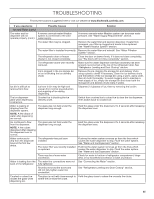
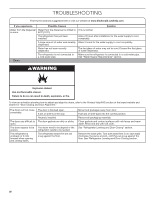
TROUBLESHOOTING First try the solutions suggested here or visit our website at www.kitchenaid.custhelp.com. If you experience Possible Causes Solution Unusual Noise (cont.) Creaking/Cracking/ Grinding May be heard as ice is being ejected This is normal. from the ice maker mold. Clatter May be heard when the ice falls into This is normal. the ice storage bin. Temperature and Moisture Temperature is too warm. The refrigerator has just been installed. Allow 24 hours following installation for the refrigerator to cool completely. The controls are not set correctly for Adjust the controls a setting colder. Check the temperature in the surrounding conditions. 24 hours. See "Using the Controls" section. The door(s) are opened often or not Minimize door openings and keep doors fully closed. closed completely. Allows warm air to enter refrigerator. A large load of food was recently added. Allow several hours for refrigerator to return to normal temperature. Temperature is too cold The refrigerator air vent(s) are in the refrigerator/crisper. blocked. If the air vent located in the middle rear of the refrigerator compartment is blocked by items placed directly in front of it, the refrigerator will get too cold. Move items away from the air vent. The controls are not set correctly for Adjust the controls a setting warmer. Check the temperature in the surrounding conditions. 24 hours. See "Using the Controls" section. The ice storage bin is not in the correct position. See "Ice Maker and Ice Storage Bin" section. Temperature is too cold The control is not set correctly for the Adjust the temperature setting. See "Using the Controls" in the in the pantry drawer. items stored in drawer. "Refrigerator Use" section. There is interior moisture buildup. NOTE: Some moisture buildup is normal. The room is humid. The door(s) are opened often or not closed completely. Allows humid air to enter the refrigerator. A humid environment contributes to moisture buildup. Minimize door openings and close doors completely. The door(s) are blocked open. Move food packages away from door. A bin or shelf is in the way. Push bin or shelf back into the correct position. Storing liquid in open containers This adds humidity to the refrigerator interior. Keep all containers tightly covered. There is frost/ice buildup in the freezer compartment. The drawer is opened often or left open. Poor door seal Minimize drawer openings and close drawer completely after use. Ensure door seals are making full contact with the refrigerator cabinet to allow for an adequate seal. Temperature controls are not set correctly. See "Using the Controls" section for recommended temperature settings. Ice and Water The ice maker is not producing ice or is not producing enough ice. The refrigerator is not connected to a water supply or the water supply shut-off valve is not turned on. Connect refrigerator to water supply and turn water shut-off valve fully open. There is a kink in the water source line. A kink in the line can reduce water flow. Straighten the water source line. The ice maker is not turned on. Make sure the ice maker is ON. See "Ice Maker and Ice Storage Bin" section. The refrigerator has just been installed. Wait 24 hours after ice maker installation for ice production to begin. Wait 3 days for full ice production. The refrigerator door is not closed completely. Close the door firmly. If it does not close completely, see "The doors will not close completely" in this table. A large amount of ice was recently removed. Allow sufficient time for ice maker to produce more ice. See "Ice Maker and Ice Storage Bin" section for ice production rates. 33
-
 1
1 -
2
-
3
-
4
-
5
-
6
-
7
-
8
-
9
-
10
-
11
-
12
-
13
-
14
-
15
-
16
-
17
-
18
-
19
-
20
-
21
-
22
-
23
-
24
-
25
-
26
-
27
-
 28
28 -
 29
29 -
 30
30 -
 31
31 -
 32
32 -
 33
33 -
 34
34 -
 35
35 -
 36
36 -
 37
37 -
 38
38 -
39
-
40
-
41
-
42
-
43
-
44
-
45
-
46
-
47
-
48
-
49
-
50
-
51
-
52
-
53
-
54
-
55
-
56
-
57
-
58
-
59
-
60
-
61
-
62
-
63
-
64
-
65
-
66
-
67
-
68
-
69
-
70
-
71
-
72
-
73
-
74
-
75
-
76
-
77
-
78
-
79
-
80
-
81
-
82
-
83
-
84
-
85
-
86
-
87
-
88
-
89
-
90
-
91
-
92
-
93
-
94
-
95
-
96
-
97
-
98
-
99
-
100
-
101
-
102
-
103
-
104
-
105
-
106
-
107
-
108
-
109
-
110
-
111
-
112
-
113
-
114
-
115
-
116
 |
 |