Kodak S1220 User Guide - Page 38
Getting your photos ready to scan, photos on the top of this stack 9 - photo scanner software
 |
UPC - 041778466193
View all Kodak S1220 manuals
Add to My Manuals
Save this manual to your list of manuals |
Page 38 highlights
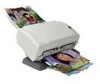
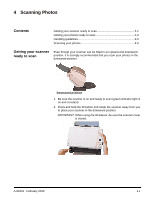
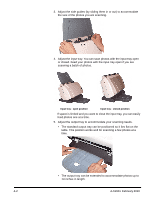
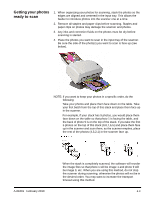
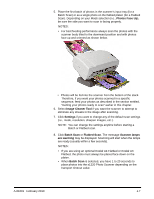
Getting your photos ready to scan 1. When organizing your photos for scanning, stack the photos so the edges are aligned and centered in the input tray. This allows the feeder to introduce photos into the scanner one at a time. 2. Remove all staples and paper clips before scanning. Staples and paper clips on photos may damage the scanner and photos. 3. Any inks and correction fluids on the photos must be dry before scanning is started. 4. Place the photos you want to scan in the input tray of the scanner. Be sure the side of the photo(s) you want to scan is face up (see below). NOTE: If you want to keep your photos in a specific order, do the following: Take your photos and place them face down on the table. Take your first batch from the top of this stack and place them face up in the scanner. For example, if your stack has 9 photos, you would place them face down on the table so that photo 1 is facing the table, and the back of photo 9 is on the top of the stack. If you take the first 5 photos on the top of this stack (9,8,7,6,5) and place them face up in the scanner and scan them, as the scanner empties, place the rest of the photos (4,3,2,1) in the scanner face up. A-61601 February 2010 When the stack is completely scanned, the software will reorder the image files so that photo 1 will be image 1 and photo 9 will be image 9, etc. When you are using this method, do not stop the scanner during scanning, otherwise the photos will not be in the desired order. You may want to increase the transport timeout using this method. 4-3
-
 1
1 -
2
-
3
-
4
-
5
-
6
-
7
-
8
-
9
-
10
-
11
-
12
-
13
-
14
-
15
-
16
-
17
-
18
-
19
-
20
-
21
-
22
-
23
-
24
-
25
-
26
-
27
-
28
-
29
-
30
-
31
-
32
-
 33
33 -
 34
34 -
 35
35 -
 36
36 -
 37
37 -
 38
38 -
 39
39 -
 40
40 -
 41
41 -
 42
42 -
 43
43 -
44
-
45
-
46
-
47
-
48
-
49
-
50
-
51
-
52
-
53
-
54
-
55
-
56
-
57
-
58
-
59
-
60
-
61
-
62
-
63
-
64
-
65
-
66
-
67
-
68
-
69
-
70
-
71
-
72
-
73
-
74
-
75
-
76
-
77
-
78
-
79
-
80
-
81
 |
 |
