LG KG300 User Guide - Page 29
To setup the Camera [Menu 4-2-2]
 |
View all LG KG300 manuals
Add to My Manuals
Save this manual to your list of manuals |
Page 29 highlights
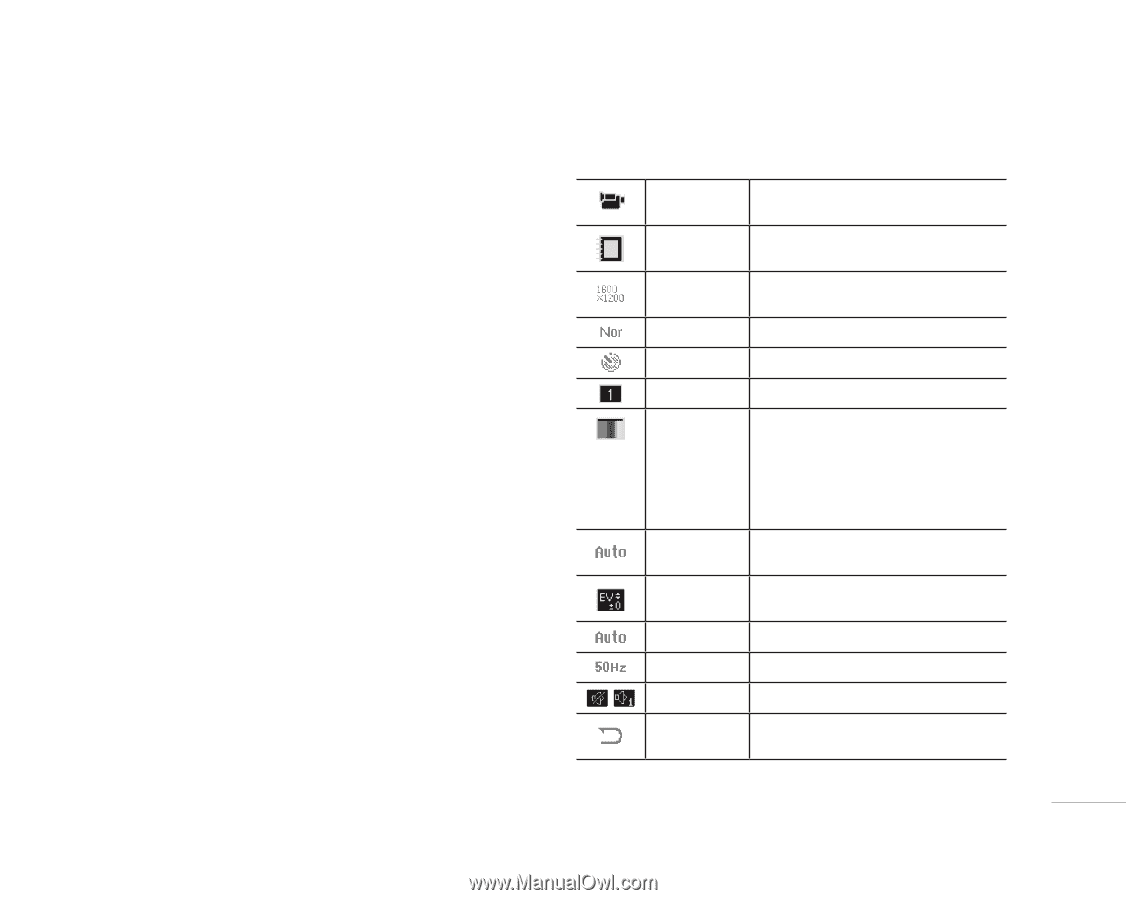
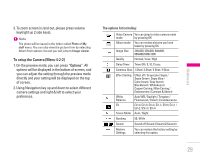
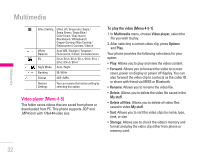
| Multimedia 3. To zoom screen in /and out, please press volume key(right up 2 side keys). ! Note The photo will be saved in the folder called Photo of My stuff menu. You can also view the picture from by selecting Album from options list and you will jump to Image viewer. To setup the Camera [Menu 4-2-2] 1. On the preview mode, you can press "Options". All options will be displayed in the bottom of screen, and you can adjust the setting through the preview mode directly and your setting will be displayed on the top of screen. 2. Using Navigation key up and down to select different camera settings and right & left to select your preference. The options list including: Video Camera You can jump to video camera mode mode by pressing OK Album mode You can review pictures you have taken by pressing OK Image Size 240x320, 320x240, 640x480, 800x600,1600x1200 Quality Normal / Low / High Delay Timer Timer Off / 5, 10, 15 sec. Continue Shot 1 Shot / 3 Shot / 5 Shot / 9 Shot Effect Setting Effect off / Grayscale / Sepia / Sepia Green / Sepia Blue / Color Invert / Gray Invert / Blackboard / Whiteboard / Copper Carving / Blue Carving / Embossment / Contrast & Sketch White Balance EV Auto WB / Daylight / Tungsten / Fluorescent / Cloud / Incandescence EV-4 / EV-3 / EV-2 / EV-1 / EV 0 / EV+1 / EV+2 / EV+3 / EV+4 Scene Mode Auto / Night Bonding 50 / 60 Hz Sound Sound off /Sound 1/Sound 2/Sound 3 Restore Settings You can restore the factory setting by selecting this option. 29
-
 1
1 -
2
-
3
-
4
-
5
-
6
-
7
-
8
-
9
-
10
-
11
-
12
-
13
-
14
-
15
-
16
-
17
-
18
-
19
-
20
-
21
-
22
-
23
-
 24
24 -
 25
25 -
 26
26 -
 27
27 -
 28
28 -
 29
29 -
 30
30 -
 31
31 -
 32
32 -
 33
33 -
 34
34 -
35
-
36
-
37
-
38
-
39
-
40
-
41
-
42
-
43
-
44
-
45
-
46
-
47
-
48
-
49
-
50
-
51
-
52
-
53
-
54
-
55
-
56
-
57
-
58
-
59
-
60
-
61
-
62
-
63
-
64
-
65
-
66
-
67
-
68
-
69
-
70
-
71
-
72
-
73
-
74
-
75
-
76
-
77
-
78
 |
 |