LG VM510 Specification - Page 31
Add Attachment, Smileys. Touch a desired symbol - reviews
 |
View all LG VM510 manuals
Add to My Manuals
Save this manual to your list of manuals |
Page 31 highlights
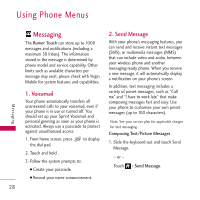
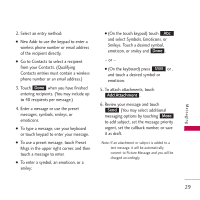
2. Select an entry method: G New Addr to use the keypad to enter a wireless phone number or email address of the recipient directly. G Go to Contacts to select a recipient from your Contacts. (Qualifying Contacts entries must contain a wireless phone number or an email address.) 3. Touch Done when you have finished entering recipients. (You may include up to 40 recipients per message.) 4. Enter a message or use the preset messages, symbols, smileys, or emoticons. G To type a message, use your keyboard or touch keypad to enter your message. G To use a preset message, touch Preset Msgs in the upper right corner, and then touch a message to enter. G To enter a symbol, an emoticon, or a smiley: G (On the touch keypad) touch Abc and select Symbols, Emoticons, or Smileys. Touch a desired symbol, emoticon, or smiley and Done . - or - G (On the keyboard) press SYM or , and touch a desired symbol or emoticon. 5. To attach attachments, touch Add Attachment . 6. Review your message and touch Send (You may select additional messaging options by touching More to add subject, set the message priority urgent, set the callback number, or save it as draft. Note: If an attachment or subject is added to a text message, it will be automatically convert to Picture Message and you will be charged accordingly. Messaging 29
-
 1
1 -
2
-
3
-
4
-
5
-
6
-
7
-
8
-
9
-
10
-
11
-
12
-
13
-
14
-
15
-
16
-
17
-
18
-
19
-
20
-
21
-
22
-
23
-
24
-
25
-
 26
26 -
 27
27 -
 28
28 -
 29
29 -
 30
30 -
 31
31 -
 32
32 -
 33
33 -
 34
34 -
 35
35 -
 36
36 -
37
-
38
-
39
-
40
-
41
-
42
-
43
-
44
-
45
-
46
-
47
-
48
-
49
-
50
-
51
-
52
-
53
-
54
-
55
-
56
-
57
-
58
-
59
-
60
-
61
-
62
-
63
-
64
-
65
-
66
-
67
-
68
-
69
-
70
-
71
-
72
-
73
-
74
-
75
-
76
-
77
-
78
-
79
-
80
-
81
-
82
-
83
-
84
-
85
-
86
-
87
-
88
-
89
-
90
-
91
-
92
-
93
-
94
-
95
-
96
-
97
-
98
 |
 |