Lexmark 260dn User's Guide - Page 65
Setting Jam Recovery, Canceling a print job, From the printer control panel, For Windows users
 |
UPC - 734646056960
View all Lexmark 260dn manuals
Add to My Manuals
Save this manual to your list of manuals |
Page 65 highlights
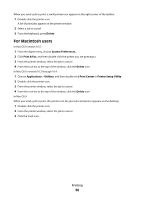
Setting Jam Recovery To ensure that a page will reprint after a paper jam, set Jam Recovery to Auto or On. To access Jam Recovery, do one of the following: • Open the Embedded Web Server: 1 Type the printer IP address into the address field of your Web browser. Note: If you do not know the IP address of the printer, then print a network setup page and locate the IP address in the TCP/IP section. 2 From the Settings screen, click General Settings, and then click Print Recovery. 3 Click Jam Recovery, and then select Auto or On. 4 Click Submit. • If the printer is connected to a computer by a USB or parallel cable, open the Local Printer Settings Utility for Windows or Printer Settings for Macintosh. One of these utilities installs with your printer software. Under the Setup menu, make sure Jam Recovery is set to Auto or On. Canceling a print job To cancel a print job, do one of the following: From the printer control panel 1 Press to cancel the current print job. 2 Wait for the light to appear before re-sending the print job. For Windows users In Windows Vista: 1 Click . 2 Click Control Panel. 3 Click Hardware and Sound. 4 Click Printers. 5 Double-click the printer icon. 6 Select the job to cancel. 7 From the keyboard, press Delete. In Windows XP: 1 Click Start. 2 From Printers and Faxes, double-click the printer icon. 3 Select the job to cancel. 4 From the keyboard, press Delete. From the Windows taskbar: Printing 65
-
 1
1 -
2
-
3
-
4
-
5
-
6
-
7
-
8
-
9
-
10
-
11
-
12
-
13
-
14
-
15
-
16
-
17
-
18
-
19
-
20
-
21
-
22
-
23
-
24
-
25
-
26
-
27
-
28
-
29
-
30
-
31
-
32
-
33
-
34
-
35
-
36
-
37
-
38
-
39
-
40
-
41
-
42
-
43
-
44
-
45
-
46
-
47
-
48
-
49
-
50
-
51
-
52
-
53
-
54
-
55
-
56
-
57
-
58
-
59
-
 60
60 -
 61
61 -
 62
62 -
 63
63 -
 64
64 -
 65
65 -
 66
66 -
 67
67 -
 68
68 -
 69
69 -
 70
70 -
71
-
72
-
73
-
74
-
75
-
76
-
77
-
78
-
79
-
80
-
81
-
82
-
83
-
84
-
85
-
86
-
87
-
88
-
89
-
90
-
91
-
92
-
93
-
94
-
95
-
96
-
97
-
98
-
99
-
100
-
101
-
102
-
103
-
104
-
105
-
106
-
107
-
108
-
109
-
110
-
111
-
112
-
113
-
114
-
115
-
116
-
117
-
118
-
119
-
120
-
121
-
122
-
123
-
124
-
125
-
126
-
127
-
128
-
129
-
130
-
131
-
132
-
133
-
134
-
135
-
136
-
137
-
138
-
139
-
140
-
141
-
142
-
143
-
144
-
145
-
146
-
147
-
148
-
149
-
150
-
151
-
152
-
153
-
154
-
155
-
156
 |
 |
