Lexmark 260dn User's Guide - Page 69
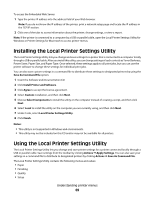
Installing the Local Printer Settings Utility, Using the Local Printer Settings Utility
 |
UPC - 734646056960
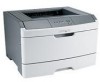
View all Lexmark 260dn manuals
Add to My Manuals
Save this manual to your list of manuals |
Page 69 highlights
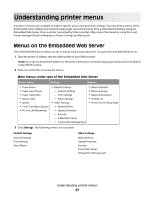
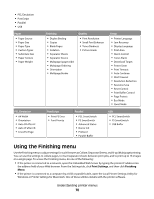
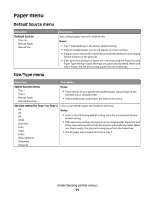
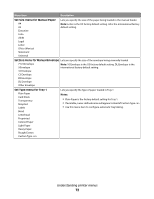
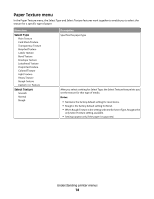
To access the Embedded Web Server: 1 Type the printer IP address into the address field of your Web browser. Note: If you do not know the IP address of the printer, print a network setup page and locate the IP address in the TCP/IP section. 2 Click one of the tabs to access information about the printer, change settings, or view a report. Note: If the printer is connected to a computer by a USB or parallel cable, open the Local Printer Settings Utility for Windows or Printer Settings for Macintosh to access printer menus. Installing the Local Printer Settings Utility The Local Printer Settings Utility lets you change and save settings for a printer that is connected to a computer locally through a USB or parallel cable. After you install this utility, you can change settings of such controls as Toner Darkness, Power Saver, Paper Size, and Paper Type. Once selected, these settings apply to all print jobs, but you can use the printer software to change these settings for individual print jobs. You can also save custom settings in a command file to distribute these settings to designated printers by using the Save As Command File option. 1 Insert the Software and Documentation CD. 2 Click Install Printer and Software. 3 Click Agree to accept the license agreement. 4 Select Custom installation, and then click Next. 5 Choose Select Components to install the utility on the computer instead of creating a script, and then click Next. 6 Select Local to install the utility on the computer you are currently using, and then click Next. 7 Under Tools, select Local Printer Settings Utility. 8 Click Finish. Notes: • This utility is not supported in Windows x64 environments. • This utility may not be included on this CD and/or may not be available for all printers. Using the Local Printer Settings Utility The Local Printer Settings Utility lets you change and save printer settings for a printer connected locally through a USB or parallel cable. Save settings from the toolbar by clicking Actions Œ Apply Settings. You can also save your settings in a command file to distribute to designated printers by clicking Actions Œ Save As Command File. The Local Printer Settings Utility contains the following menus and values: • Paper • Finishing • Quality • Setup Understanding printer menus 69
-
 1
1 -
2
-
3
-
4
-
5
-
6
-
7
-
8
-
9
-
10
-
11
-
12
-
13
-
14
-
15
-
16
-
17
-
18
-
19
-
20
-
21
-
22
-
23
-
24
-
25
-
26
-
27
-
28
-
29
-
30
-
31
-
32
-
33
-
34
-
35
-
36
-
37
-
38
-
39
-
40
-
41
-
42
-
43
-
44
-
45
-
46
-
47
-
48
-
49
-
50
-
51
-
52
-
53
-
54
-
55
-
56
-
57
-
58
-
59
-
60
-
61
-
62
-
63
-
 64
64 -
 65
65 -
 66
66 -
 67
67 -
 68
68 -
 69
69 -
 70
70 -
 71
71 -
 72
72 -
 73
73 -
 74
74 -
75
-
76
-
77
-
78
-
79
-
80
-
81
-
82
-
83
-
84
-
85
-
86
-
87
-
88
-
89
-
90
-
91
-
92
-
93
-
94
-
95
-
96
-
97
-
98
-
99
-
100
-
101
-
102
-
103
-
104
-
105
-
106
-
107
-
108
-
109
-
110
-
111
-
112
-
113
-
114
-
115
-
116
-
117
-
118
-
119
-
120
-
121
-
122
-
123
-
124
-
125
-
126
-
127
-
128
-
129
-
130
-
131
-
132
-
133
-
134
-
135
-
136
-
137
-
138
-
139
-
140
-
141
-
142
-
143
-
144
-
145
-
146
-
147
-
148
-
149
-
150
-
151
-
152
-
153
-
154
-
155
-
156
 |
 |