Lexmark Pro205 User Guide - Page 119
Printer is printing blank s, Maintenance - printhead replacement
 |
UPC - 734646275675
View all Lexmark Pro205 manuals
Add to My Manuals
Save this manual to your list of manuals |
Page 119 highlights
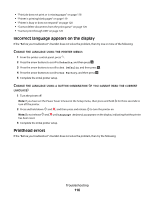
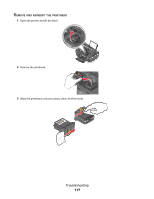
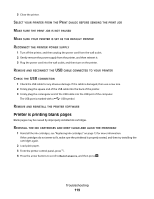
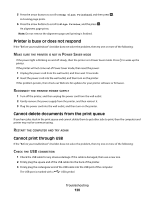
3 Close the printer. SELECT YOUR PRINTER FROM THE PRINT DIALOG BEFORE SENDING THE PRINT JOB MAKE SURE THE PRINT JOB IS NOT PAUSED MAKE SURE YOUR PRINTER IS SET AS THE DEFAULT PRINTER RECONNECT THE PRINTER POWER SUPPLY 1 Turn off the printer, and then unplug the power cord from the wall outlet. 2 Gently remove the power supply from the printer, and then reinsert it. 3 Plug the power cord into the wall outlet, and then turn on the printer. REMOVE AND RECONNECT THE USB CABLE CONNECTED TO YOUR PRINTER CHECK THE USB CONNECTION 1 Check the USB cable for any obvious damage. If the cable is damaged, then use a new one. 2 Firmly plug the square end of the USB cable into the back of the printer. 3 Firmly plug the rectangular end of the USB cable into the USB port of the computer. The USB port is marked with a USB symbol. REMOVE AND REINSTALL THE PRINTER SOFTWARE Printer is printing blank pages Blank pages may be caused by improperly installed ink cartridges. REINSTALL THE INK CARTRIDGES AND DEEP CLEAN AND ALIGN THE PRINTHEAD 1 Reinstall the ink cartridges, see "Replacing ink cartridges" on page 13 for more information. If the cartridges do not seem to fit, make sure the printhead is properly seated, and then try installing the cartridges again. 2 Load plain paper. 3 From the printer control panel, press . 4 Press the arrow buttons to scroll to Maintenance, and then press . Troubleshooting 119
-
 1
1 -
2
-
3
-
4
-
5
-
6
-
7
-
8
-
9
-
10
-
11
-
12
-
13
-
14
-
15
-
16
-
17
-
18
-
19
-
20
-
21
-
22
-
23
-
24
-
25
-
26
-
27
-
28
-
29
-
30
-
31
-
32
-
33
-
34
-
35
-
36
-
37
-
38
-
39
-
40
-
41
-
42
-
43
-
44
-
45
-
46
-
47
-
48
-
49
-
50
-
51
-
52
-
53
-
54
-
55
-
56
-
57
-
58
-
59
-
60
-
61
-
62
-
63
-
64
-
65
-
66
-
67
-
68
-
69
-
70
-
71
-
72
-
73
-
74
-
75
-
76
-
77
-
78
-
79
-
80
-
81
-
82
-
83
-
84
-
85
-
86
-
87
-
88
-
89
-
90
-
91
-
92
-
93
-
94
-
95
-
96
-
97
-
98
-
99
-
100
-
101
-
102
-
103
-
104
-
105
-
106
-
107
-
108
-
109
-
110
-
111
-
112
-
113
-
 114
114 -
 115
115 -
 116
116 -
 117
117 -
 118
118 -
 119
119 -
 120
120 -
 121
121 -
 122
122 -
 123
123 -
 124
124 -
125
-
126
-
127
-
128
-
129
-
130
-
131
-
132
-
133
-
134
-
135
-
136
-
137
-
138
-
139
-
140
-
141
-
142
-
143
-
144
-
145
-
146
-
147
-
148
-
149
-
150
-
151
-
152
-
153
-
154
-
155
-
156
-
157
-
158
-
159
-
160
-
161
-
162
-
163
-
164
-
165
-
166
-
167
-
168
-
169
-
170
-
171
-
172
-
173
-
174
-
175
-
176
-
177
 |
 |