Lexmark Pro205 User Guide - Page 148
Start, Enter, Utilities, Network Utility, COMPUTER, COMMUNICATE, PRINTER, ON WIRELESS, ACCESS
 |
UPC - 734646275675
View all Lexmark Pro205 manuals
Add to My Manuals
Save this manual to your list of manuals |
Page 148 highlights
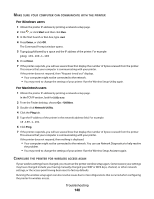
MAKE SURE YOUR COMPUTER CAN COMMUNICATE WITH THE PRINTER For Windows users 1 Obtain the printer IP address by printing a network setup page. 2 Click , or click Start and then click Run. 3 In the Start Search or Run box, type cmd. 4 Press Enter, or click OK. The Command Prompt window opens. 5 Type ping followed by a space and the IP address of the printer. For example: ping 192.168.1.100 6 Press Enter. 7 If the printer responds, you will see several lines that display the number of bytes received from the printer. This ensures that your computer is communicating with your printer. If the printer does not respond, then "Request timed out" displays. • Your computer might not be connected to the network. • You may need to change the settings of your printer. Run the Wireless Setup Utility again. For Macintosh users 1 Obtain the printer IP address by printing a network setup page. In the TCP/IP section, look for Address. 2 From the Finder desktop, choose Go > Utilities. 3 Double-click Network Utility. 4 Click the Ping tab. 5 Type the IP address of the printer in the network address field. For example: 10.168.1.101 6 Click Ping. 7 If the printer responds, you will see several lines that display the number of bytes received from the printer. This ensures that your computer is communicating with your printer. If the printer does not respond, then nothing is displayed. • Your computer might not be connected to the network. You can use Network Diagnostics to help resolve the problem. • You may need to change the settings of your printer. Run the Wireless Setup Assistant again. CONFIGURE THE PRINTER FOR WIRELESS ACCESS AGAIN If your wireless settings have changed, you must run the printer wireless setup again. Some reasons your settings may have changed include your having manually changed your WEP or WPA keys, channel, or other network settings; or the access point having been reset to factory defaults. Running the wireless setup again can also resolve issues due to misconfigurations that occurred when configuring the printer for wireless access. Troubleshooting 148
-
 1
1 -
2
-
3
-
4
-
5
-
6
-
7
-
8
-
9
-
10
-
11
-
12
-
13
-
14
-
15
-
16
-
17
-
18
-
19
-
20
-
21
-
22
-
23
-
24
-
25
-
26
-
27
-
28
-
29
-
30
-
31
-
32
-
33
-
34
-
35
-
36
-
37
-
38
-
39
-
40
-
41
-
42
-
43
-
44
-
45
-
46
-
47
-
48
-
49
-
50
-
51
-
52
-
53
-
54
-
55
-
56
-
57
-
58
-
59
-
60
-
61
-
62
-
63
-
64
-
65
-
66
-
67
-
68
-
69
-
70
-
71
-
72
-
73
-
74
-
75
-
76
-
77
-
78
-
79
-
80
-
81
-
82
-
83
-
84
-
85
-
86
-
87
-
88
-
89
-
90
-
91
-
92
-
93
-
94
-
95
-
96
-
97
-
98
-
99
-
100
-
101
-
102
-
103
-
104
-
105
-
106
-
107
-
108
-
109
-
110
-
111
-
112
-
113
-
114
-
115
-
116
-
117
-
118
-
119
-
120
-
121
-
122
-
123
-
124
-
125
-
126
-
127
-
128
-
129
-
130
-
131
-
132
-
133
-
134
-
135
-
136
-
137
-
138
-
139
-
140
-
141
-
142
-
 143
143 -
 144
144 -
 145
145 -
 146
146 -
 147
147 -
 148
148 -
 149
149 -
 150
150 -
 151
151 -
 152
152 -
 153
153 -
154
-
155
-
156
-
157
-
158
-
159
-
160
-
161
-
162
-
163
-
164
-
165
-
166
-
167
-
168
-
169
-
170
-
171
-
172
-
173
-
174
-
175
-
176
-
177
 |
 |