Lexmark Pro205 User Guide - Page 127
Partial copies or scans of documents or photos, Scan was not successful, Scanning takes too long or - reviews
 |
UPC - 734646275675
View all Lexmark Pro205 manuals
Add to My Manuals
Save this manual to your list of manuals |
Page 127 highlights
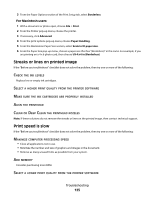
ADJUST THE SCAN QUALITY FROM THE PRINTER SOFTWARE REVIEW THE TIPS FOR COPYING, SCANNING, AND IMPROVING PRINT QUALITY USE A CLEARER VERSION OF THE ORIGINAL DOCUMENT OR IMAGE MAKE SURE THE DOCUMENT OR PHOTO IS LOADED FACEDOWN ON THE SCANNER GLASS AND IN THE CORRECT CORNER Partial copies or scans of documents or photos If the "Before you troubleshoot" checklist does not solve the problem, then try one or more of the following: MAKE SURE THE DOCUMENT OR PHOTO IS LOADED FACEDOWN ON THE SCANNER GLASS AND IN THE CORRECT CORNER SELECT A PAPER SIZE FROM THE PRINTER SOFTWARE THAT MATCHES THE LOADED PAPER MAKE SURE THE ORIGINAL SIZE SETTING MATCHES THE SIZE OF THE DOCUMENT YOU ARE SCANNING Scan was not successful If the "Before you troubleshoot" checklist does not solve the problem, then try one or more of the following: CHECK THE USB CONNECTION 1 Check the USB cable for any obvious damage. If the cable is damaged, then use a new one. 2 Firmly plug the square end of the USB cable into the back of the printer. 3 Firmly plug the rectangular end of the USB cable into the USB port of the computer. The USB port is marked with a USB symbol. RESTART THE COMPUTER Scanning takes too long or freezes the computer If the "Before you troubleshoot" checklist does not solve the problem, then try one or more of the following: CLOSE OTHER SOFTWARE PROGRAMS THAT ARE NOT BEING USED USE A LOWER SCANNING RESOLUTION Troubleshooting 127
-
 1
1 -
2
-
3
-
4
-
5
-
6
-
7
-
8
-
9
-
10
-
11
-
12
-
13
-
14
-
15
-
16
-
17
-
18
-
19
-
20
-
21
-
22
-
23
-
24
-
25
-
26
-
27
-
28
-
29
-
30
-
31
-
32
-
33
-
34
-
35
-
36
-
37
-
38
-
39
-
40
-
41
-
42
-
43
-
44
-
45
-
46
-
47
-
48
-
49
-
50
-
51
-
52
-
53
-
54
-
55
-
56
-
57
-
58
-
59
-
60
-
61
-
62
-
63
-
64
-
65
-
66
-
67
-
68
-
69
-
70
-
71
-
72
-
73
-
74
-
75
-
76
-
77
-
78
-
79
-
80
-
81
-
82
-
83
-
84
-
85
-
86
-
87
-
88
-
89
-
90
-
91
-
92
-
93
-
94
-
95
-
96
-
97
-
98
-
99
-
100
-
101
-
102
-
103
-
104
-
105
-
106
-
107
-
108
-
109
-
110
-
111
-
112
-
113
-
114
-
115
-
116
-
117
-
118
-
119
-
120
-
121
-
 122
122 -
 123
123 -
 124
124 -
 125
125 -
 126
126 -
 127
127 -
 128
128 -
 129
129 -
 130
130 -
 131
131 -
 132
132 -
133
-
134
-
135
-
136
-
137
-
138
-
139
-
140
-
141
-
142
-
143
-
144
-
145
-
146
-
147
-
148
-
149
-
150
-
151
-
152
-
153
-
154
-
155
-
156
-
157
-
158
-
159
-
160
-
161
-
162
-
163
-
164
-
165
-
166
-
167
-
168
-
169
-
170
-
171
-
172
-
173
-
174
-
175
-
176
-
177
 |
 |