Linksys EPSX3 User Guide - Page 12
Device Information, Status, Enter, Configuration, System, Error - firmware
 |
UPC - 745883548255
View all Linksys EPSX3 manuals
Add to My Manuals
Save this manual to your list of manuals |
Page 12 highlights
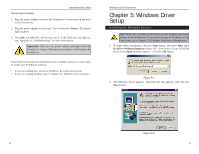
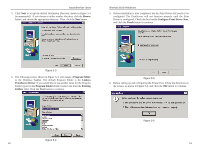
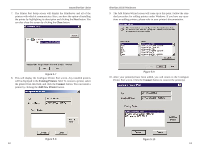
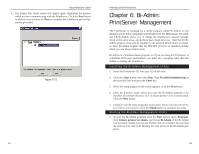
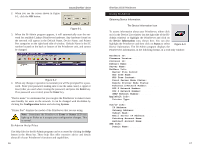
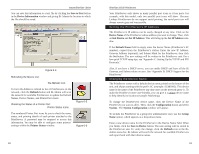
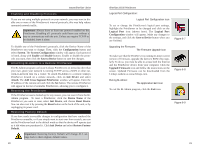
2. When you see the screen shown in Figure 6-1, click the OK button. Instant EtherFast® Series Figure 6-1 3. When the Bi-Admin program appears, it will automatically scan the network for available Linksys PrintServer hardware. Any hardware found on the network will appear in the Default Name, Device Name, and Printer Port categories on the right hand side of window. Default Name is the SC number located on the back or bottom of the PrintServer unit, and cannot be changed. Figure 6-2 4. When any change or operation is executed, you will be prompted for a pass- word. Enter your password, making sure to use the same case (i.e. upper or lower) that you used when creating the password, and press the Enter key. If no password was created, press the Enter key. "Device name" is a nickname that you can give the PrintServer to make it more user-friendly for users on the network. It can be changed with Bi-Admin by clicking the Configuration button and selecting System. "Printer Port" displays the model of the PrintServer that you are using. Note: Sometimes the PrintServer's Error or Status LED may light up or flicker as it accepts your configuration changes. This is normal. Bi-Admin Help Files The Help files for the Bi-Admin program can be accessed by clicking the Help button in the Menu bar. These help files offer extensive advice and details about all of your PrintServer's functions and capabilities. 16 EtherFast 10/100 PrintServers UUssiinngg BBii--AAddmmiinn Obtaining Device Information: The Device Information Icon To access information about your PrintServer, either click on it in the Device List window (on the right side of the BiAdmin window) or highlight the PrintServer and click on the Device Information icon, shown here. You can also highlight the PrintServer and then click on Status to select Figure 6-3 Device Information. The Bi-Admin program displays the PrintServer's information, in the following format, in a read-only window: Hardware ID: 0620103428 Firmware Version: 6010 Protocol ID: 005F Default Name: SCA71107 Server Name: SCA71107 NetWare Info: Master File Server: NDS Tree Name: NDS Tree Context: Print Server Mode Status: Remote Printer Mode Status: N/A Ethernet || Network Number: DD319022 802.2 Network Number: 02000100 802.3 Network Number: DD319023 SNAP Network Number: AA0000AA AppleTalk Info: Printer Type: SCA71107:LaserWriter TCP/IP Info: IP Address: 192.168.1.78 Gateway Address: 192.168.1.254 Subnet Mask: 255.255.255.0 Email Server IP Address: 0.0.0.0 Printing Account Name: N/A Redirect Account Name: N/A SMB Info: Domain Name: WORKGROUP 17
-
 1
1 -
2
-
3
-
4
-
5
-
6
-
 7
7 -
 8
8 -
 9
9 -
 10
10 -
 11
11 -
 12
12 -
 13
13 -
 14
14 -
 15
15 -
 16
16 -
 17
17 -
18
-
19
-
20
-
21
-
22
-
23
-
24
-
25
-
26
-
27
-
28
-
29
-
30
-
31
-
32
-
33
-
34
-
35
-
36
-
37
-
38
-
39
-
40
 |
 |
