Linksys WRT54GX2 User Guide - Page 45
The Status Tab - Router, Router Information, Internet Connection - firmware update
 |
UPC - 745883566570
View all Linksys WRT54GX2 manuals
Add to My Manuals
Save this manual to your list of manuals |
Page 45 highlights
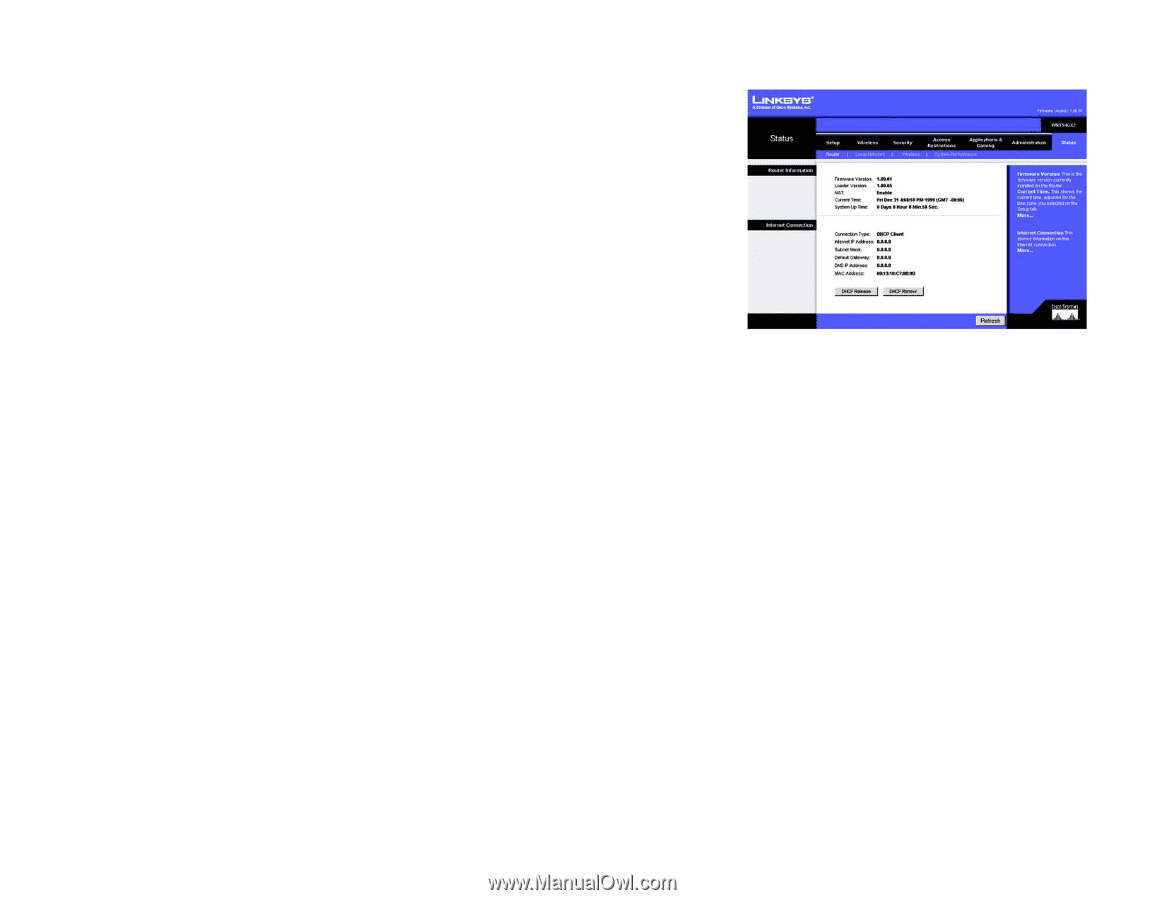
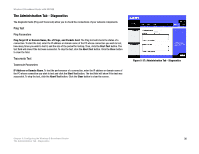
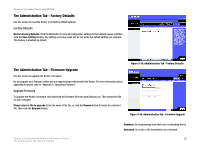
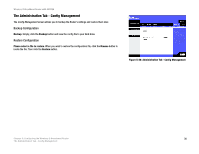
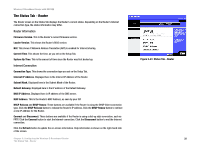
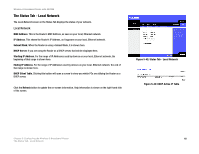
Wireless-G Broadband Router with SRX200 The Status Tab - Router The Router screen on the Status Tab displays the Router's current status. Depending on the Router's Internet connection type, the status information may differ. Router Information Firmware Version. This is the Router's current firmware version. Loader Version. This shows the Router's BIOS version. NAT. This shows if Network Address Translation (NAT) is enabled for Internet sharing. Current Time. This shows the time, as you set on the Setup Tab. System Up Time. This is the amount of time since the Router was first booted up. Internet Connection Connection Type. This shows the connection type you set on the Setup Tab. Internet IP Address. Displayed here is the Internet IP Address of the Router. Subnet Mask. Displayed here is the Subnet Mask of the Router. Default Gateway. Displayed here is the IP address of the Default Gateway. DNS IP Address. Displayed here is IP address of the DNS server. MAC Address. This is the Router's MAC Address, as seen by your ISP. DHCP Release and DHCP Renew. These buttons are available if the Router is using the DHCP Client connection type. Click the DHCP Release button to release the Router's IP address. Click the DHCP Renew button to retrieve a new IP address for the Router. Connect and Disconnect. These buttons are available if the Router is using a dial-up style connection, such as PPTP. Click the Connect button to start the Internet connection. Click the Disconnect button to end the Internet connection. Click the Refresh button to update the on-screen information. Help information is shown on the right-hand side of the screen. Chapter 5: Configuring the Wireless-G Broadband Router The Status Tab - Router Figure 5-41: Status Tab - Router 39
-
 1
1 -
2
-
3
-
4
-
5
-
6
-
7
-
8
-
9
-
10
-
11
-
12
-
13
-
14
-
15
-
16
-
17
-
18
-
19
-
20
-
21
-
22
-
23
-
24
-
25
-
26
-
27
-
28
-
29
-
30
-
31
-
32
-
33
-
34
-
35
-
36
-
37
-
38
-
39
-
 40
40 -
 41
41 -
 42
42 -
 43
43 -
 44
44 -
 45
45 -
 46
46 -
 47
47 -
 48
48 -
 49
49 -
 50
50 -
51
-
52
-
53
-
54
-
55
-
56
-
57
-
58
-
59
-
60
-
61
-
62
-
63
-
64
-
65
-
66
-
67
-
68
-
69
-
70
-
71
-
72
-
73
-
74
-
75
-
76
-
77
-
78
-
79
-
80
-
81
-
82
-
83
-
84
-
85
 |
 |