Lowrance HOOK Reveal 9 TripleShot HOOK Reveal Series Operator Manual - Page 60
Recording SideScan data, Setting up the SideScan image, Custom options, Range, Auto range
 |
View all Lowrance HOOK Reveal 9 TripleShot manuals
Add to My Manuals
Save this manual to your list of manuals |
Page 60 highlights
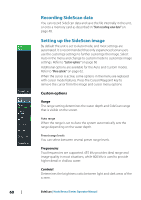
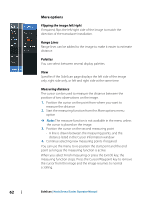
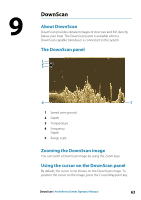
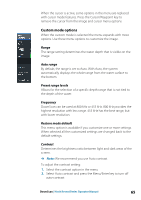
Recording SideScan data You can record SideScan data and save the file internally in the unit, or onto a memory card as described in "Start recording sonar data" on page 48. Setting up the SideScan image By default the unit is set to Auto mode, and most settings are automated. It is recommended that only experienced sonar users use the customize settings to further customize the image. Select Auto in the menu and change to custom mode to customize image settings. Refer to "Custom options" on page 60 Additional options are available for the Auto and Custom modes. Refer to "More options" on page 62. When the cursor is active, some options in the menu are replaced with cursor mode features. Press the Cursor/Waypoint key to remove the cursor from the image and cursor menu options. Custom options Range The range setting determines the water depth and SideScan range that is visible on the screen. Auto range When the range is set to Auto the system automatically sets the range depending on the water depth. Preset range levels You can select between several preset range levels. Frequencies Two frequencies are supported. 455 kHz provides ideal range and image quality in most situations, while 800 kHz is used to provide higher detail in shallow water. Contrast Determines the brightness ratio between light and dark areas of the screen. 60 SideScan | Hook Reveal Series Operator Manual
-
 1
1 -
2
-
3
-
4
-
5
-
6
-
7
-
8
-
9
-
10
-
11
-
12
-
13
-
14
-
15
-
16
-
17
-
18
-
19
-
20
-
21
-
22
-
23
-
24
-
25
-
26
-
27
-
28
-
29
-
30
-
31
-
32
-
33
-
34
-
35
-
36
-
37
-
38
-
39
-
40
-
41
-
42
-
43
-
44
-
45
-
46
-
47
-
48
-
49
-
50
-
51
-
52
-
53
-
54
-
 55
55 -
 56
56 -
 57
57 -
 58
58 -
 59
59 -
 60
60 -
 61
61 -
 62
62 -
 63
63 -
 64
64 -
 65
65 -
66
-
67
-
68
-
69
-
70
-
71
-
72
-
73
-
74
-
75
-
76
-
77
-
78
-
79
-
80
-
81
-
82
-
83
-
84
-
85
-
86
 |
 |
