Nokia 3361 User Guide - Page 25
files. When saving JPEG files, Nokia Image
 |
View all Nokia 3361 manuals
Add to My Manuals
Save this manual to your list of manuals |
Page 25 highlights
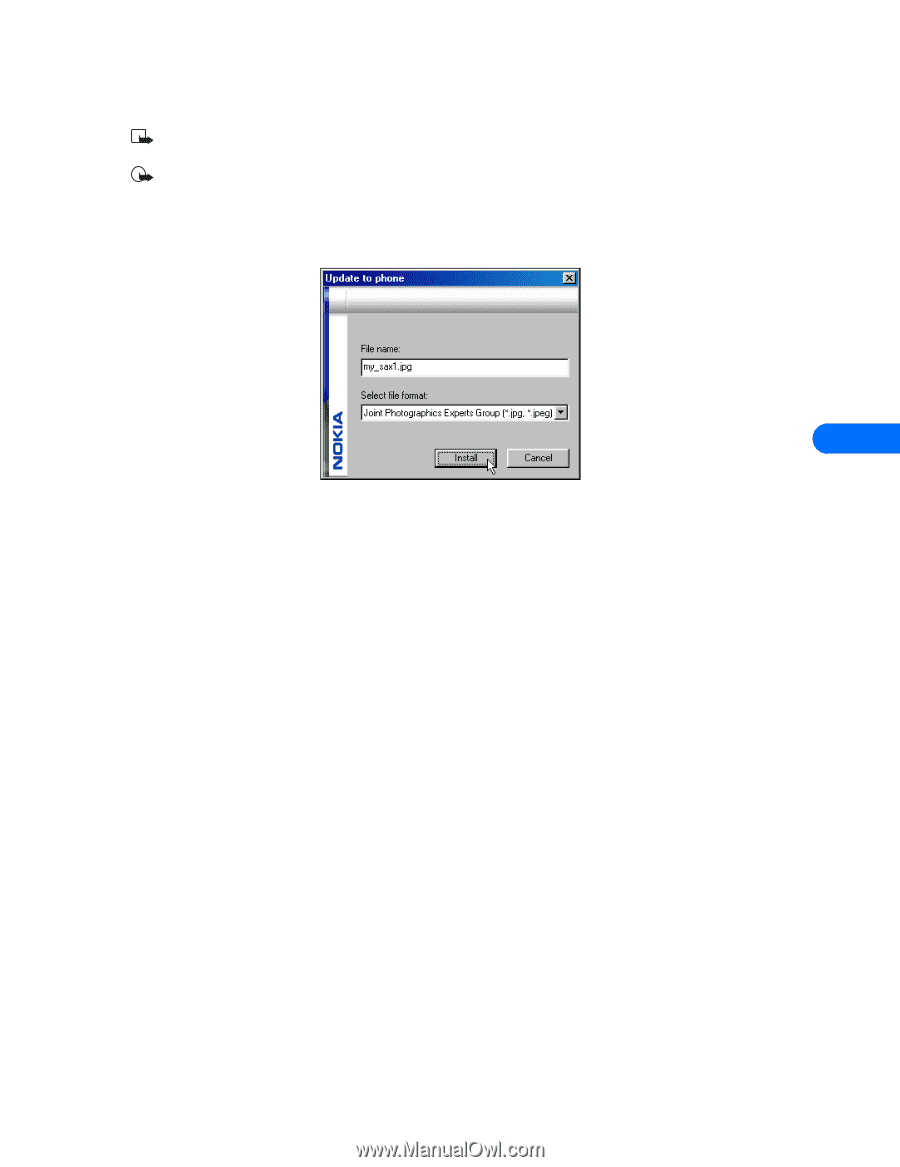
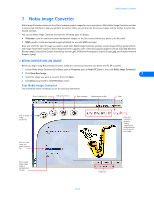
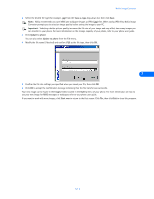
Nokia Image Converter 2 Select the desired file type (for example, .jpg) from the Save as type drop-down list, then click Save. Note: Nokia recommends you save MMS and wallpaper images as JPEG (.jpg) files. When saving JPEG files, Nokia Image Converter prompts you to select an image quality before saving the image to your PC. Important: Selecting a better picture quality increases the file size of your image and may affect how many images you can transfer to your phone. For more information on the storage capacity of your phone, refer to your phone user guide. 3 Click Update to phone. You can also select Update to phone from the File menu. 4 Modify the file name (if desired) and confirm JPEG as the file type, then click OK. 7 5 Confirm the file size settings you specified when you saved your file, then click OK. 6 Click OK to accept the confirmation message indicating that the file transfer was successful. Your new image can be found in the Images folder, located in the Gallery menu of your phone. For more information on how to use your new image for MMS messages or wallpaper, refer to your phone user guide. If you want to work with more images, click Start over to return to the first screen. Click File, then click Exit to close this program. [ 21 ]
-
 1
1 -
2
-
3
-
4
-
5
-
6
-
7
-
8
-
9
-
10
-
11
-
12
-
13
-
14
-
15
-
16
-
17
-
18
-
19
-
 20
20 -
 21
21 -
 22
22 -
 23
23 -
 24
24 -
 25
25 -
 26
26 -
 27
27 -
 28
28 -
 29
29 -
 30
30 -
31
-
32
-
33
-
34
-
35
-
36
-
37
-
38
-
39
-
40
-
41
-
42
-
43
-
44
-
45
-
46
-
47
-
48
-
49
-
50
-
51
-
52
-
53
-
54
-
55
 |
 |