Oki 62435901 User Manual - Page 58
Local PC, USB Memory
 |
View all Oki 62435901 manuals
Add to My Manuals
Save this manual to your list of manuals |
Page 58 highlights
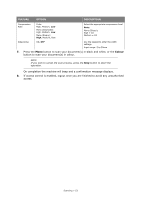
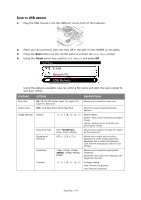
SCAN TO REMOTE PC NOTE By default the PC scan mode is set to simple. To enable Secure Scan Mode refer to "PC Scan Mode" on page 149. NOTE After Remote PC is selected, user action is performed at your PC (Pull Scan). NOTE The example below is relevant to a machine being connected via USB. > The instructions below use PaperPort® 11 SE (supplied with your machine) as an example. If you use an alternative application, the instructions and user interface will differ. > Only the basic instructions are included here; for full instructions on how to use PaperPort® 11 SE, refer to the documentation that accompanies the utility. The following example is based on your printer being connected via USB. 1. At the MFP: Place your document(s) with text face UP in the ADF or face DOWN on the glass. 2. Press the Scan button on the control panel to prompt the Scan Menu screen. 3. Using the Down arrow key, scroll to Remote PC and press OK. Scan Menu USB Memory Local PC Remote PC 4. At your PC: Start your scanning application. 5. Select the File menu and choose Scan or Get Photo. A dialogue box with a list of scanning sources displays. 6. Select TWAIN: OKI MC361_561 Twain. You need to select the source only once, unless you want to choose another scanner. 7. Select a profile. Choose from: (a) B&W Document. (b) Grayscale Document. (c) Color Document. (d) Color Photograph. Scanning > 58
-
 1
1 -
2
-
3
-
4
-
5
-
6
-
7
-
8
-
9
-
10
-
11
-
12
-
13
-
14
-
15
-
16
-
17
-
18
-
19
-
20
-
21
-
22
-
23
-
24
-
25
-
26
-
27
-
28
-
29
-
30
-
31
-
32
-
33
-
34
-
35
-
36
-
37
-
38
-
39
-
40
-
41
-
42
-
43
-
44
-
45
-
46
-
47
-
48
-
49
-
50
-
51
-
52
-
 53
53 -
 54
54 -
 55
55 -
 56
56 -
 57
57 -
 58
58 -
 59
59 -
 60
60 -
 61
61 -
 62
62 -
 63
63 -
64
-
65
-
66
-
67
-
68
-
69
-
70
-
71
-
72
-
73
-
74
-
75
-
76
-
77
-
78
-
79
-
80
-
81
-
82
-
83
-
84
-
85
-
86
-
87
-
88
-
89
-
90
-
91
-
92
-
93
-
94
-
95
-
96
-
97
-
98
-
99
-
100
-
101
-
102
-
103
-
104
-
105
-
106
-
107
-
108
-
109
-
110
-
111
-
112
-
113
-
114
-
115
-
116
-
117
-
118
-
119
-
120
-
121
-
122
-
123
-
124
-
125
-
126
-
127
-
128
-
129
-
130
-
131
-
132
-
133
-
134
-
135
-
136
-
137
-
138
-
139
-
140
-
141
-
142
-
143
-
144
-
145
-
146
-
147
-
148
-
149
-
150
-
151
-
152
-
153
-
154
-
155
-
156
-
157
-
158
-
159
-
160
-
161
-
162
-
163
-
164
-
165
-
166
 |
 |
