Onkyo TX-NR747 User Manual - Page 66
Advanced Settings (Setup Menu), How to Set, Operation, Overview of the Setup menu
 |
View all Onkyo TX-NR747 manuals
Add to My Manuals
Save this manual to your list of manuals |
Page 66 highlights
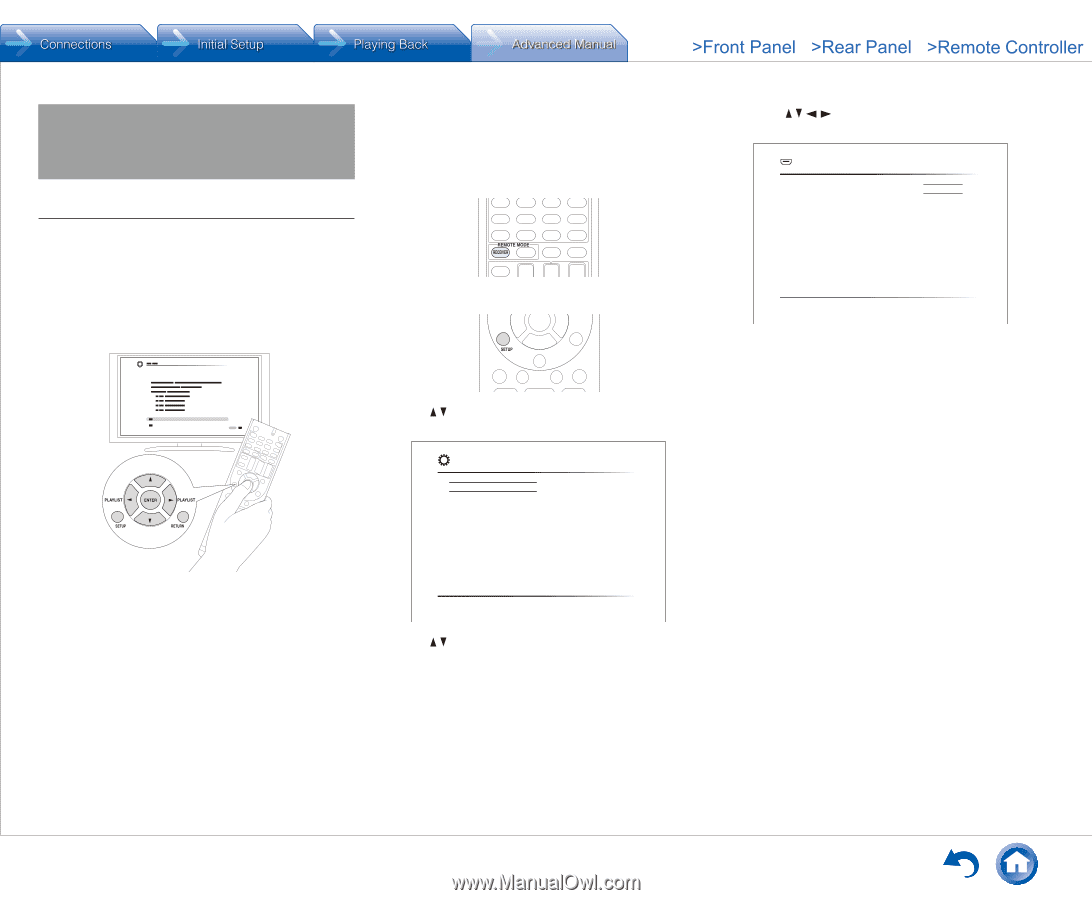
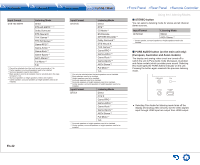
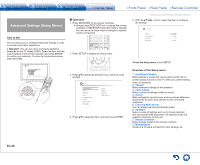
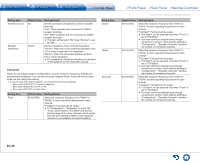
Advanced Settings (Setup Menu) How to Set The unit allows you to configure advanced settings in order to provide even better experience. ● Operation: You can set up by viewing the guidance displayed on the TV screen (OSD). Select the item with the cursor buttons of the remote controller and press ENTER to confirm your selection. To return to the previous screen, press RETURN. „„Operation 1. Press RECEIVER on the remote controller. ●● Always press RECEIVER first to change the remote controller to RECEIVER mode (the mode to operate this unit) since its mode may be changed to operate another component. 2. Press SETUP to display the Setup menu. Advanced Settings (Setup Menu) 5. With the / / / cursors, select the item to configure the settings. 1-1. TV Out HDMI Out OSD Language Impose OSD Screen Saver MAIN English On 3 minutes To exit the setup menu, press SETUP. 3. Press / to select the desired menu, and then press ENTER. Setup 1. Input/Output Assign 2. Speaker 3. Audio Adjust 4. Source 5. Listening Mode Preset 6. Hardware 7. Remote Controller 8. Miscellaneous 1. TV Out 2.HDMI Input 3. Video Input 4. Digital Audio Input 4. Press / to select the item, and then press ENTER. Overview of the Setup menu 1. Input/Output Assign Make settings to assign the various jacks and for the on- screen display function on the TV when you use the setting menu, for example. 2. Speaker Make advanced settings for the speakers. 3. Audio Adjust Make a variety of settings related to sound. 4. Source Make settings for input sources, such as volume difference adjustments for each input selector for the connected equipment. 5. Listening Mode Preset You can preset your favorite listening mode. 6. Hardware Make a variety of settings such as for linked operation with connected HDMI equipment, the standby mode and network connection for this unit. 7. Remote Controller Make settings related to the remote controller. 8. Miscellaneous Update the firmware and perform initial settings, etc. En-34
-
 1
1 -
2
-
3
-
4
-
5
-
6
-
7
-
8
-
9
-
10
-
11
-
12
-
13
-
14
-
15
-
16
-
17
-
18
-
19
-
20
-
21
-
22
-
23
-
24
-
25
-
26
-
27
-
28
-
29
-
30
-
31
-
32
-
33
-
34
-
35
-
36
-
37
-
38
-
39
-
40
-
41
-
42
-
43
-
44
-
45
-
46
-
47
-
48
-
49
-
50
-
51
-
52
-
53
-
54
-
55
-
56
-
57
-
58
-
59
-
60
-
 61
61 -
 62
62 -
 63
63 -
 64
64 -
 65
65 -
 66
66 -
 67
67 -
 68
68 -
 69
69 -
 70
70 -
 71
71 -
72
-
73
-
74
-
75
-
76
-
77
-
78
-
79
-
80
-
81
-
82
-
83
-
84
-
85
-
86
-
87
-
88
-
89
-
90
-
91
-
92
-
93
-
94
-
95
-
96
-
97
-
98
-
99
-
100
-
101
-
102
-
103
-
104
-
105
-
106
-
107
-
108
-
109
-
110
-
111
-
112
-
113
-
114
-
115
-
116
-
117
-
118
-
119
-
120
-
121
-
122
-
123
-
124
-
125
-
126
-
127
-
128
-
129
-
130
-
131
-
132
-
133
 |
 |