Optoma EH319UST User manual - Page 13
Installing the mount
 |
View all Optoma EH319UST manuals
Add to My Manuals
Save this manual to your list of manuals |
Page 13 highlights
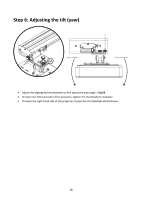
Installing the mount Step 1: Attach the wall plate to the wall For ease of installation mount the bracket on the wall using position 1 and mark other positions using a spirit level. Remove bracket and drill other positions Use fixings suitable for your type of wall construction Use all available fixing points If in any doubt of the suitability of the wall, it's construction or what type of fixings to use, consult a qualified builder or installer Note: Remove wall plate cover before attaching to wall. Retain fixings for re-attaching cover later. 13
-
 1
1 -
2
-
3
-
4
-
5
-
6
-
7
-
 8
8 -
 9
9 -
 10
10 -
 11
11 -
 12
12 -
 13
13 -
 14
14 -
 15
15 -
 16
16 -
 17
17 -
 18
18 -
19
-
20
-
21
-
22
-
23
-
24
-
25
-
26
-
27
-
28
-
29
-
30
-
31
-
32
-
33
-
34
-
35
-
36
-
37
-
38
-
39
-
40
-
41
-
42
 |
 |

13
Installing the mount
Step 1: Attach the wall plate to the wall
For ease of installation mount the bracket on the wall using position
1
and mark other
positions using a spirit level.
Remove bracket and drill other positions
Use fixings suitable for your type of wall construction
Use all available fixing points
If in any doubt of the suitab
ility of the wall, it’s construction or what type of fixings to use,
consult a qualified builder or installer
Note:
Remove wall plate cover before attaching to wall. Retain fixings for re-attaching cover later.