Panasonic PT-LB90NTEA User Manual
Panasonic PT-LB90NTEA Manual
 |
View all Panasonic PT-LB90NTEA manuals
Add to My Manuals
Save this manual to your list of manuals |
Panasonic PT-LB90NTEA manual content summary:
- Panasonic PT-LB90NTEA | User Manual - Page 1
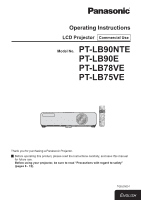
Operating Instructions LCD Projector Commercial Use Model No. PT-LB90NTE PT-LB90E PT-LB78VE PT-LB75VE Thank you for purchasing a Panasonic Projector. JJ Before operating this product, please read the instructions carefully, and save this manual for future use. Before using your projector, be sure to - Panasonic PT-LB90NTEA | User Manual - Page 2
Panasonic LCD projector. The serial number of your product may be found on its bottom. You should note it in the space provided below and retain this booklet in case service is required. Model number: PT-LB90NTE/PT-LB90E/PT-LB78VE/PT follow the attached installation instructions, which includes using - Panasonic PT-LB90NTEA | User Manual - Page 3
products and batteries, please contact your local municipality, your waste disposal service or the point of sale where you purchased the items. Penalties may of this waste, in accordance with national legislation. For business users in the European Union If you wish to discard electrical and - Panasonic PT-LB90NTEA | User Manual - Page 4
a copy of the original DoC for this product from our DoC server: http://www.doc.panasonic.de Contact in the EU: Panasonic Services Europe, a Division of Panasonic Marketing Europe GmbH, Panasonic Testing Centre, Winsbergring 15, 22525 Hamburg, F.R.Germany This product is intended to be used in - Panasonic PT-LB90NTEA | User Manual - Page 5
Important Information Important Safety Notice ENGLISH - 5 - Panasonic PT-LB90NTEA | User Manual - Page 6
User logo display power is highly reduced from the previous model. Approx. 4.0 W (PT-LB80NTE) Approx. 0.9 W (PT-LB90NTE) (Standby mode: In "ECO") Contents Accessories 12 Preparation Read this first 13 About Your Projector 14 Projector body 14 Remote control 16 JJQuick steps For details, - Panasonic PT-LB90NTEA | User Manual - Page 7
DEVICE SETUP 46 NETWORK menu (PT-LB90NTE only 47 Maintenance LAMP and TEMP Indicators 48 Managing the indicated problems 48 Care and Replacement 49 Before Care and Replacement 49 Cleaning the projector 49 Replacing the Lamp unit 50 Troubleshooting 53 Appendix Technical Information 54 List - Panasonic PT-LB90NTEA | User Manual - Page 8
accessible when problems occur. If the followings problems occur, cut off the power supply immediately. Continued use of the projector in these objects on top of it or wrap it into a bundle. Ask an Authorised Service Centre to carry out any repairs to the mains lead that might be necessary. - Panasonic PT-LB90NTEA | User Manual - Page 9
projector. High voltages can cause fire or electric shocks. For any inspection, adjustment and repair work, please contact an Authorised Service Centre shocks or explosions can result if this is not done. zzWhen replacing the lamp, allow it to cool for at least one hour before handling it otherwise - Panasonic PT-LB90NTEA | User Manual - Page 10
than 2 700 m (8 858 ft) above sea level. If using this projector at high elevations 1 400 2 700 m (4 593 - 8 858 ft) above sea level, set the HIGH ALTITUDE MODE to ON. Failure to observe this will result in malfunctions or the lamp life or life of other components will be shortened. „„Be sure to ask - Panasonic PT-LB90NTEA | User Manual - Page 11
to vibration or impact. The service life of its internal components will be shortened. „„The projector has a high pressure mercury lamp that is characterised as follows: zzThe brightness of the lamp will decrease over time. zzThe lamp may explode or shorten the lamp life by shocks or chipping damage - Panasonic PT-LB90NTEA | User Manual - Page 12
accessories are provided with your projector. Remote control for PT-LB90NTE (×1) (N2QAYB000436) Remote control for PT-LB90E/LB78VE/ LB75VE (×1) control (×2) Carrying bag (×1) (TPEP021) CD-ROM (×1) (TXFQB02VKJ2) (PT-LB90NTE only) Note zzThe protectors for enclosed products, such as a plug cover - Panasonic PT-LB90NTEA | User Manual - Page 13
MENU. JJLANGUAGE Select the required language setting. (Æpage 37) 1111 Press buttons of the remote control or control panel on the projector to highlight the required language. JJINITIAL SETTING Select the required setting of INSTALLATION and HIGH ALTITUDE MODE. 1111 Press ▲▼buttons to select - Panasonic PT-LB90NTEA | User Manual - Page 14
Projector body JJTop and front view Control panel Adjuster button (Æpage 18) Zoom ring Adjust the projection size. (Æpage 25) Focus ring Adjust the focus. (Æpage 25) Remote control signal receptor Ambient Luminance Sensor (ALS) TEMP indicator Indicates the temperature status. (Æpage 48) LAMP - Panasonic PT-LB90NTEA | User Manual - Page 15
by Kensington, to protect your projector. Compatible with the Kensington MicroSaver Security System. Lamp unit compartment (Æpage 51) (Æpage 20) LAN Connect a network cable. (PT-LB90NTE only) (Æpage 56) SERIAL Connect a computer to control the projector operation. (Æpage 20, 55) S-VIDEO/VIDEO - Panasonic PT-LB90NTEA | User Manual - Page 16
to the factory default settings. (Æpage 27) The MULTI-LIVE button is only for PT-LB90NTE. (See CD-ROM contents.) Control to change the scale by means of digital malfunction under strong light such as fluorescent. zzYou can operate the projector with the remote control within the remote range of 15 m - Panasonic PT-LB90NTEA | User Manual - Page 17
shades or curtains to block the light and turn off the lamps. zzDo not use the projector at a raised or a horizontally tilted position. Doing so may cause malfunction of the projector. You can tilt the projector body approximately ±30 ° vertically and ±10 ° horizontally. Overtilting may result - Panasonic PT-LB90NTEA | User Manual - Page 18
and projecting from rear (Using translucent screen) Menu INSTALLATION Method REAR/DESK Menu INSTALLATION Method REAR/CEILING Remarks zzWhen mounting the projector in the ceiling, the optional ceiling mount bracket (ET-PKB80) is required. Front leg adjusters and throwing angle You can adjust - Panasonic PT-LB90NTEA | User Manual - Page 19
Connections Connections Before connecting to the projector zzRead and follow the operating instructions of each peripheral device. zzThe peripheral devices must be turned off. zzOne RGB cable is provided with the projector. If necessary, prepare commercial connecting cables that match with the - Panasonic PT-LB90NTEA | User Manual - Page 20
the CD-ROM contents provided . (PT-LB90NTE only) zzWhen you connect more than one computer, switch the computer connection manually. zzOne RGB cable is provided with the projector. If necessary, prepare commercial connecting cables that match with the projector and each peripheral device terminals - Panasonic PT-LB90NTEA | User Manual - Page 21
guide 4 ) Hold the plug and unplug the mains lead from the AC IN terminal on the back of the projector. JJDirect power off function You can switch off the electric power supply any time by unplugging the mains plug from the mains socket or by switching off the main power. The internal lamp - Panasonic PT-LB90NTEA | User Manual - Page 22
to NORMAL). The power is on and preparing for projection. The projector is projecting. No power supply and the internal fan is cooling the lamp by internal power supply. The power is switched on again while cooling the lamp and recovering to the projection mode. Recovery may take a while. Remarks - Panasonic PT-LB90NTEA | User Manual - Page 23
the mains lead is connected to a mains socket. (Æpage 41) zzIf the projector is switched on again while the internal cooling fan is still operating by the internal power supply, the display may flicker for the characteristics of the lamp. Those are normal and will not affect the performance of the - Panasonic PT-LB90NTEA | User Manual - Page 24
and return to the projection. 2222 Press the POWER button again. The lamp goes off, the operational sound (beep) sounds, and projection stops. zzThe installed. Remarks zzConfirm that CONTROL PANEL (when operating with the projector body) or REMOTE CONTROLLER (when operating with the remote control) - Panasonic PT-LB90NTEA | User Manual - Page 25
a connected DVD player, if SIGNAL SEARCH in the DISPLAY OPTION menu is set to ON, the input signal is detected and projected automatically when the projector is switched on. (Æpage 39) zzSet the INPUT GUIDE under the ON-SCREEN DISPLAY in the DISPLAY OPTION menu to DETAILED. If the - Panasonic PT-LB90NTEA | User Manual - Page 26
PT-LB90NTE projection and audio sound through the projector temporarily. Press button. Press the ENGLISH NETWORK Signal transmitted by "Wireless Manager" from computer through network VIDEO Signal input to VIDEO IN terminal If INPUT GUIDE under the ON-SCREEN DISPLAY in the DISPLAY OPTION - Panasonic PT-LB90NTEA | User Manual - Page 27
Remote control operation Setting up the image position automatically When a RGB signal is input, the projector adjusts the SHIFT, DOT CLOCK and CLOCK PHASE automatically. Press button. Projecting an image in INDEX-WINDOW mode You can project an image split in 2 - Panasonic PT-LB90NTEA | User Manual - Page 28
control panel or remote control for 3 seconds or more. QQWhen not using the FUNCTION button 1111 Select DISABLE in this menu (FUNCTION BUTTON in the PROJECTOR SETUP menu). 2222 Press the ENTER button. 3333 Select OK. 4444 Press the ENTER button. Remarks zzFor details, see "FUNCTION BUTTON" in the - Panasonic PT-LB90NTEA | User Manual - Page 29
item. PICTURE POSITION LANGUAGE DISPLAY OPTION PROJECTOR SETUP SECURITY NETWORK KEYSTONE SHIFT OVER lower level, the next level will be displayed. **** PT-LB90NTE only Remarks zzPress the MENU or RETURN button to DEFAULT button. Adjust each menu item manually. zzThe triangle mark under the bar - Panasonic PT-LB90NTEA | User Manual - Page 30
menu item and press ENTER to display the sub-menu. PICTURE POSITION LANGUAGE DISPLAY OPTION PROJECTOR SETUP SECURITY Sub-menu Select the required sub-menu item and press ENTER to display the values vary depending on the PICTURE MODE setting. NETWORK (PT-LB90NTE only) Settings 30 - ENGLISH - Panasonic PT-LB90NTEA | User Manual - Page 31
or deactive, depending on the input signal and the specific setting. JJLANGUAGE [ ] For details, see "LANGUAGE ALTITUDE MODE STANDBY MODE LAMP POWER LAMP RUNTIME EMULATE FUNCTION BUTTON (PT-LB90NTE only) For details, see "NETWORK menu". (Æpage 47) Sub-menu item Default WIRED LAN WIRELESS LAN - Panasonic PT-LB90NTEA | User Manual - Page 32
PPICICTUTRUE RmeEnumenu Navigating through the MENU (Æpage 29), select PICTURE from the main menu and then select the required item from the sub-menu. zzSet the selected item with ◄►buttons. Remote control Control panel COLOR You can adjust the colour saturation of the projected image. ( - Panasonic PT-LB90NTEA | User Manual - Page 33
signal is changed, the setting switches automatically. You can switch the setting manually to match the video data. (Available with signals of S-VIDEO/VIDEO only -M PAL Note zzAUTO mode is selected by default. zzWhen the projector is not working properly in AUTO mode, change the setting according - Panasonic PT-LB90NTEA | User Manual - Page 34
even when the REALTIME KEYSTONE is activated, you can correct the keystone manually. Image Operation Remarks zzYou can correct the distortion ±30 ° from the plane. For a better quality image, installing the projector with a minimum of distortion is recommended. zzThe distortion of the Main menu - Panasonic PT-LB90NTEA | User Manual - Page 35
in zzSetting range: 0 to +3 Remarks zzOVER SCAN is not available when network signals are input. ASPECT You can switch the aspect ratio manually when needed. Selectable options vary according to input signal. Change setting Change setting AUTO 4:3 16:9 THROUGH H FIT S4:3 HV FIT V FIT - Panasonic PT-LB90NTEA | User Manual - Page 36
POSITION menu JJS4:3 When a standard signal *1 is input, the input signal will be sized down 75% and projected. S4:3 mode is effective when projecting 4:3 image onto a 16:9 screen. zzInput signal: XGA FRAME LOCK If the projected image is degraded, you can activate FRAME LOCK for synchronisation. ( - Panasonic PT-LB90NTEA | User Manual - Page 37
▲▼buttons and press the ENTER button to set. Remote control Control panel LANGUAGE menu PICTURE POSITION LANGUAGE DISPLAY OPTION PROJECTOR SETUP SECURITY NETWORK PICTURE POSITION LANGUAGE DISPLAY OPTION PROJECTOR SETUP SECURITY NETWORK The set language is highlighted. Settings ENGLISH - 37 - Panasonic PT-LB90NTEA | User Manual - Page 38
setting JJINPUT GUIDE When you change to the instructions which USER is selected, the image transferred by the Logo Transfer Software is displayed when starting up the projector. (You can download the Logo Transfer Software from the Panasonic Projector website (http://panasonic.net/avc/projector - Panasonic PT-LB90NTEA | User Manual - Page 39
menu without setting. AUTO SETUP You can turn off the automatic AUTO SETUP adjustment system. Change setting Change setting AUTO BUTTON When the projector detects a COMPUTER signal, automatically set the setting of SHIFT, DOT CLOCK and CLOCK PHASE in the POSITION menu. Only when the AUTO SETUP - Panasonic PT-LB90NTEA | User Manual - Page 40
and see it as a still picture. While the image is frozen, the audio sound through the projector will stop. Press the RETURN button to escape. JJAV MUTE If you will not be using the projector for some time, you can stop the projection and audio sound temporarily. Press the RETURN button to - Panasonic PT-LB90NTEA | User Manual - Page 41
of input signal JJRUNTIME zzPROJECTOR: Display current usage time of projector zzLAMP: Display current usage time of lamp NO SIGNAL SHUT-OFF If no image signal is input for the time set with the timer, the projector will enter into standby mode automatically. Change setting Change setting - Panasonic PT-LB90NTEA | User Manual - Page 42
. The power of the projector can be turned ON and the audio output can be set active from controlling the computer connected via a wired LAN or a wireless LAN in the NORMAL mode. LAMP POWER You can adjust the power of the lamp to save electricity, prolong the lamp life and reduce the noise. Change - Panasonic PT-LB90NTEA | User Manual - Page 43
panel or remote control for at least 3 seconds. QQWhen not using the FUNCTION button 1111 Select DISABLE in this menu (FUNCTION BUTTON in the PROJECTOR SETUP menu). 2222 Press the ENTER button. 3333 Select OK. 4444 Press the ENTER button. Remarks zzAfter the setting is completed, the text colour - Panasonic PT-LB90NTEA | User Manual - Page 44
. Select OK and turn off the power according to the instruction. (All other buttons are deactivated.) zzThe INITIAL SETTING menu screen will display when the power is connected. (Æpage 13) Remarks zzThe usage time of the projector, lamp runtime and the NETWORK settings are not initialised. zzWhen - Panasonic PT-LB90NTEA | User Manual - Page 45
SECURITY menu SECURITY menu Navigating through the MENU (Æpage 29), select SECURITY from the main menu and then select the required item from the sub-menu. zzWhen you apply to the SECURITY menu for the first time, you will be asked to perform the password operation. Input the initial password by - Panasonic PT-LB90NTEA | User Manual - Page 46
also enable the button operation by pressing and holding the ENTER button of the control panel and MENU button for at least 2 seconds while the projector is projecting. OK CANCEL 2222 Press▲▼◄►buttons to select OK and press the ENTER button. Select CANCEL or press the MENU/RETURN button to return - Panasonic PT-LB90NTEA | User Manual - Page 47
(PT-LB90NTE only manual" in the CD-ROM provided. JJWIRED LAN You can set a wired LAN. JJWIRELESS LAN You can set a wireless LAN. JJNAME CHANGE You can change the name of the projector this function to ON to allow other users to connect to live mode while the projector is operating in the live mode of - Panasonic PT-LB90NTEA | User Manual - Page 48
or the lamp unit is damaged. The projector is LAMP circuit switched on again failure, abnormal too soon. function. Lamp unit is damaged. Let the lamp unit cool down and turn on the projector after 90 seconds. Switch off the projector (Æpage 24) and contact an Authorised Service Centre. See - Panasonic PT-LB90NTEA | User Manual - Page 49
a soft cloth. zzIf it is difficult to remove the dirt, soak a cloth with water, wring the cloth well and then wipe the projector. Dry off the projector with dry cloth. zzDo not use petroleum benzine, thinner, any alcoholic solvent, kitchen detergents or chemical clothes. Failure to observe these may - Panasonic PT-LB90NTEA | User Manual - Page 50
is the replacing time as a rough guide, and that might be shortened by the usage conditions, characteristics of the lamp unit or environmental conditions. You can find the duration of usage time by checking LAMP RUNTIME in the PROJECTOR SETUP menu. Do not use a lamp unit over 3 000 hours. Failure to - Panasonic PT-LB90NTEA | User Manual - Page 51
turn loose, and remove the lamp unit cover. Lamp unit cover fixing screws Lamp unit cover 3333 Use a Phillips-head screwdriver to loosen the 3 lamp unit fixing screws. Pull the used lamp unit gently from the projector. Lamp unit fixing screws Handles 4444 Press in the lamp unit until it clicks and - Panasonic PT-LB90NTEA | User Manual - Page 52
(Æpage 41) 8888 Press the MENU button to display the main menu and press▲▼buttons to scroll to the PROJECTOR SETUP menu. 9999 Press the ENTER button to select the PROJECTOR SETUP menu and press▲▼buttons to select LAMP RUNTIME. 11111 Press and hold the ENTER button for approximately 3 seconds. zzThe - Panasonic PT-LB90NTEA | User Manual - Page 53
Troubleshooting Troubleshooting Confirm the following problem and cause. Should any problem persist, contact an Authorised Service Centre. Problem Cause Page Power does not turn on. No picture appears. The picture is fuzzy. Colour is pale or grayish. No sound can be heard from - Panasonic PT-LB90NTEA | User Manual - Page 54
TTeecchnhicnalicInafolrmInatfioonrmation List of compatible signals This projector can project the following image signals. Mode Display resolution (dots) *1 Scanning frequency H (kHz) V (Hz) Dot clock frequency (MHz) Picture PnP quality *2 availability *3 Terminals NTSC/NTSC4. - Panasonic PT-LB90NTEA | User Manual - Page 55
the connector panel of the projector conforms to the RS-232C interface specifications, so that the projector can be controlled by a . You can add the required parameter. Note zzThe projector can not receive any command for 10 seconds after the lamp is switched on. Wait for 10 seconds before sending - Panasonic PT-LB90NTEA | User Manual - Page 56
63) Parameter: VID = VIDEO SVD = S-VIDEO RG1 = COMPUTER 1 IN RG2 = COMPUTER 2 IN NWP = NETWORK (PT-LB90NTE only) Call back: 0 = Standby 1 = Lamp on control active 2 = Lamp on 3 = Lamp off control active Turning off the projection and sound temporarily. Send the command to switch between - Panasonic PT-LB90NTEA | User Manual - Page 57
Display method 3 transparent LCD panels (RGB) Drive method Active matrix method Pixels 786 432 (1 024 × 768) × 3 panels Lens Manual zoom (1.2×)/Manual focus F 1.65 - 1.93, f 18.53 mm - 22.18 mm Lamp UHM lamp (220 W) Luminosity *1 3 500 lm (PT-LB90NTE/LB90E) 3 000 lm (PT-LB78VE) 2 600 lm - Panasonic PT-LB90NTEA | User Manual - Page 58
Specifications Wireless LAN (PT-LB90NTE only) Cabinet Compatible Wireless channel Distance Dimensions Weight Operating environment Certifications Power supply Operating range Remote control Weight Dimensions Options Ceiling bracket IEEE802.11 b/IEEE802.11 g (Wireless LAN standard protocol) - Panasonic PT-LB90NTEA | User Manual - Page 59
INITIAL START UP 41 INSTALLATION 41 K KEYSTONE 34 L LAMP indicator 48 LAMP POWER 42 LAMP RUNTIME 42 LANGUAGE menu 37 LAN terminal 56 List of Specifications 57 STANDBY MODE 42 STARTUP LOGO 38 STATUS 41 STILL MODE 33 Sub-menu 30 Switching off the projector 24 Switching on the projector - Panasonic PT-LB90NTEA | User Manual - Page 60
Dimensions 368 (14 - 15/32") Unit: mm 233 (9 - 5/32") 3 - 3/32" 93 3 - 21/32" 4 - 5/32" - 3/16" 5 2 - 1/8" 54.5 97 3 - 13/16" 9 88 - 11/32" 3 - 7/16" 3 - 15/32" 88.6 103.6 194.4 4 - 1/16" 7 - 5/8" Trademark acknowledgements zzVGA and XGA are trademarks of International Business Machines
-
 1
1 -
 2
2 -
 3
3 -
 4
4 -
 5
5 -
 6
6 -
 7
7 -
8
-
9
-
10
-
11
-
12
-
13
-
14
-
15
-
16
-
17
-
18
-
19
-
20
-
21
-
22
-
23
-
24
-
25
-
26
-
27
-
28
-
29
-
30
-
31
-
32
-
33
-
34
-
35
-
36
-
37
-
38
-
39
-
40
-
41
-
42
-
43
-
44
-
45
-
46
-
47
-
48
-
49
-
50
-
51
-
52
-
53
-
54
-
55
-
56
-
57
-
58
-
59
-
60
 |
 |

Model No.
PT-LB90NTE
PT-LB90E
PT-LB78VE
PT-LB75VE
Operating Instructions
LCD Projector
Commercial Use
Thank you for purchasing a Panasonic Projector.
Before operating this product, please read the instructions carefully, and save this manual
J
for future use.
Before using your projector, be sure to read “Precautions with regard to safety”
(pages 8 - 12).
TQBJ0303-1
E
NGLISH