Panasonic PT-LB90NTEA User Manual - Page 16
Remote control, Front view
 |
View all Panasonic PT-LB90NTEA manuals
Add to My Manuals
Save this manual to your list of manuals |
Page 16 highlights
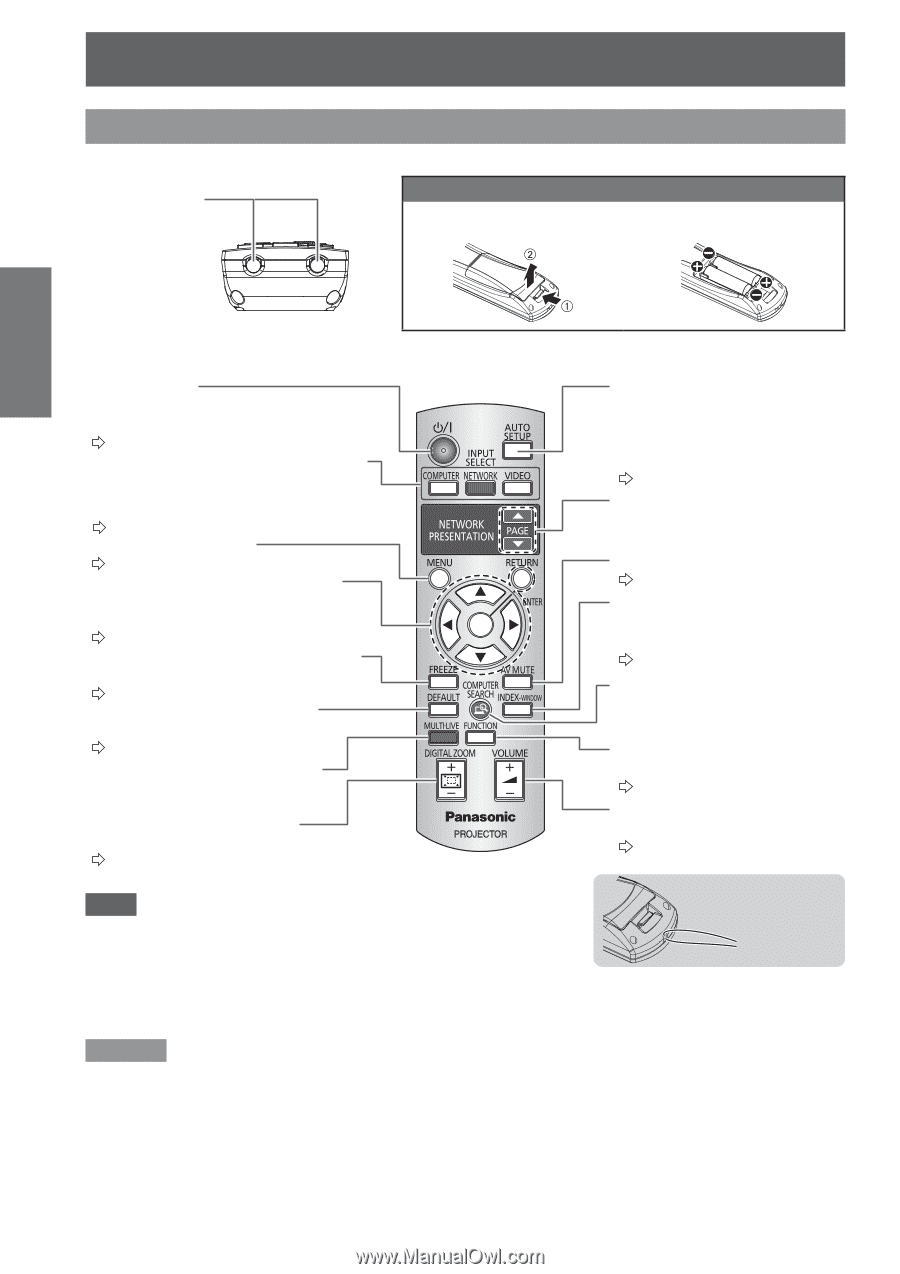
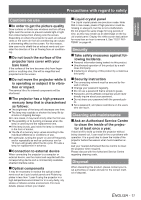
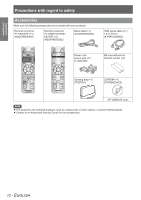
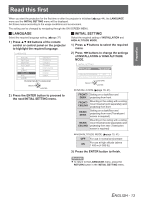
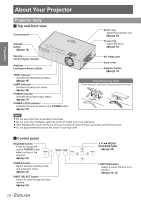
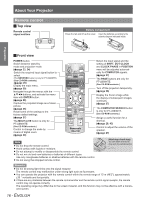
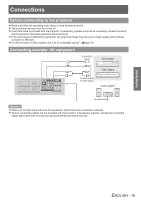
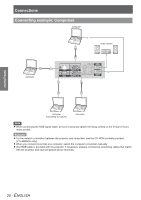
About Your Projector Remote control JJTop view Remote control signal emitters Battery compartment Press the tab and lift up the cover. Insert the batteries according to the polarity diagram indicated inside. Preparation JJFront view POWER button Switch between stand-by mode and projection mode. (Æpage 23, 24) Switch the required input signal button to select. (The NETWORK button is only for PT-LB90NTE) (See CD-ROM contents.) (Æpage 26) Display the main menu. (Æpage 30) Navigate through the menus with the buttons, and activate the menu item with ENTER button. (Æpage 29) Capture the projected image as a frozen picture. (Æpage 26) Reset some of the settings to the factory default settings. (Æpage 27) The MULTI-LIVE button is only for PT-LB90NTE. (See CD-ROM contents.) Control to change the scale by means of digital zoom. (Æpage 28) Detect the input signal and the setting of SHIFT, DOT CLOCK and CLOCK PHASE in POSITION menu will be adjusted automatically for COMPUTER signals. (Æpage 27) The PAGE buttons are only for PT-LB90NTE. (See CD-ROM contents.) Turn off the projection temporarily. (Æpage 26) Display the frozen image while the display of subsequent images continues. (Æpage 27) The COMPUTER SEARCH button is only for PT-LB90NTE. (See CD-ROM contents.) Assign a useful function for a shortcut. (Æpage 28, 43) Control to adjust the volume of the speaker. (Æpage 27) Note zzDo not drop the remote control. zzAvoid contact with liquids or moisture. zzDo not attempt to modify or disassemble the remote control. zzDo not mix old and new batteries or batteries of different types. Use only manganese batteries or alkaline batteries with the remote control. zzDo not swing the strapped remote control. Attaching a hand strap You can attach a favourite strap onto the remote control. Remarks zzDo not let strong light shine onto the signal receptor. The remote control may malfunction under strong light such as fluorescent. zzYou can operate the projector with the remote control within the remote range of 15 m (49'2"), approximately ±30 ° vertically and horizontally. zzIf there are any obstacles between the remote control emitter and the remote control signal receptor, the remote control may not operate correctly. The operating range may differ due to the screen material, and this function may not be effective with a translucent screen. 16 - ENGLISH
-
 1
1 -
2
-
3
-
4
-
5
-
6
-
7
-
8
-
9
-
10
-
 11
11 -
 12
12 -
 13
13 -
 14
14 -
 15
15 -
 16
16 -
 17
17 -
 18
18 -
 19
19 -
 20
20 -
 21
21 -
22
-
23
-
24
-
25
-
26
-
27
-
28
-
29
-
30
-
31
-
32
-
33
-
34
-
35
-
36
-
37
-
38
-
39
-
40
-
41
-
42
-
43
-
44
-
45
-
46
-
47
-
48
-
49
-
50
-
51
-
52
-
53
-
54
-
55
-
56
-
57
-
58
-
59
-
60
 |
 |