Panasonic PT-LB90NTEA User Manual - Page 6
Contents, Important Information, Preparation, Getting Started, Basic Operation - pt lb90nte projector
 |
View all Panasonic PT-LB90NTEA manuals
Add to My Manuals
Save this manual to your list of manuals |
Page 6 highlights
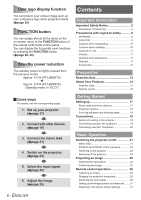
User logo display function You can project your unique image such as your company's logo when projection starts. (Æpage 38) FUNCTION button You can assign almost all the items on the on-screen menu to the FUNCTION button of the remote control and control panel. You can display the frequently used functions by pressing the FUNCTION button. (Æpage 28, 43) Standby power reduction The standby power is highly reduced from the previous model. Approx. 4.0 W (PT-LB80NTE) Approx. 0.9 W (PT-LB90NTE) (Standby mode: In "ECO") Contents Important Information Important Safety Notice 2 Declaration of Conformity 4 Precautions with regard to safety 8 WARNING 8 CAUTION 9 Cautions when transporting 10 Cautions when installing 10 Cautions on use 11 Security 11 Cleaning and maintenance 11 Disposal 11 Accessories 12 Preparation Read this first 13 About Your Projector 14 Projector body 14 Remote control 16 JJQuick steps For details, see the corresponding pages. 1. Set up your projector. (Æpage 17) 2. Connect with other devices. (Æpage 19) 3. Connect the mains lead. (Æpage 21) 4. Switch on the projector. (Æpage 23) 5. Select the input signal. (Æpage 25) 6. Adjust the image. (Æpage 25) Getting Started Setting up 17 Screen size and throw distance 17 Projection method 18 Front leg adjusters and throwing angle 18 Connections 19 Before connecting to the projector 19 Connecting example: AV equipment 19 Connecting example: Computers 20 Basic Operation Switching the projector on/off 21 Mains lead 21 POWER and POWER LOCK indicators 22 Switching on the projector 23 Switching off the projector 24 Projecting an image 25 Selecting the input signal 25 Positioning the image 25 Remote control operation 26 Capturing an image 26 Stopping the projection temporarily 26 Switching the input signal 26 Setting up the image position automatically.........27 Resetting to the factory default settings 27 6 - ENGLISH
-
 1
1 -
 2
2 -
 3
3 -
 4
4 -
 5
5 -
 6
6 -
 7
7 -
 8
8 -
 9
9 -
 10
10 -
 11
11 -
 12
12 -
13
-
14
-
15
-
16
-
17
-
18
-
19
-
20
-
21
-
22
-
23
-
24
-
25
-
26
-
27
-
28
-
29
-
30
-
31
-
32
-
33
-
34
-
35
-
36
-
37
-
38
-
39
-
40
-
41
-
42
-
43
-
44
-
45
-
46
-
47
-
48
-
49
-
50
-
51
-
52
-
53
-
54
-
55
-
56
-
57
-
58
-
59
-
60
 |
 |