Panasonic VDRM30 VDRM30 User Guide - Page 50
Setting Date And Time
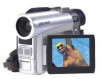 |
View all Panasonic VDRM30 manuals
Add to My Manuals
Save this manual to your list of manuals |
Page 50 highlights
Setting Date and Time Set the current date and time so that the date and time you make a recording can be recorded correctly. The following procedure can also be used to correct the date and time you have already set. Tilt up/down and to left/ right to select, and then press to designate. 1 Turn the DVD Palmcorder on. 2 Press the MENU button. The menu screen will appear. Came ra Func t i ons Set u p P r o g r am AE : A u t o Wh i t e Ba l . : A u t o EIS : On Dig. Zoom : 40x Wind Cut : Of f ENTER RETURN RAM 3 Use the joystick to choose "Date Setup" and then "Date Set". Da t e Se t u p Da t e Mode Da t e Se t JAN 1 2003 12: 00AM ENTER RETURN RAM 4 Tilt the joystick to the right. Da t e Se t u p The figure for the month will be selected. [The digit that is Da t e Mode Da t e Se t JAN 1 2003 12: 00AM ENTER RETURN RAM highlighted first depends on the date display format (set up in Date Mode): The digit on the left end of the date display will be first highlighted.] Note: After setting the figure for the month, tilt the joystick to the right to select the digit to be set. If you press the button after selecting the figure for the month, the screen for verifying the set date will appear instead of screen for setting day, year or time. 5 Tilt the joystick to the left or the right to select the digit you want to set in sequence. Da t e Se t u p Da t e Mode Da t e Se t SEP 3 0 2003 8 : 00AM Tilt the joystick up or ENTER RETURN RAM down to select the number for current date/time, and then repeat step 5 to set the current date and time. Note: To stop date/time setting midway, press the button. 6 After setting the current date and time, press the button. Da t e Se t SEP 3 0 2003 8 : 0 0AM Da t e s e t u p? The screen for verifying the set date will appear. YES NO ENTER RAM 7 If the displayed date and time are correct, use the joystick to choose "YES", and then press the button. The date and time will be set, and the DVD Palmcorder will enter the recording pause status. Choosing "NO" will restore the menu screen. Important Note: This DVD Palmcorder incorporates a rechargeable battery to store the date and time in memory. If this built-in battery is exhausted, the date and time will be reset. To prevent this, connect the AC adapter/charger to DVD Palmcorder every 3 months, and leave them for at least 24 hours with the DVD Palmcorder turned off: The built-in battery will be charged. 50
-
 1
1 -
2
-
3
-
4
-
5
-
6
-
7
-
8
-
9
-
10
-
11
-
12
-
13
-
14
-
15
-
16
-
17
-
18
-
19
-
20
-
21
-
22
-
23
-
24
-
25
-
26
-
27
-
28
-
29
-
30
-
31
-
32
-
33
-
34
-
35
-
36
-
37
-
38
-
39
-
40
-
41
-
42
-
43
-
44
-
 45
45 -
 46
46 -
 47
47 -
 48
48 -
 49
49 -
 50
50 -
 51
51 -
 52
52 -
 53
53 -
 54
54 -
 55
55 -
56
-
57
-
58
-
59
-
60
-
61
-
62
-
63
-
64
-
65
-
66
-
67
-
68
-
69
-
70
-
71
-
72
-
73
-
74
-
75
-
76
-
77
-
78
-
79
-
80
-
81
-
82
-
83
-
84
-
85
-
86
-
87
-
88
-
89
-
90
-
91
-
92
-
93
-
94
-
95
-
96
-
97
-
98
-
99
-
100
-
101
-
102
-
103
-
104
-
105
-
106
-
107
-
108
-
109
-
110
-
111
-
112
-
113
-
114
-
115
-
116
-
117
-
118
-
119
-
120
-
121
-
122
-
123
-
124
-
125
-
126
-
127
-
128
-
129
-
130
-
131
-
132
-
133
-
134
-
135
-
136
-
137
-
138
-
139
-
140
-
141
-
142
-
143
-
144
-
145
-
146
-
147
-
148
-
149
-
150
-
151
-
152
-
153
-
154
-
155
-
156
-
157
-
158
-
159
-
160
-
161
-
162
-
163
-
164
-
165
-
166
-
167
-
168
-
169
-
170
-
171
-
172
-
173
-
174
-
175
-
176
 |
 |
