Panasonic WVNW474S WVNW474S User Guide - Page 18
Using Network Setup Menu, Notes, Important
 |
View all Panasonic WVNW474S manuals
Add to My Manuals
Save this manual to your list of manuals |
Page 18 highlights
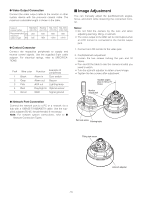
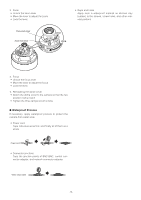
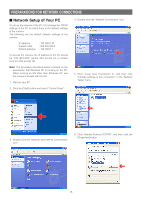
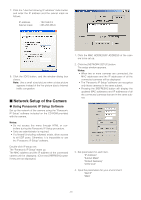
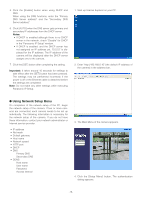
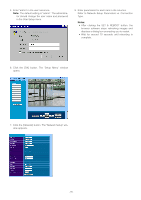
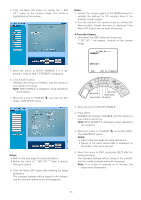
5. Click the [Enable] button when using DHCP and DNS. When using the DNS functions, enter the "Primary DNS Server address" and the "Secondary DNS Server address". 6. Click [AUTO] when the DNS server gets primary and secondary IP addresses from the DHCP server. Notes: • If DHCP is enabled although there is no DHCP server in the network, check "Disable" for DHCP in the "Panasonic IP Setup" window. • If DHCP is enabled, and the DHCP server has not assigned an IP address yet, "0.0.0.0" is displayed for the IP address. The IP address of the camera will be displayed after the DHCP server assigns one to the camera. 7. Click the [SET] button after completing the setting. Important: It takes around 10 seconds for settings to take effect after the [SET] button has been pressed. The settings may be performed incorrectly if the power is off or the Ethernet cable is detached before the settings are completed. Note: Do not make any other settings while executing Panasonic IP Setup. 1. Start up Internet Explorer on your PC. 2. Enter "http://192.168.0.10" (the default IP address of the camera) in the address bar. ● Using Network Setup Menu On completion of the network setup of the PC, begin the network setup of the camera. If two or more cameras are connected, each camera needs to be set up individually. The following information is necessary for the network setup of the camera. If you do not have these information, contact your network administrator or Internet service provider. • IP address • Net mask • Default gateway • Host name • Network speed • HTTP port • DHCP • DNS Primary DNS Secondary DNS • DDNS Host name User name Password Access interval 3. The Main Menu of the camera appears. 4. Click the [Setup Menu] button. The authentication dialog appears. -18-
-
 1
1 -
2
-
3
-
4
-
5
-
6
-
7
-
8
-
9
-
10
-
11
-
12
-
 13
13 -
 14
14 -
 15
15 -
 16
16 -
 17
17 -
 18
18 -
 19
19 -
 20
20 -
 21
21 -
 22
22 -
 23
23 -
24
-
25
-
26
-
27
-
28
-
29
-
30
-
31
-
32
-
33
-
34
-
35
-
36
-
37
-
38
-
39
-
40
-
41
-
42
-
43
-
44
-
45
-
46
-
47
-
48
-
49
-
50
-
51
-
52
-
53
-
54
-
55
-
56
-
57
-
58
-
59
-
60
-
61
-
62
-
63
-
64
-
65
-
66
-
67
-
68
 |
 |