Panasonic WVSC385 WVSC385 User Guide - Page 14
Rear view, Bottom view, About the [INITIAL SET] button, Important - installation guide
 |
View all Panasonic WVSC385 manuals
Add to My Manuals
Save this manual to your list of manuals |
Page 14 highlights
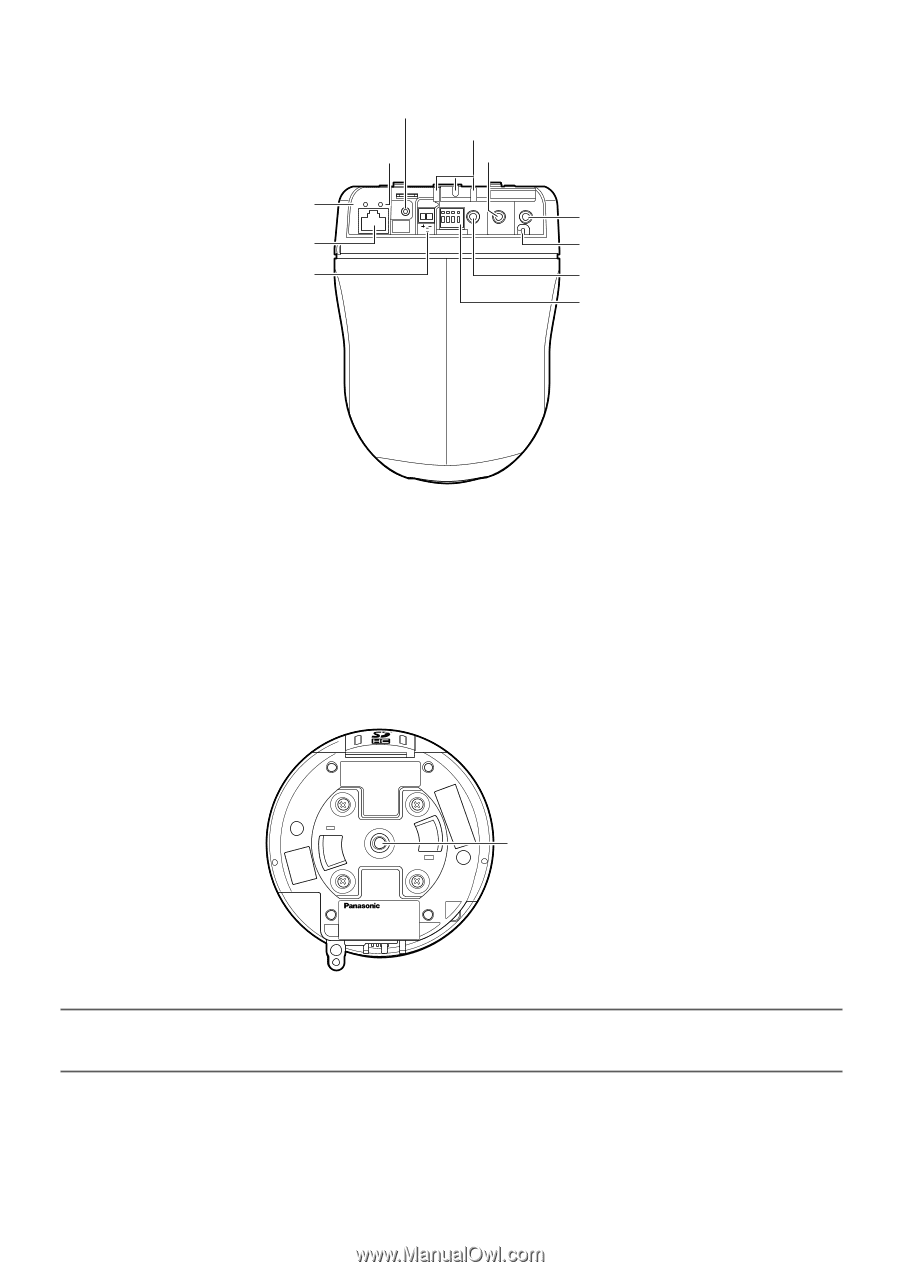
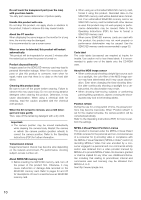
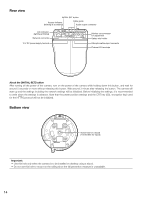
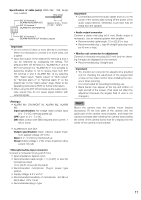
Rear view INITIAL SET button Access indicator (blinking at accessing) Cable guide Audio output connector Link indicator (lighting at linking) Network connector 12 V DC power supply terminal 10BASE-T/ 100BASE-TX LINK ACT INITIAL SET POWER EXT I/O MIC/LINE IN AUDIO OUT MONITOR OUT 12V IN 4 3 2 1 Monitor out connector for adjustment Safety wire holder Microphone/line input connector External I/O terminals About the [INITIAL SET] button After turning off the power of the camera, turn on the power of the camera while holding down this button, and wait for around 5 seconds or more without releasing this button. Wait around 3 minute after releasing the button. The camera will start up and the settings including the network settings will be initialized. Before initializing the settings, it is recommended to write down the settings in advance. Note that the preset position settings and the CRT key (SSL encryption key) used for the HTTPS protocol will not be initialized. Bottom view Screw hole for a tripod (1/4-20 UNC for tripod) Important: • Use this hole only when the camera is to be installed on desktop using a tripod. • Do not use this hole to mount on the ceiling since the fall prevention measure is unavailable. 14
-
 1
1 -
2
-
3
-
4
-
5
-
6
-
7
-
8
-
 9
9 -
 10
10 -
 11
11 -
 12
12 -
 13
13 -
 14
14 -
 15
15 -
 16
16 -
 17
17 -
 18
18 -
 19
19 -
20
-
21
-
22
-
23
-
24
-
25
-
26
-
27
-
28
-
29
-
30
-
31
-
32
-
33
-
34
-
35
-
36
 |
 |