Panasonic WVSC385 WVSC385 User Guide - Page 27
Step 1, Important, between IPv4 addresses and IPv6 addresses - ip camera
 |
View all Panasonic WVSC385 manuals
Add to My Manuals
Save this manual to your list of manuals |
Page 27 highlights
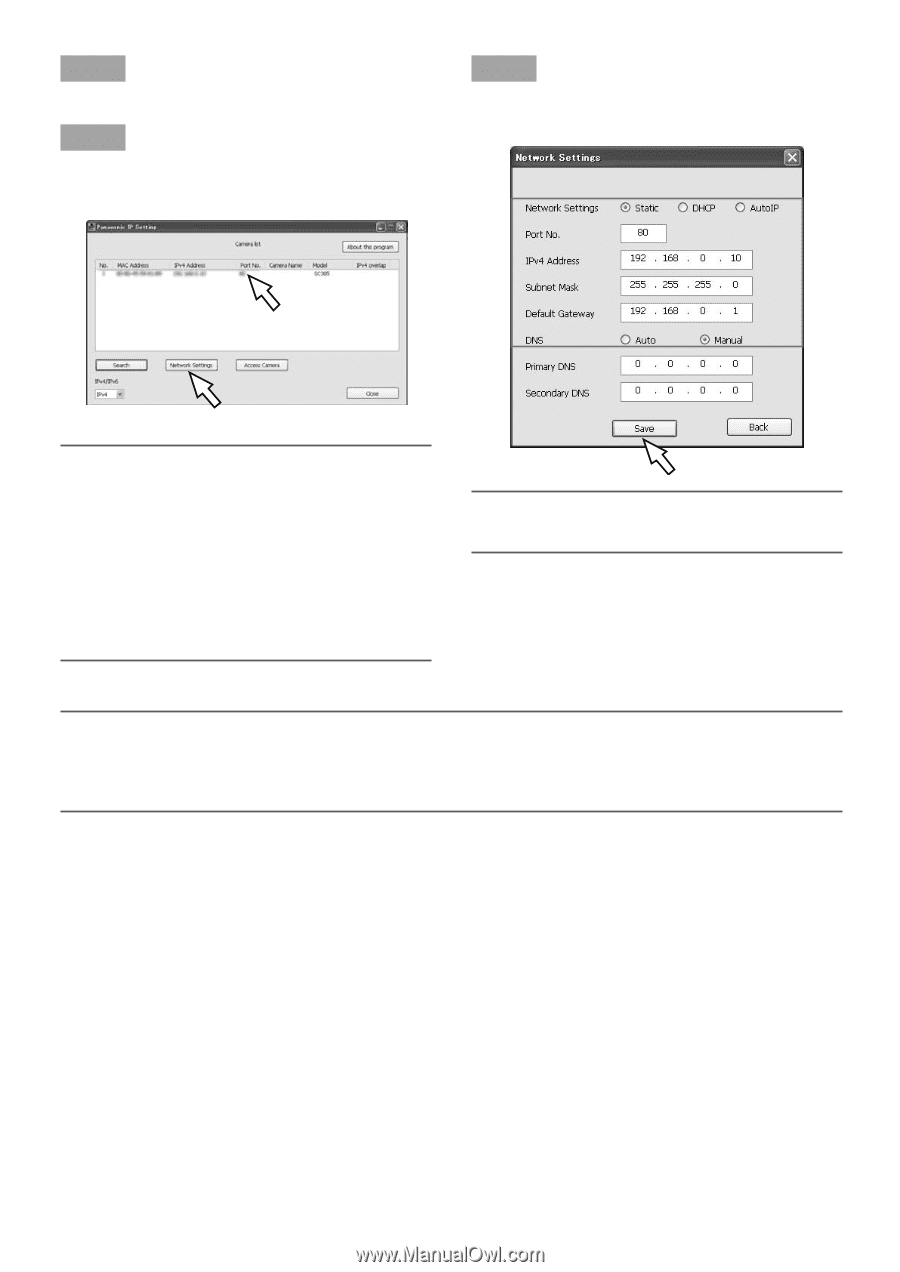
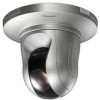
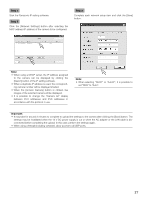
Step 1 Start the Panasonic IP setting software. Step 2 Click the [Network Settings] button after selecting the MAC address/IP address of the camera to be configured. Step 3 Complete each network setup item and click the [Save] button. Note: • When using a DHCP server, the IP address assigned to the camera can be displayed by clicking the [Search] button of the IP setting software. • When a duplicate IP address is used, the corresponding camera number will be displayed shaded. • When the [Access Camera] button is clicked, live images of the selected camera will be displayed. • It is possible to change the "Camera list" display between IPv4 addresses and IPv6 addresses in accordance with the protocol in use. Note: • When selecting "DHCP" or "AutoIP", it is possible to set "DNS" to "Auto". Important: • It may take for around 2 minutes to complete to upload the settings to the camera after clicking the [Save] button. The settings may be invalidated when the 12 V DC power supply is cut or when the AC adapter or the LAN cable is disconnected before completing the upload. In this case, perform the settings again. • When using a firewall (including software), allow access to all UDP ports. 27
-
 1
1 -
2
-
3
-
4
-
5
-
6
-
7
-
8
-
9
-
10
-
11
-
12
-
13
-
14
-
15
-
16
-
17
-
18
-
19
-
20
-
21
-
 22
22 -
 23
23 -
 24
24 -
 25
25 -
 26
26 -
 27
27 -
 28
28 -
 29
29 -
 30
30 -
 31
31 -
 32
32 -
33
-
34
-
35
-
36
 |
 |