Philips VOIP8411B User manual - Page 12
Getting started
 |
UPC - 609585128354
View all Philips VOIP8411B manuals
Add to My Manuals
Save this manual to your list of manuals |
Page 12 highlights
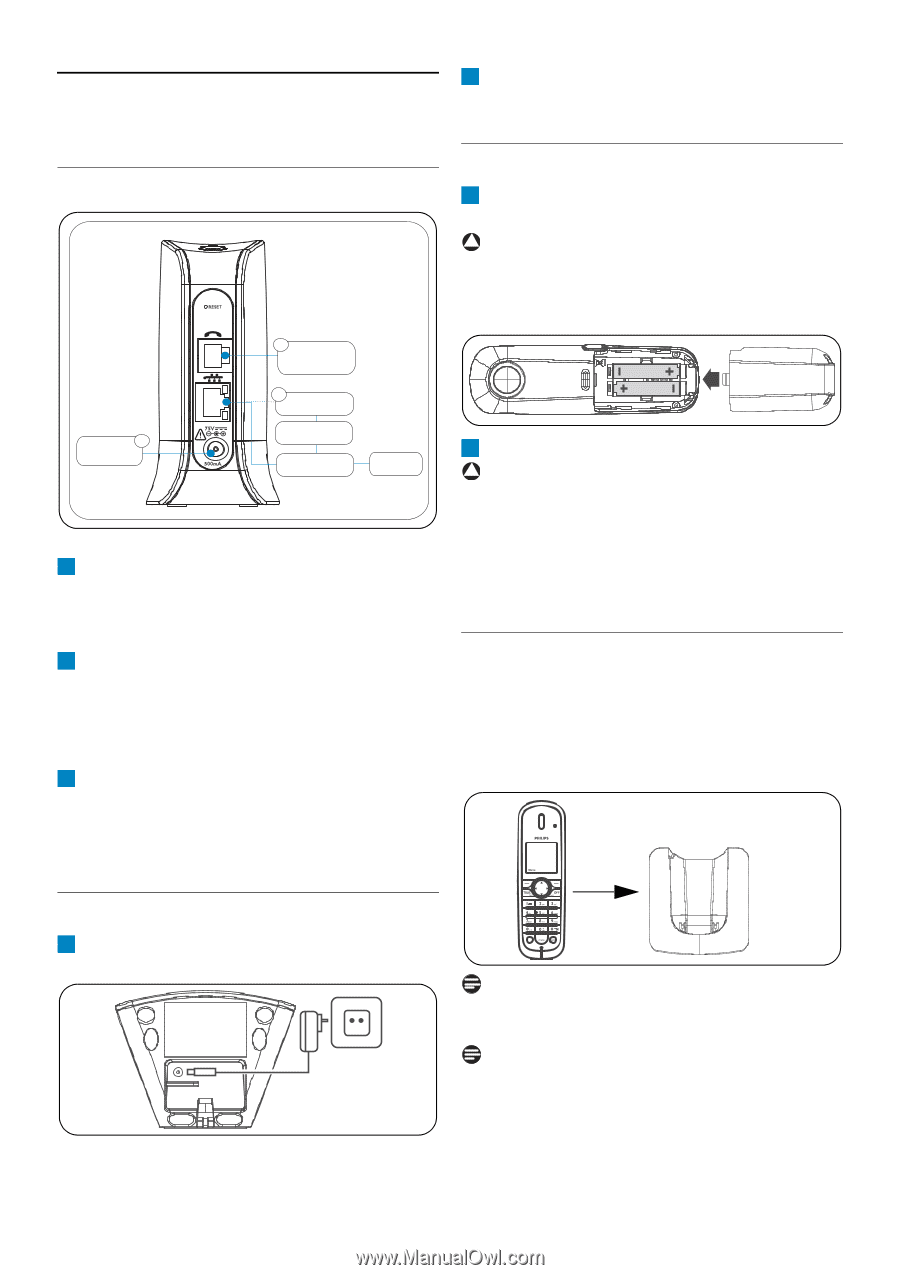
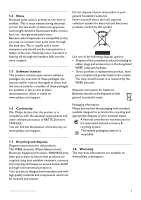
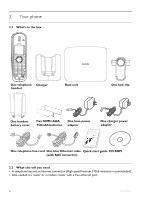
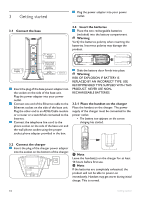
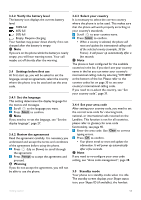
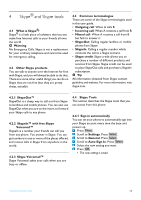
3 Getting started 2 Plug the power adapter into your power outlet. 3.1 Connect the base Power 1 Supply 2 Phone (Landline) Socket 3 Switch/Hub (Optional) Router (Optional) ADSL Cable Modem Internet 1 Insert the plug of the base power adapter into the socket on the side of the base unit. Plug the power adapter into your power outlet. 2 Connect one end of the Ethernet cable to the Ethernet socket on the side of the base unit. Plug the other end to an ADSL/Cable modem or a router or a switch/hub connected to the Internet. 3 Connect the telephone line cord to the phone socket on the side of the base unit and the wall phone socket using the proper socket phone adapter provided in the box. 3.3 Insert the batteries 1 Place the two rechargeable batteries (included) into the battery compartment. ! Warning Verify the batteries polarity when inserting the batteries. Incorrect polarity may damage the product. 2 Slide the battery door firmly into place. ! Warning RISK OF EXPLOSION IF BATTERY IS REPLACED BY AN INCORRECT TYPE. USE RECOMMENDED TYPE SUPPLIED WITH THIS PRODUCT. NEVER USE NONRECHARGEABLE BATTERIES. 3.3.1 Place the handset on the charger Place the handset on the charger. The power supply of the charger must be connected to the power outlet. • The battery icon appears on the screen: charging has started. 3.2 Connect the charger 1 Insert the plug of the charger power adapter into the socket on the bottom of the charger. Note Leave the handset(s) on the charger for at least 14 hours before first use. Note If the batteries are completely exhausted, the product will not be able to power-on immediately. Handset may get warm during initial charge. This is normal. 10 Getting started
-
 1
1 -
2
-
3
-
4
-
5
-
6
-
 7
7 -
 8
8 -
 9
9 -
 10
10 -
 11
11 -
 12
12 -
 13
13 -
 14
14 -
 15
15 -
 16
16 -
 17
17 -
18
-
19
-
20
-
21
-
22
-
23
-
24
-
25
-
26
-
27
-
28
-
29
-
30
-
31
-
32
-
33
-
34
-
35
-
36
-
37
-
38
-
39
-
40
-
41
-
42
-
43
-
44
-
45
-
46
-
47
-
48
-
49
-
50
 |
 |